
We continue our exploration of Mixed Reality capabilities of the Meta Quest 3 using Unreal Engine and the MetaXR plugin that we've started in a previous devlog post.
In this post, we look at the possibilities of using Passthrough Materials to dynamically blend the virtual and real world in Mixed Reality. Using such materials, we can poke a hole in the virtual world, so that the real world becomes visible.
Tech Stack
For this exploration, we're using the following tech stack:
Simple Passthrough Material
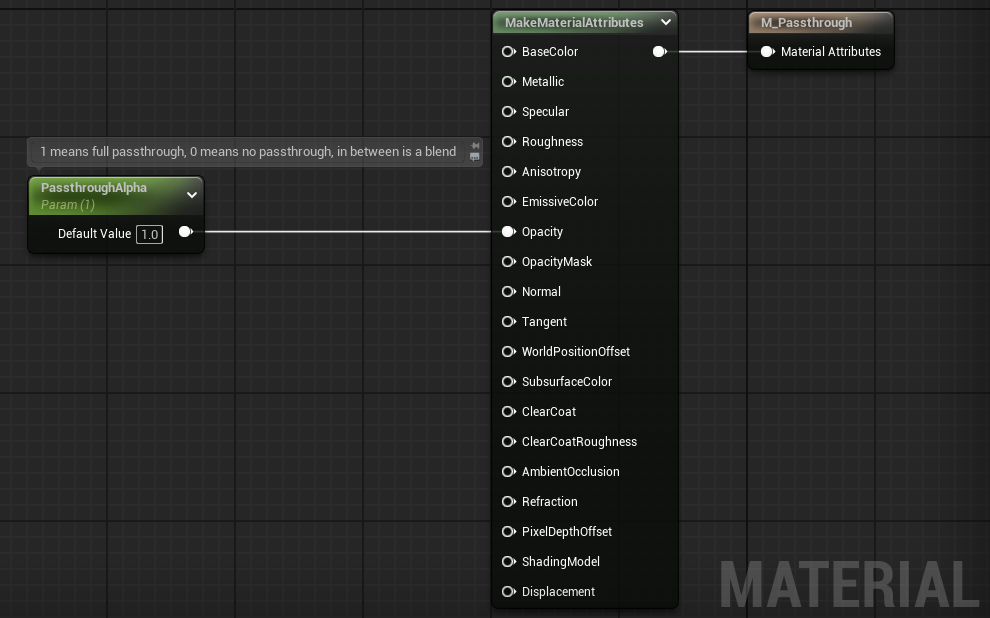
In its simplest form, a Passthrough Material is an Unreal Engine Material with the following properties:
- Material Domain
Surface - Blend Mode
Translucent - Shading Model
Unlit - Write Only Alpha
true - Opacity between
0.0(no passthrough) and1.0(full passthrough)
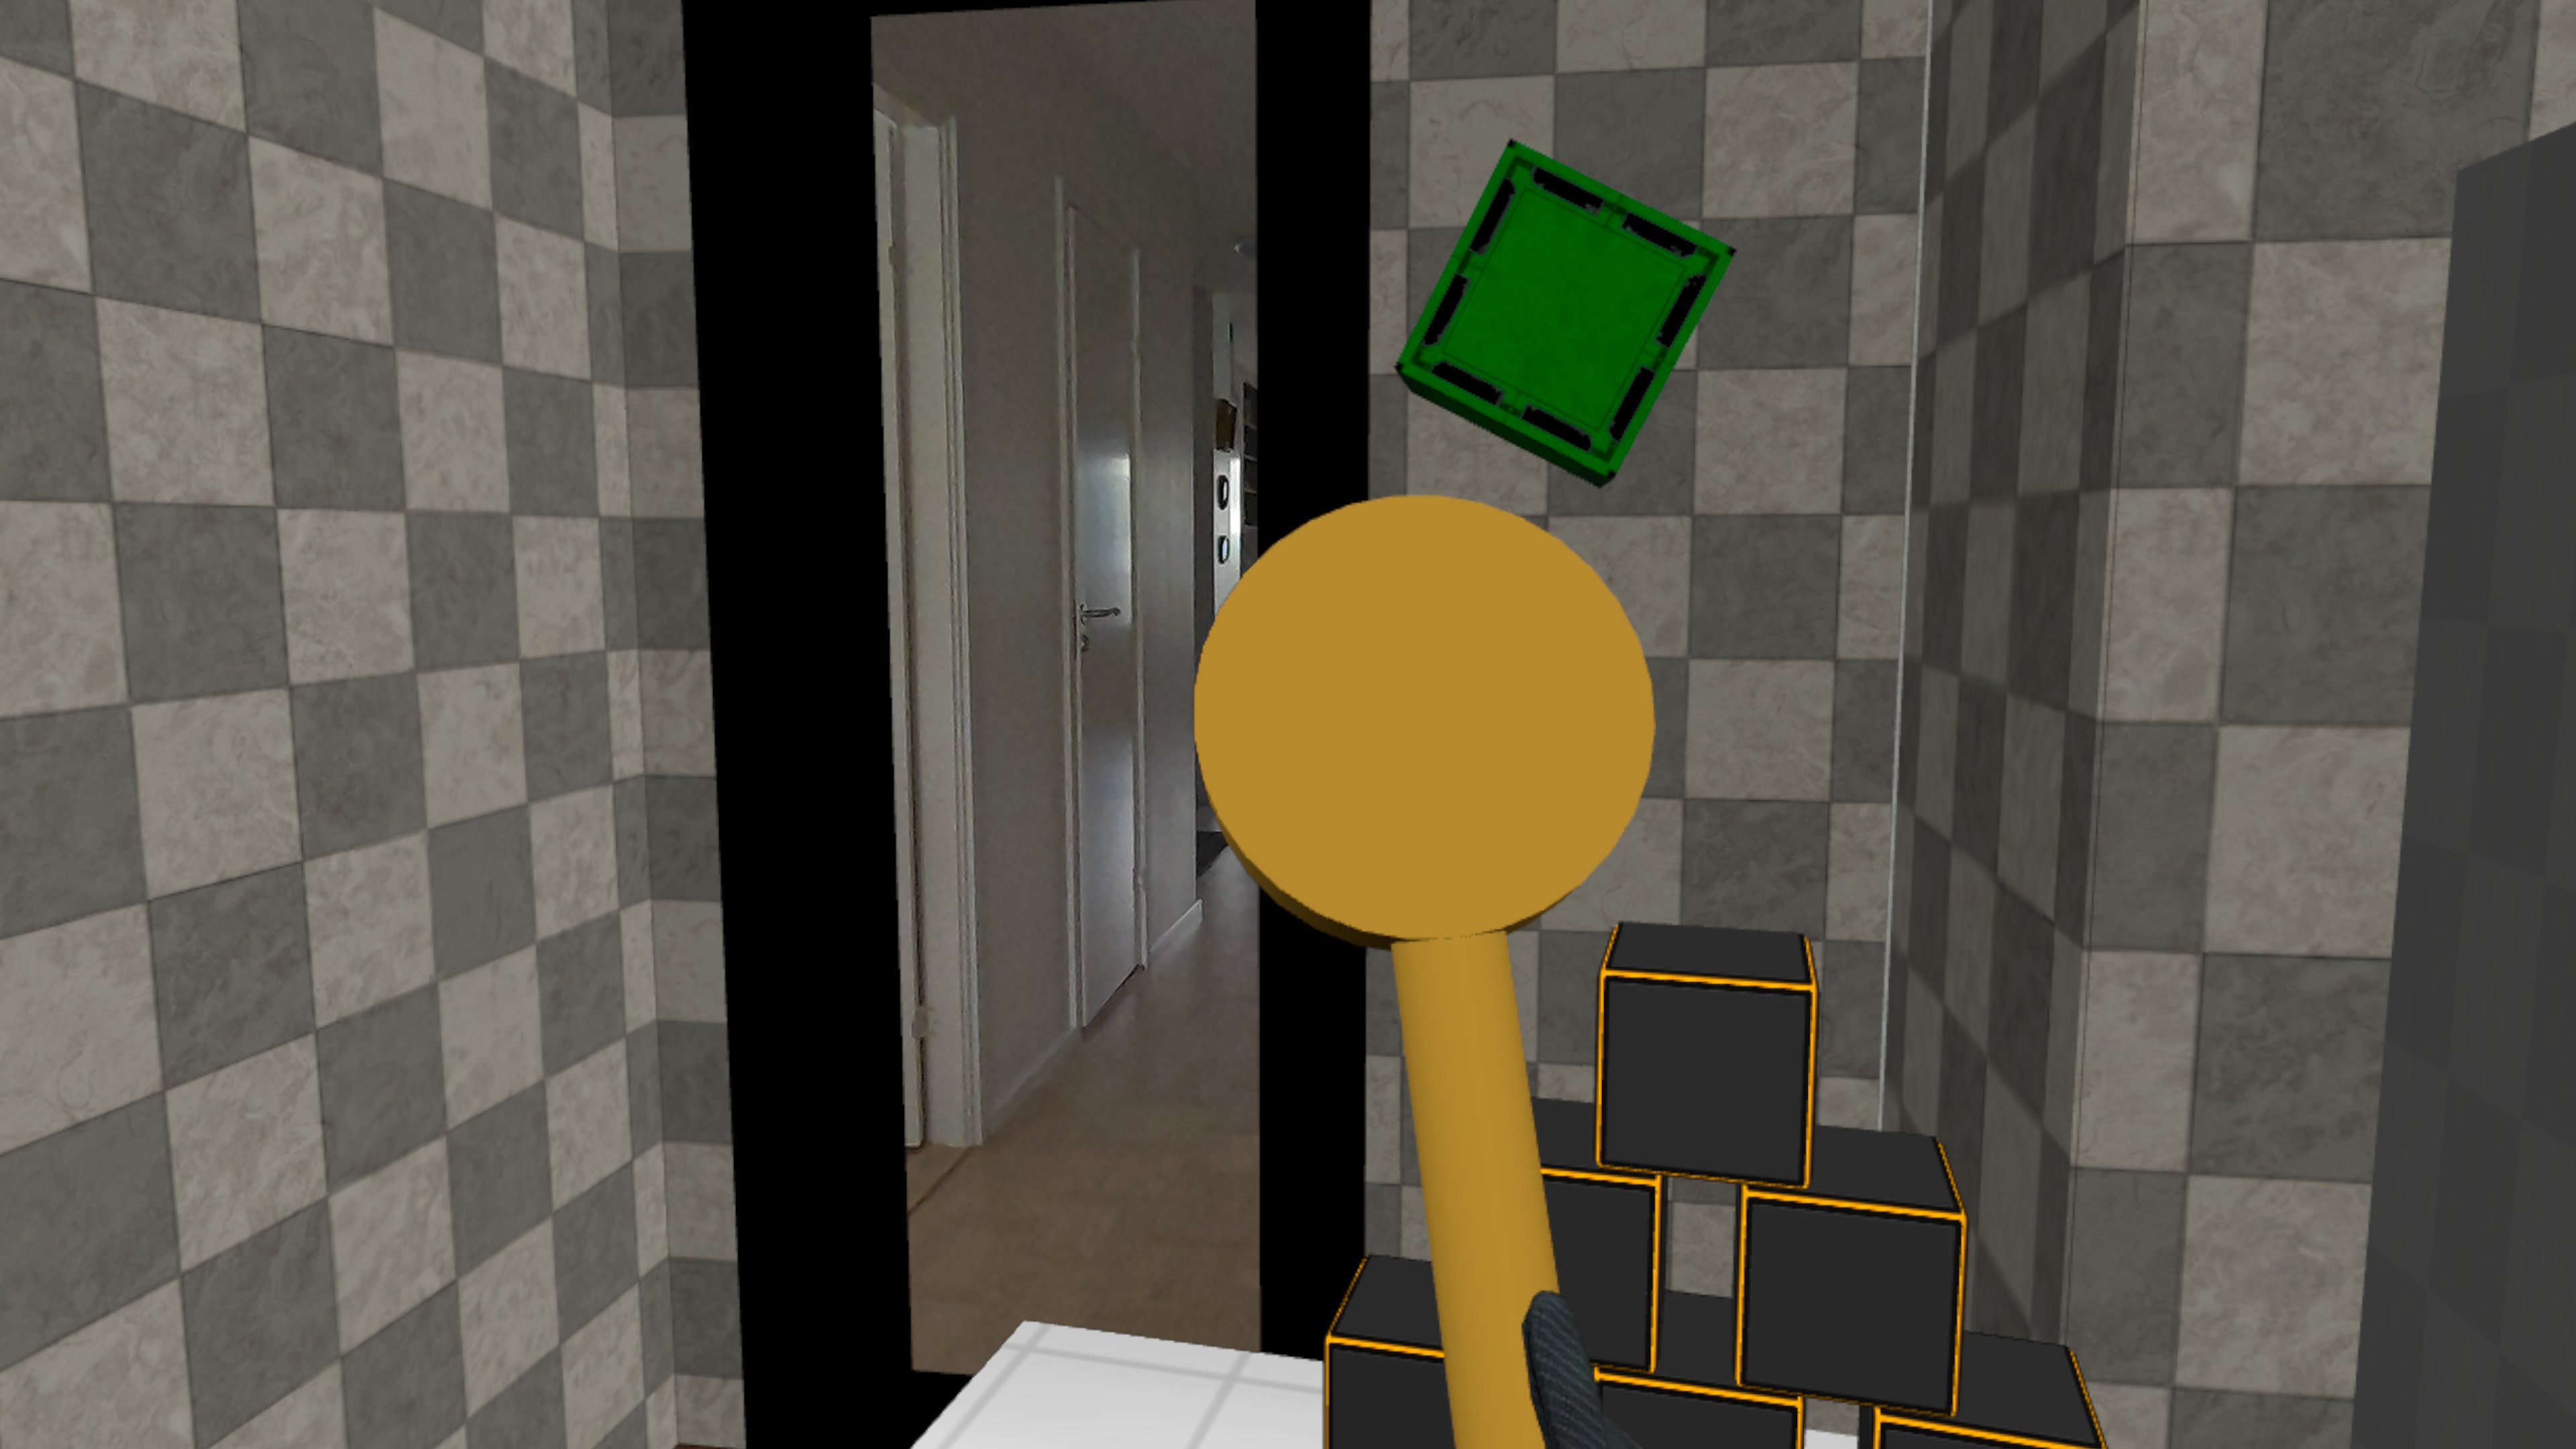
When the material is applied to a mesh, the mesh itself will not be visible, other than the passthrough blend effect. It can be seen in the images below, where the Passthrough Material has been applied to the circular part of a yellow mesh.
The material graph is very simple, as expected. We use a Material Parameter for the opacity, so it can be easily customized in Material Instances.
Passthrough Material using Vertex Color
Unreal Engine provides a default grey/yellow cube that uses Vertex Color to determine what part is the side (grey), and what part is the border (yellow/black).
What if we wanted to make the grey sides of the cube enable Passthrough instead, while still showing the yellow/blacks borders of the cube?
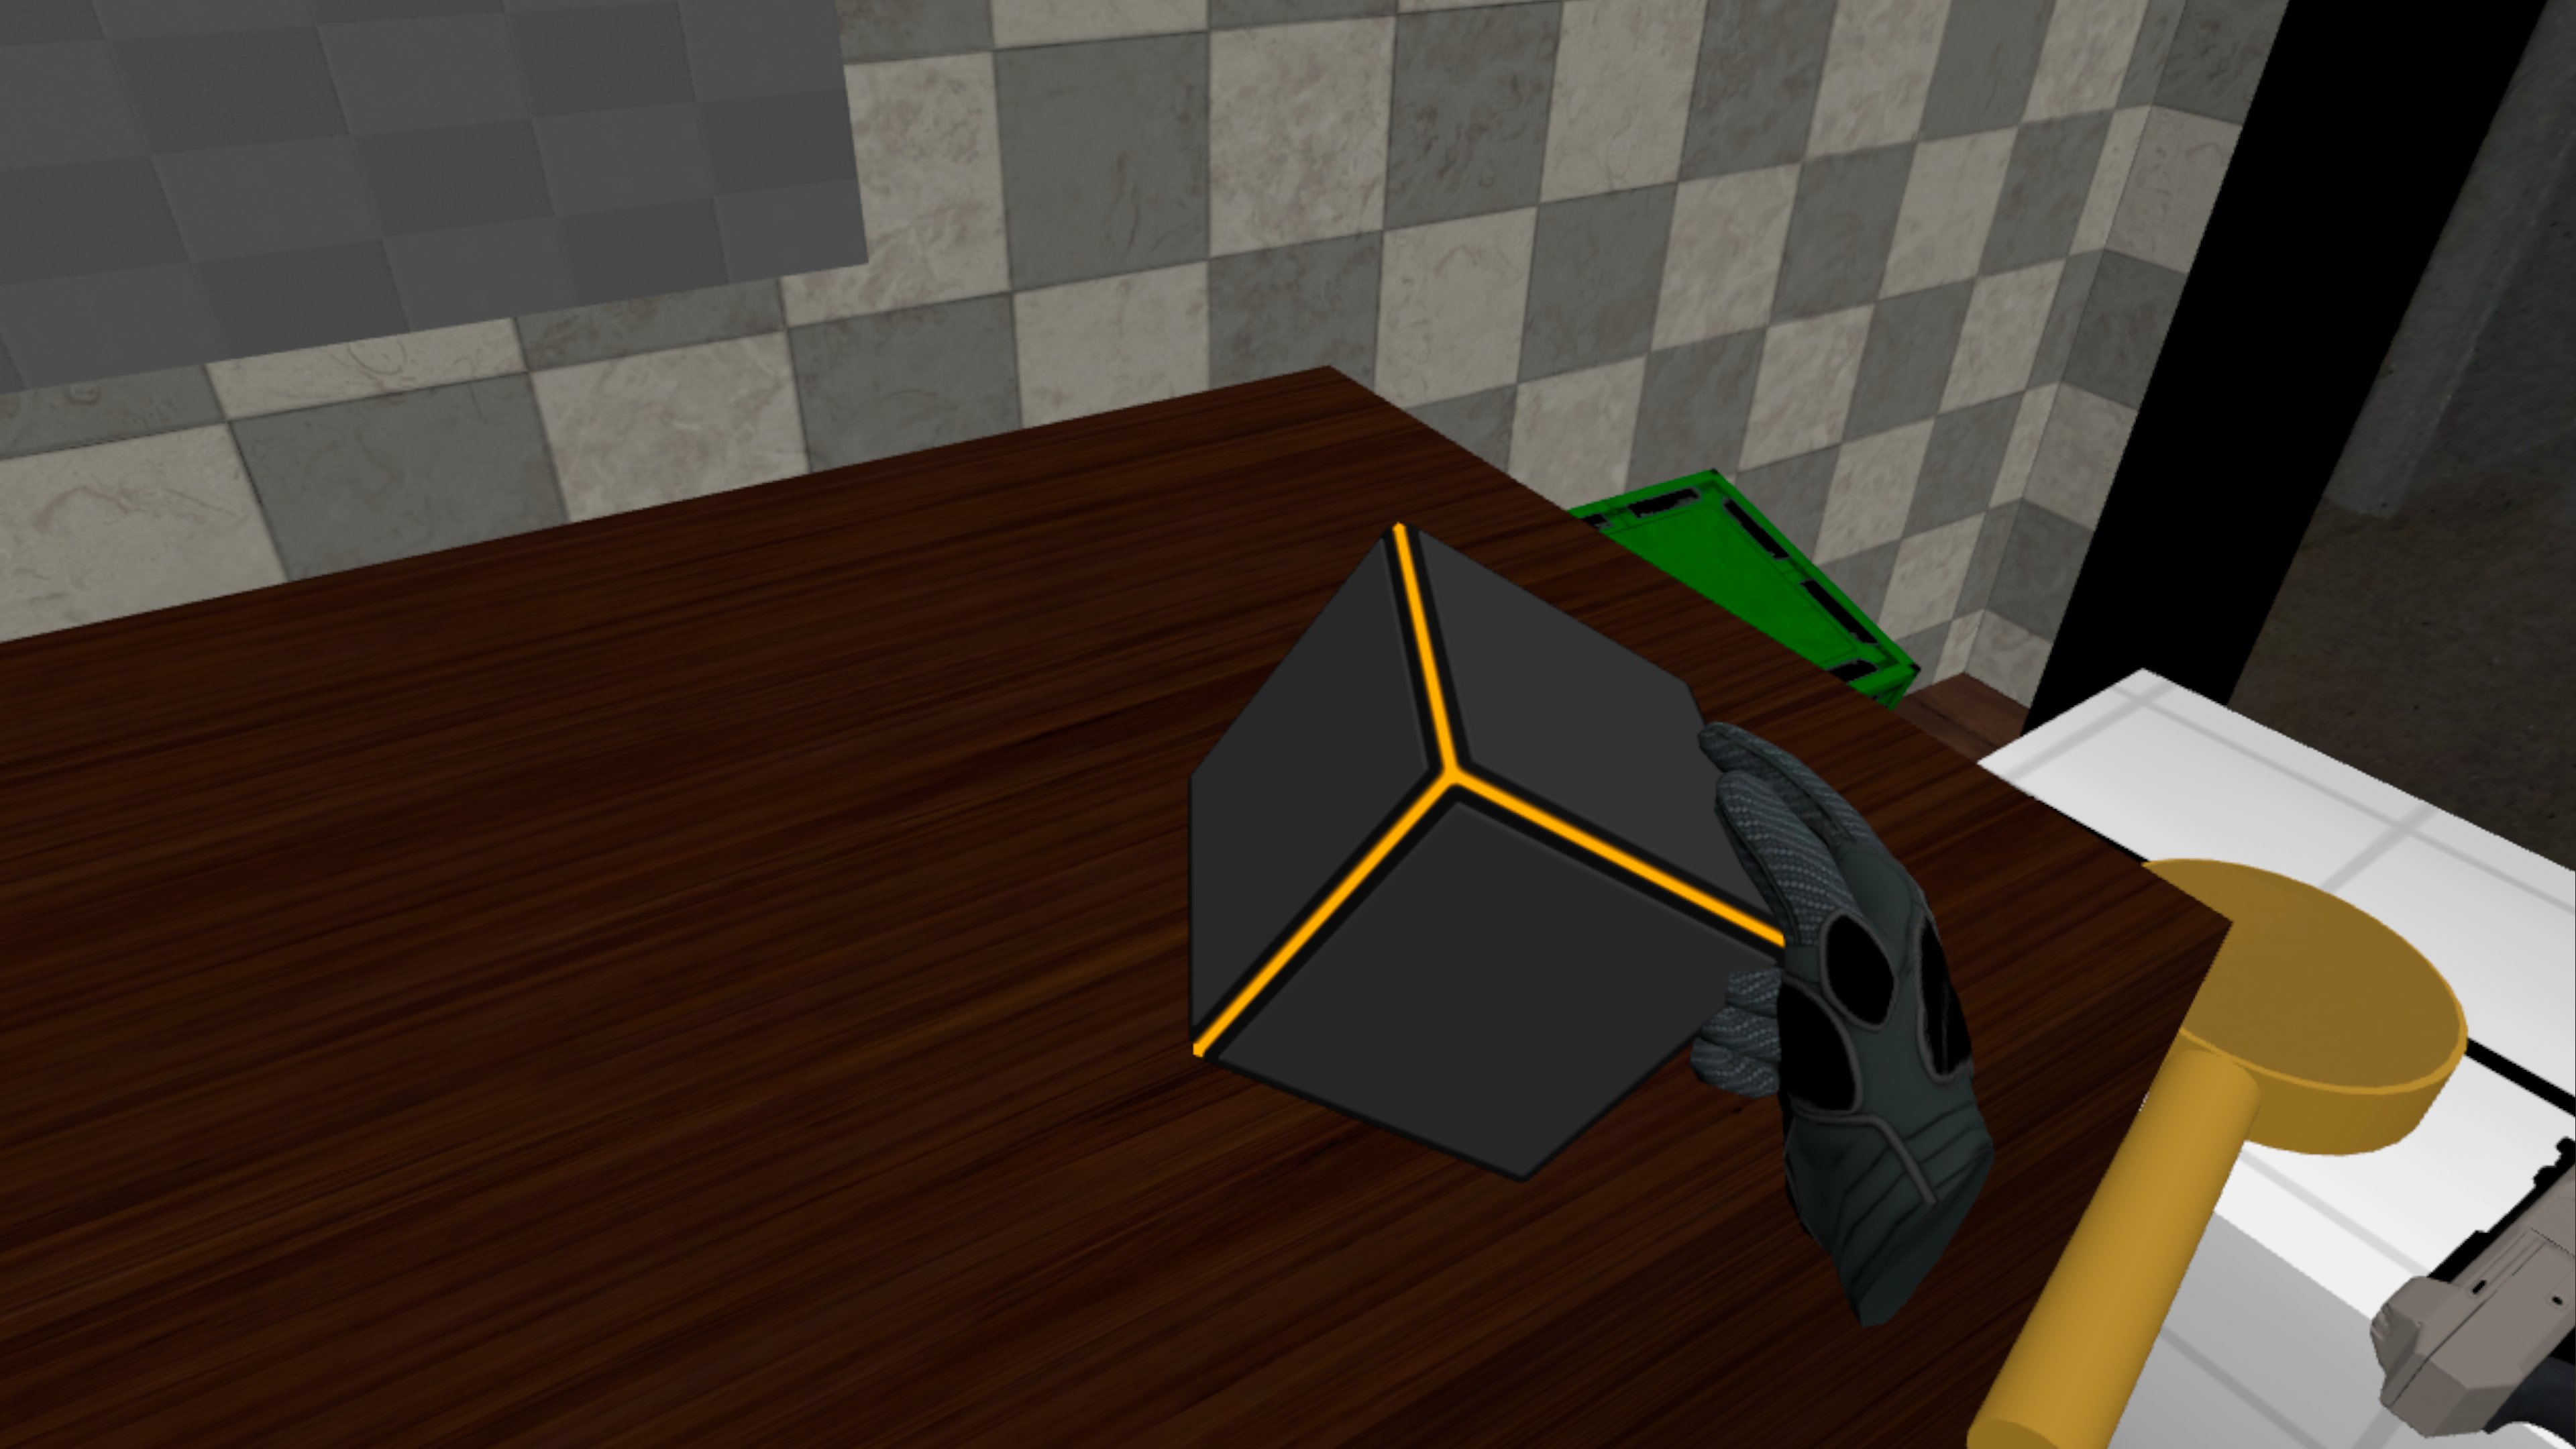
When we apply the simple Passthrough Material to the cube, the full cube will enable passthrough, losing all details about sides and borders.
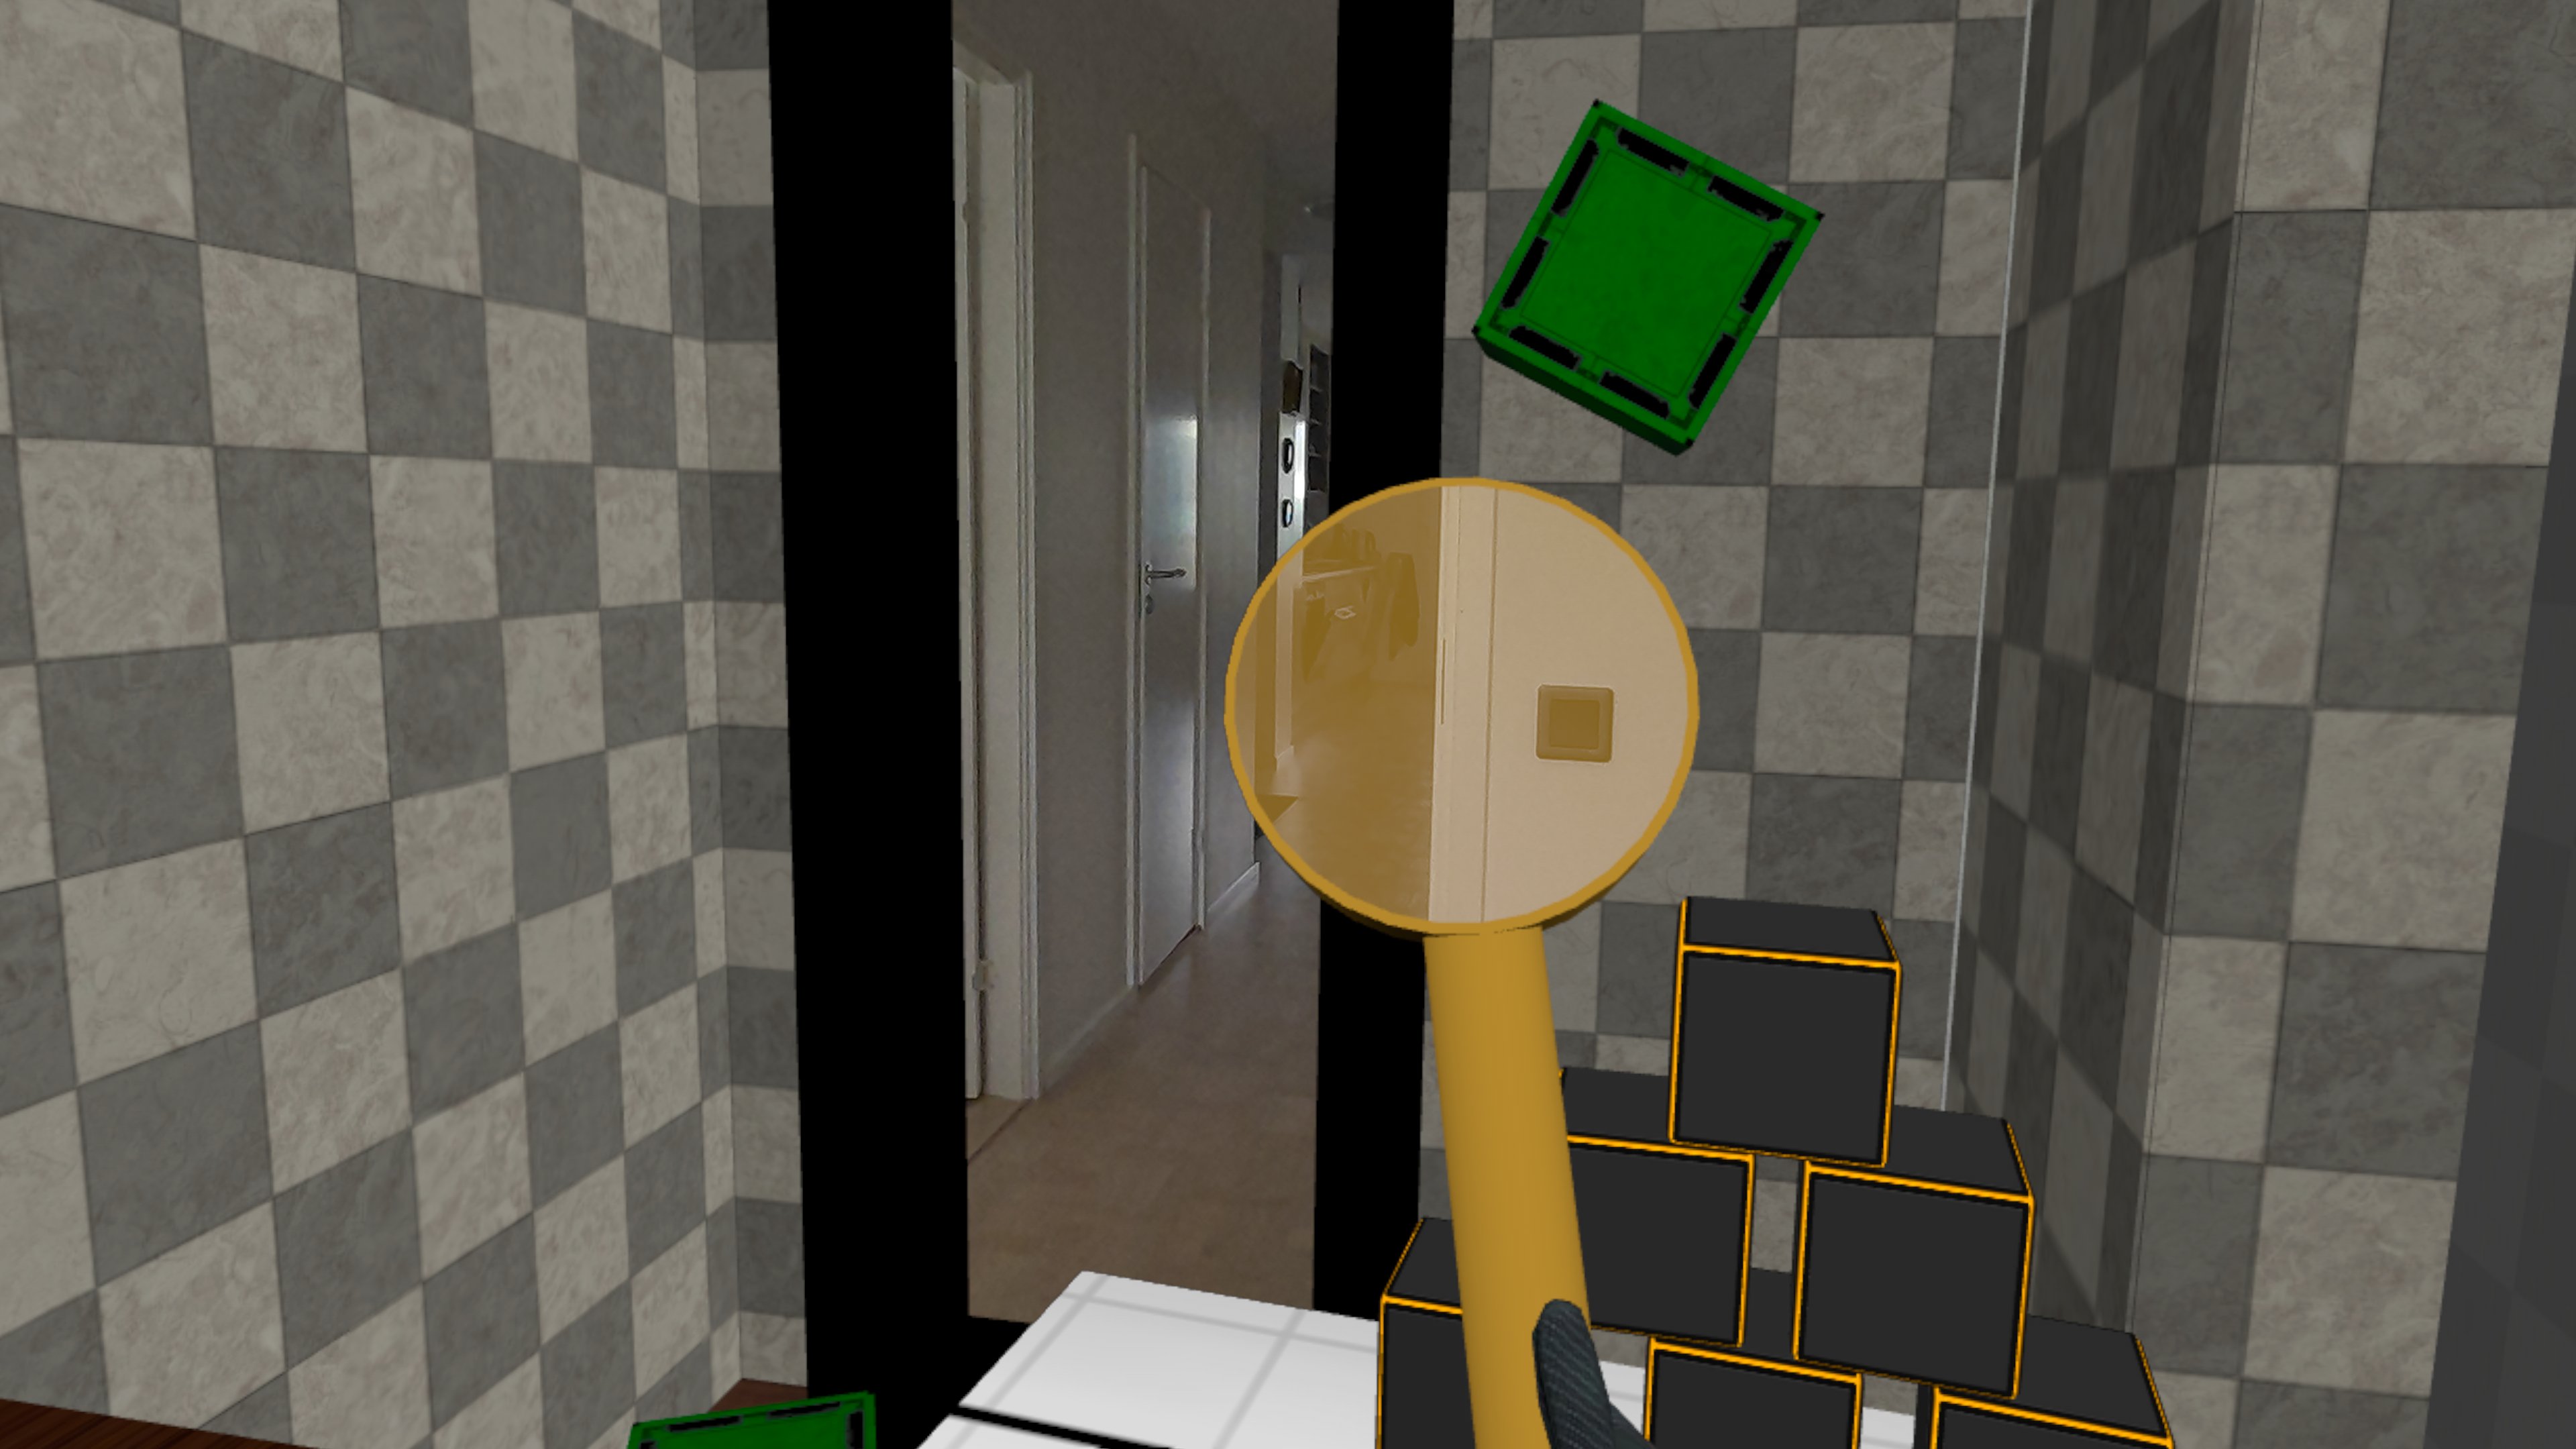
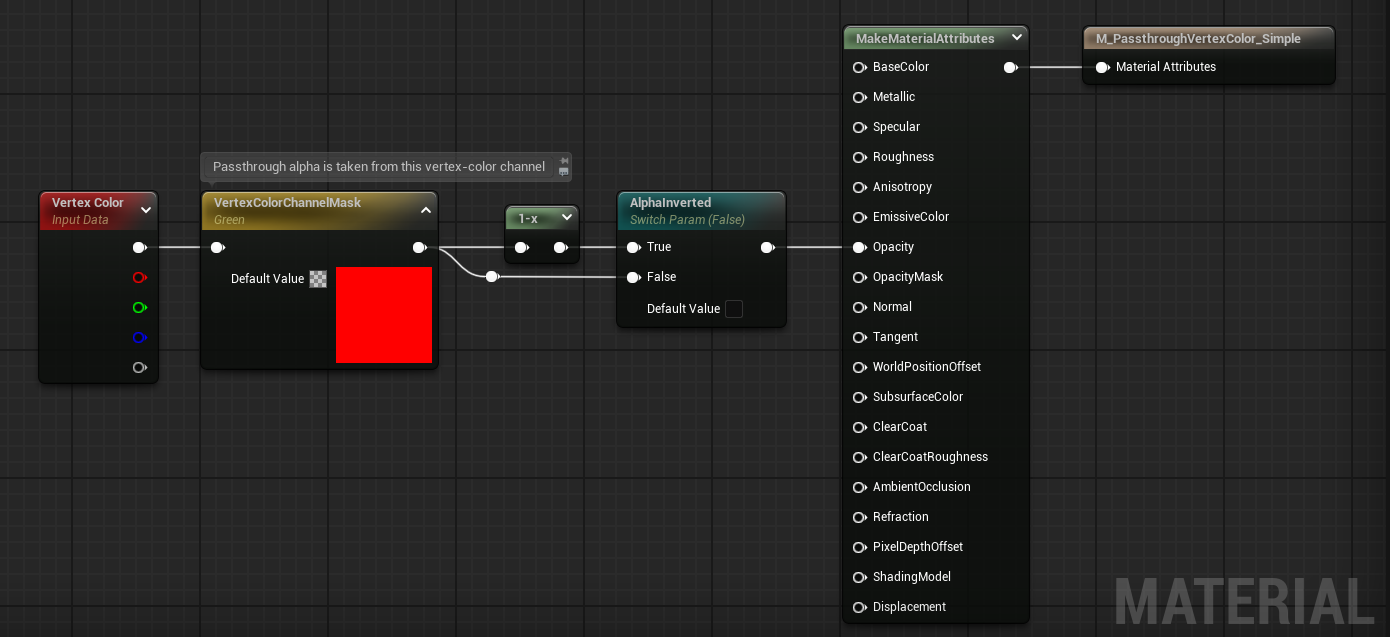
So at least we need to create a Passthrough Material that uses the Vertex Color node to determine the Opacity value, so we can enable Passthrough for the sides and disable it for the border.
In the material graph we use a Material Parameter to select which vertex color channel we want to use (Red / Green / Blue / Alpha), and another Material Parameter to be able to invert the vertex color value to produce the opacity (for example, if we want to show passthrough on everything except the sides).
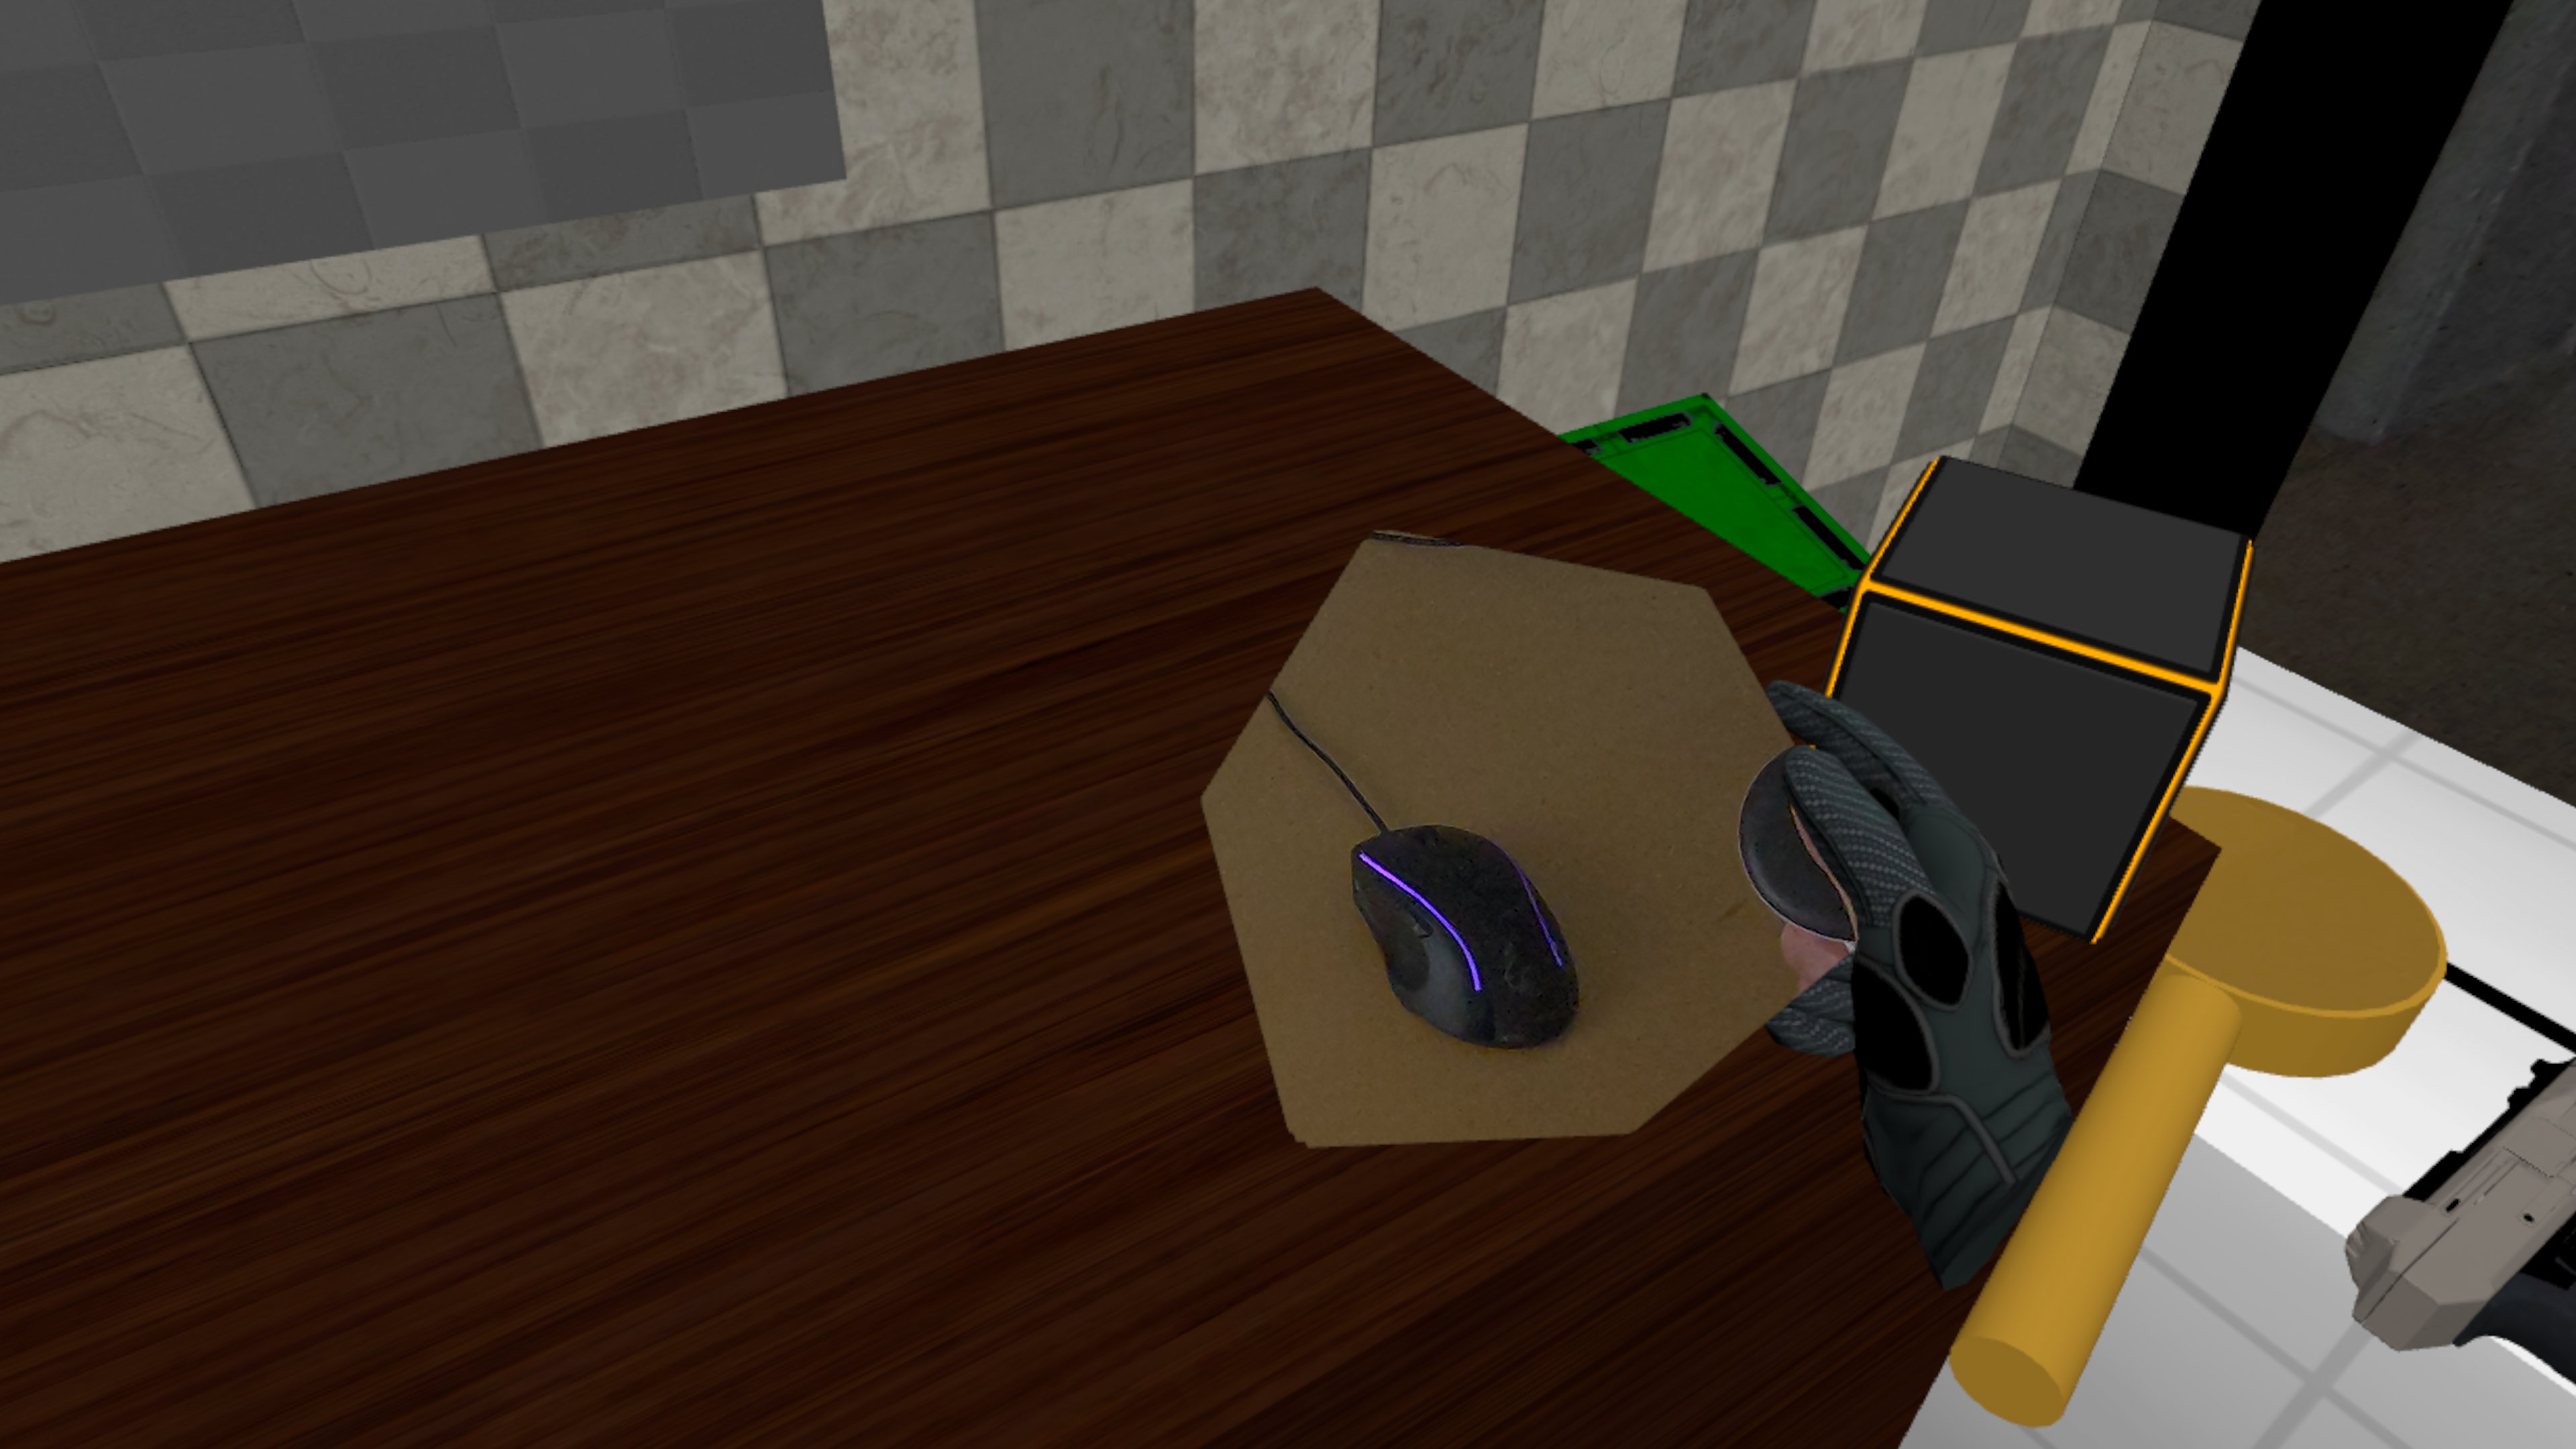
When we assign this material to the cube, we see that the sides enable Passthrough as intended, but we still don't see the yellow/black borders. This is because a Passthrough Material only affects the alpha channel, basically deciding whether to show the Passthrough image or whatever is visible in the virtual world (in this case, the virtual wooden desk).
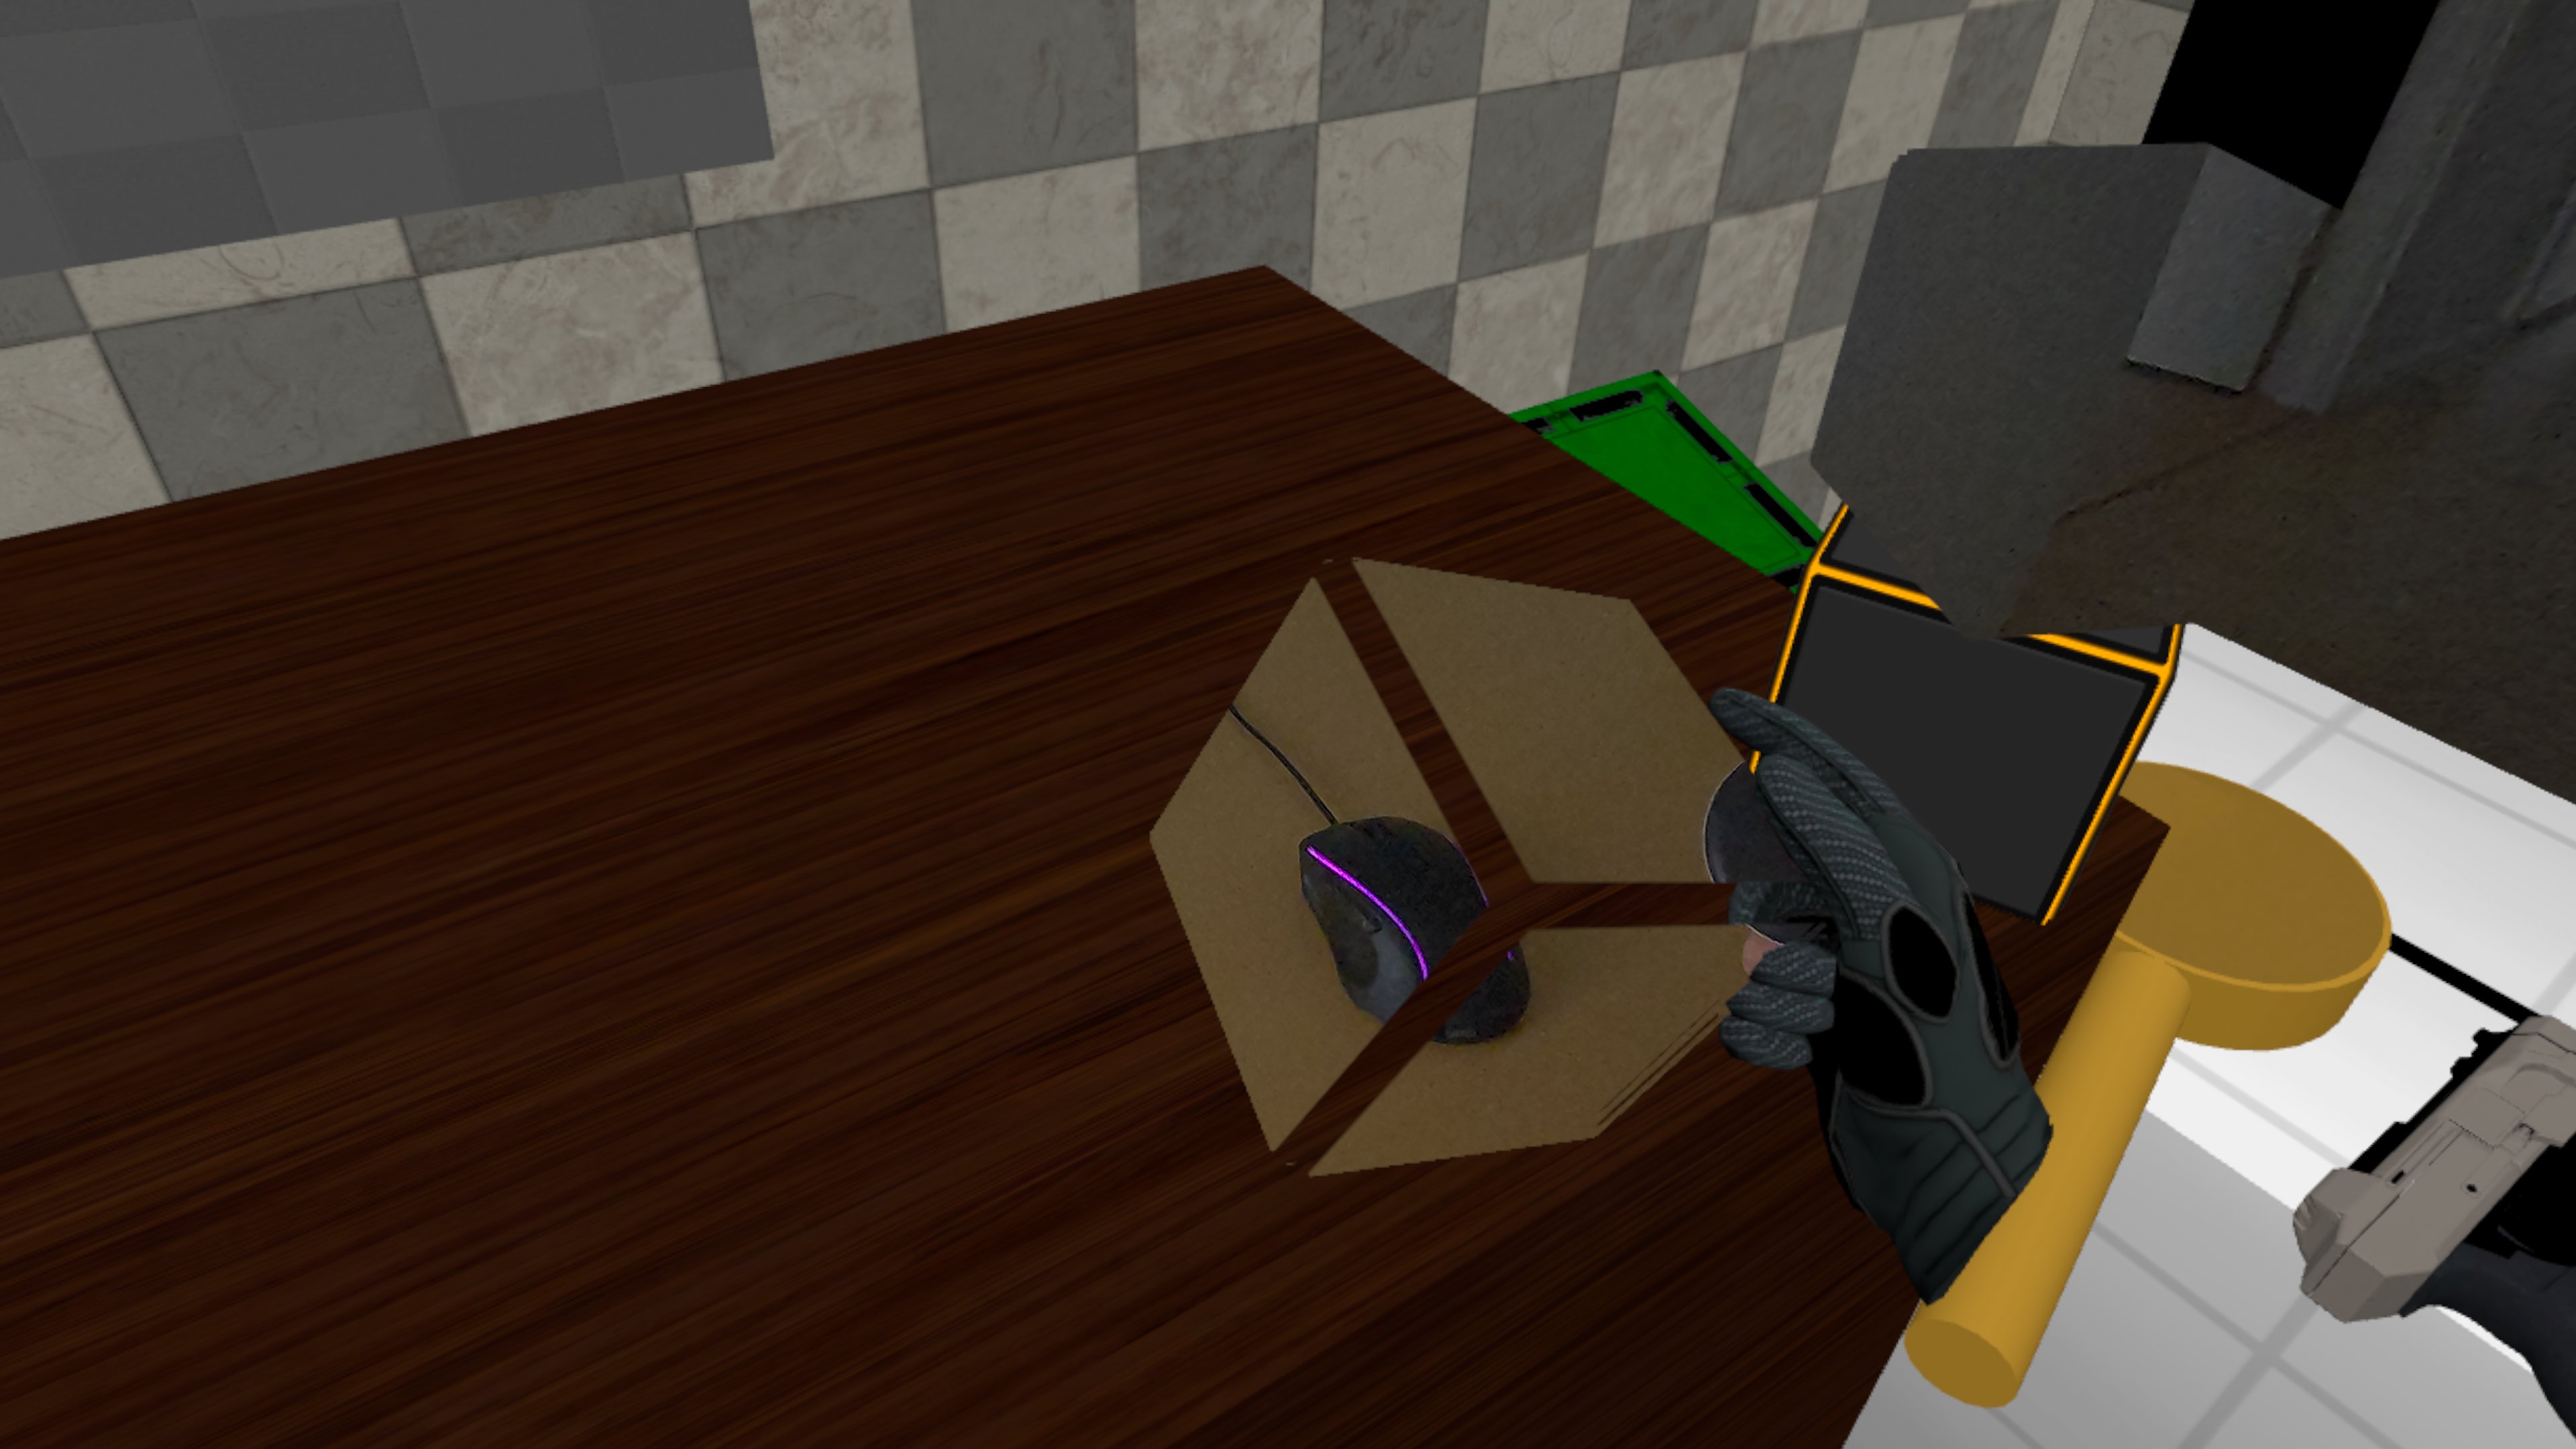
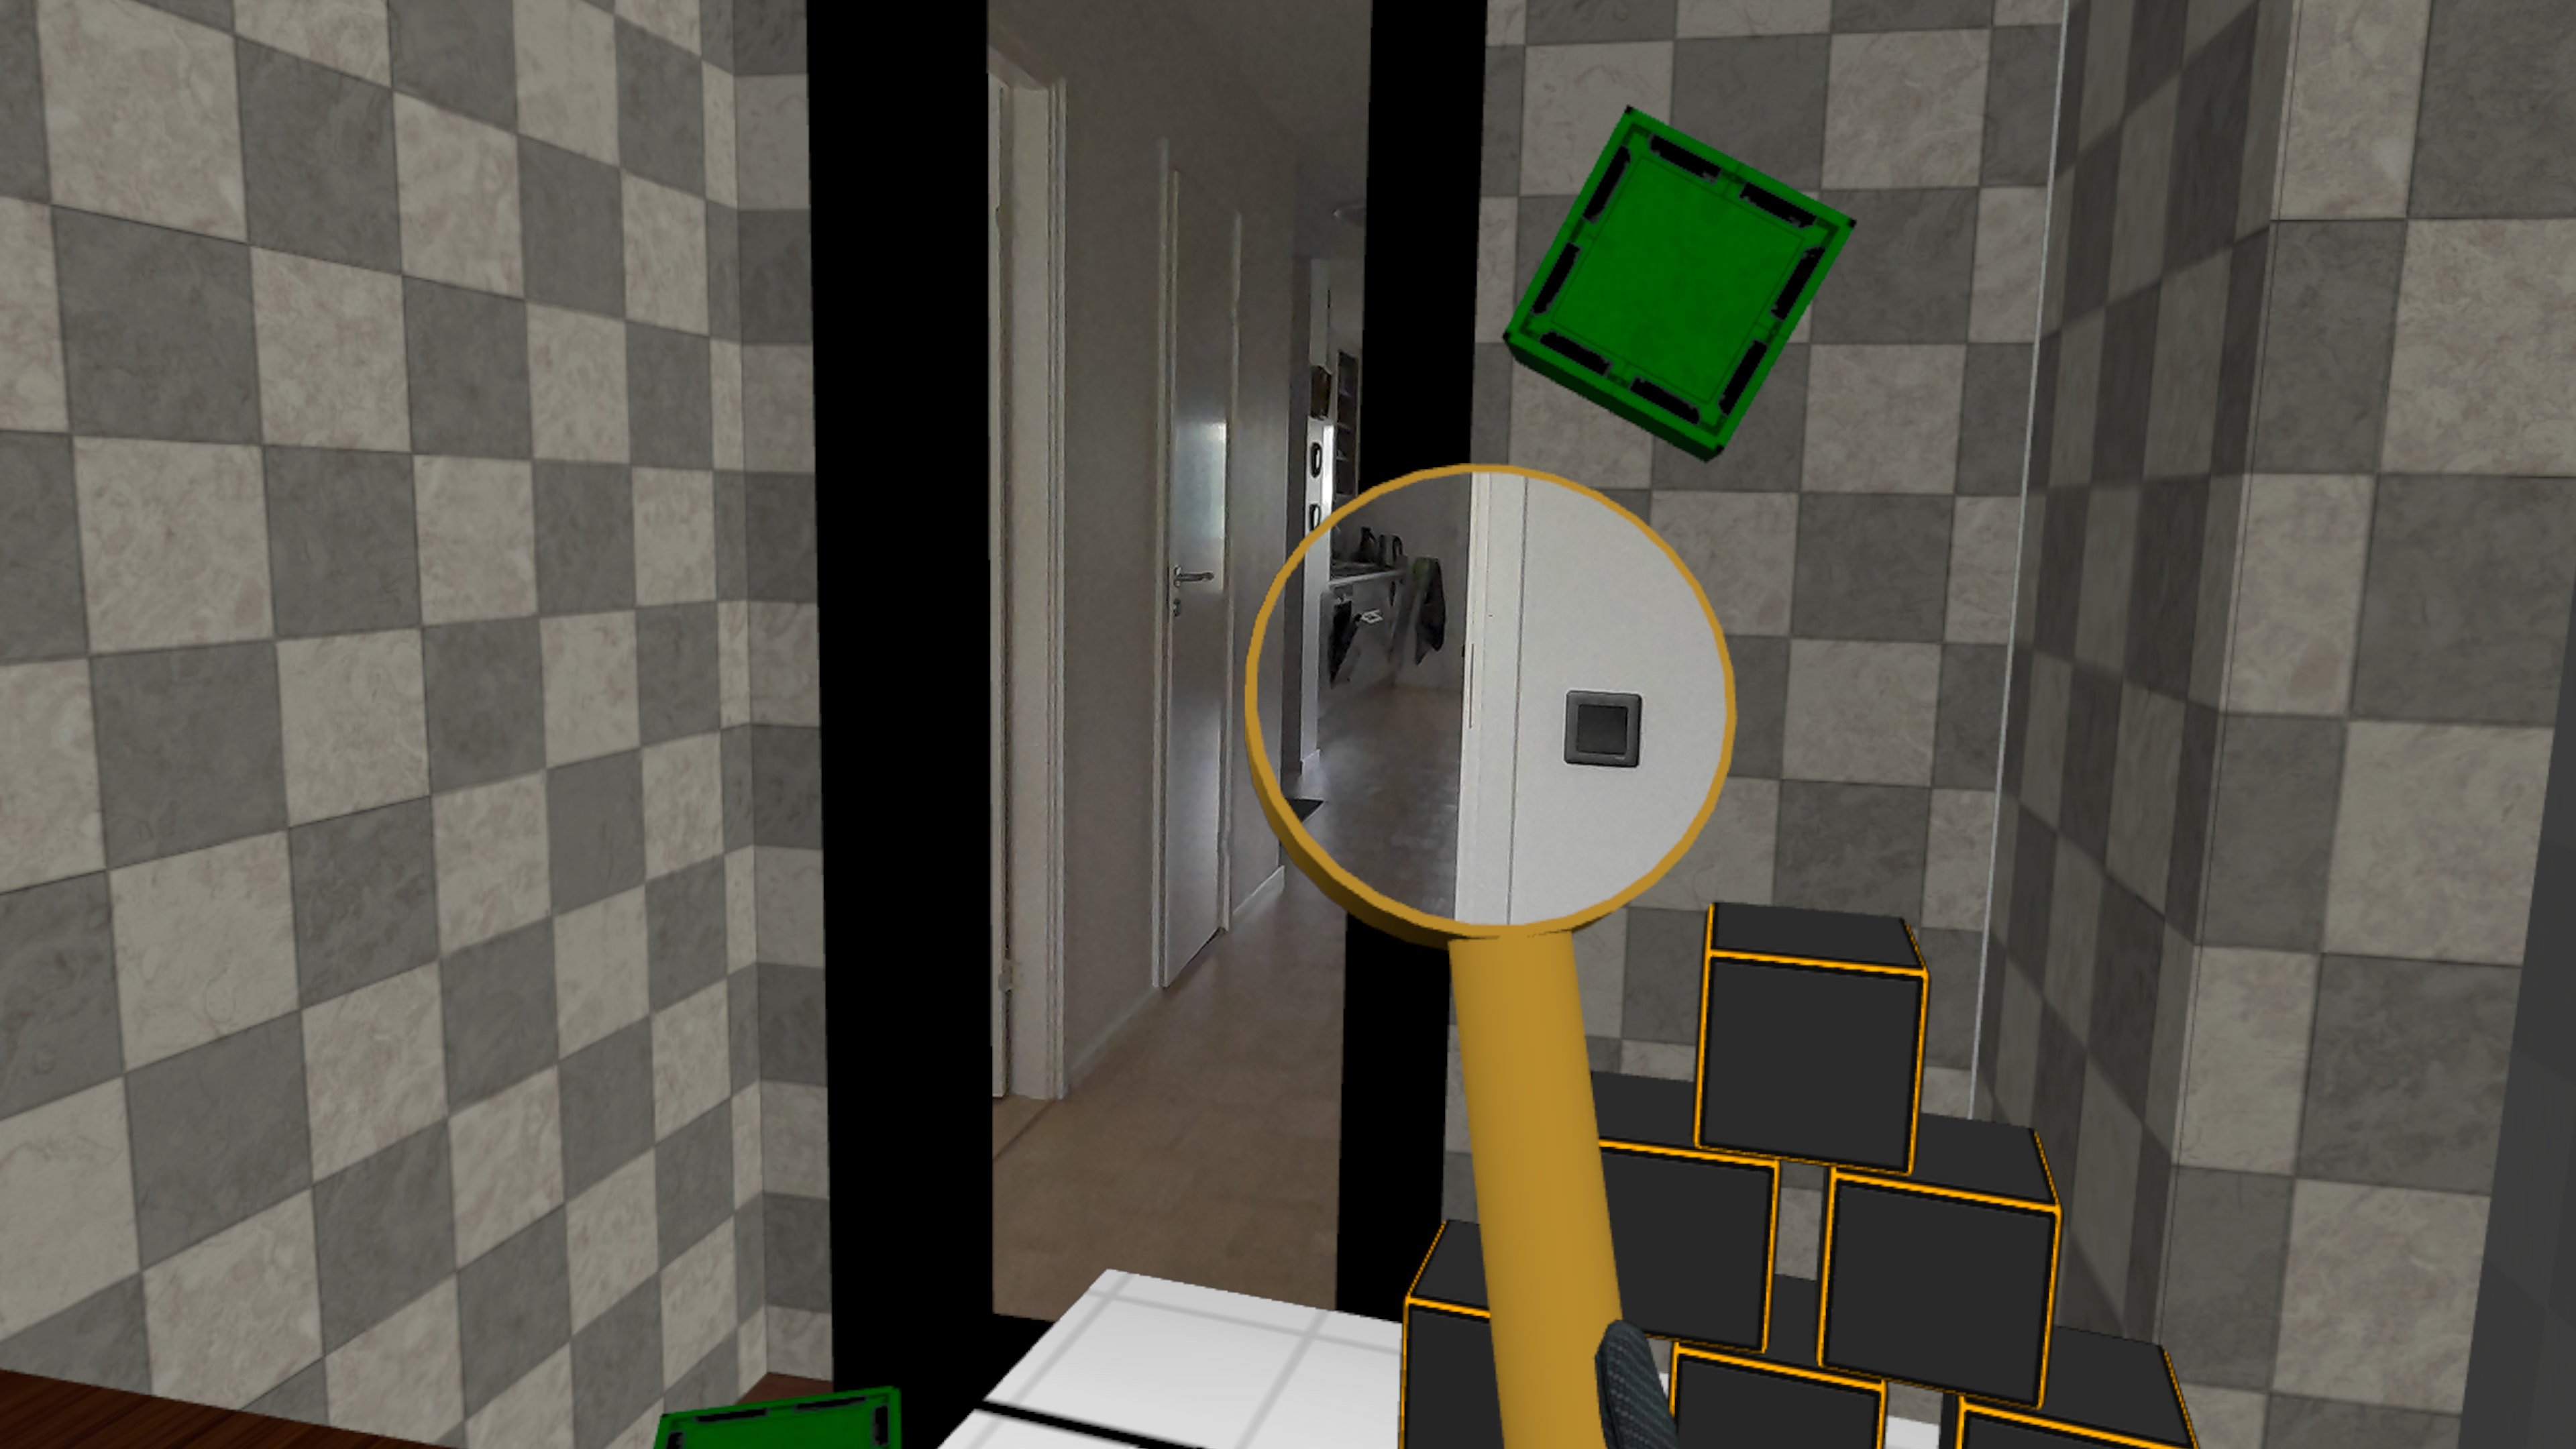
So if we want to combine the Passthrough material (passthrough or not) with the original cube material (grey or yellow), then we can do so by using the Overlay Material property on the static mesh.
Materialis set to the cube materialOverlay Materialis set to the Passthrough material
Basically the cube is now rendered twice, once with the regular material to render grey or yellow, and once with the overlay material to show the virtual or real world.
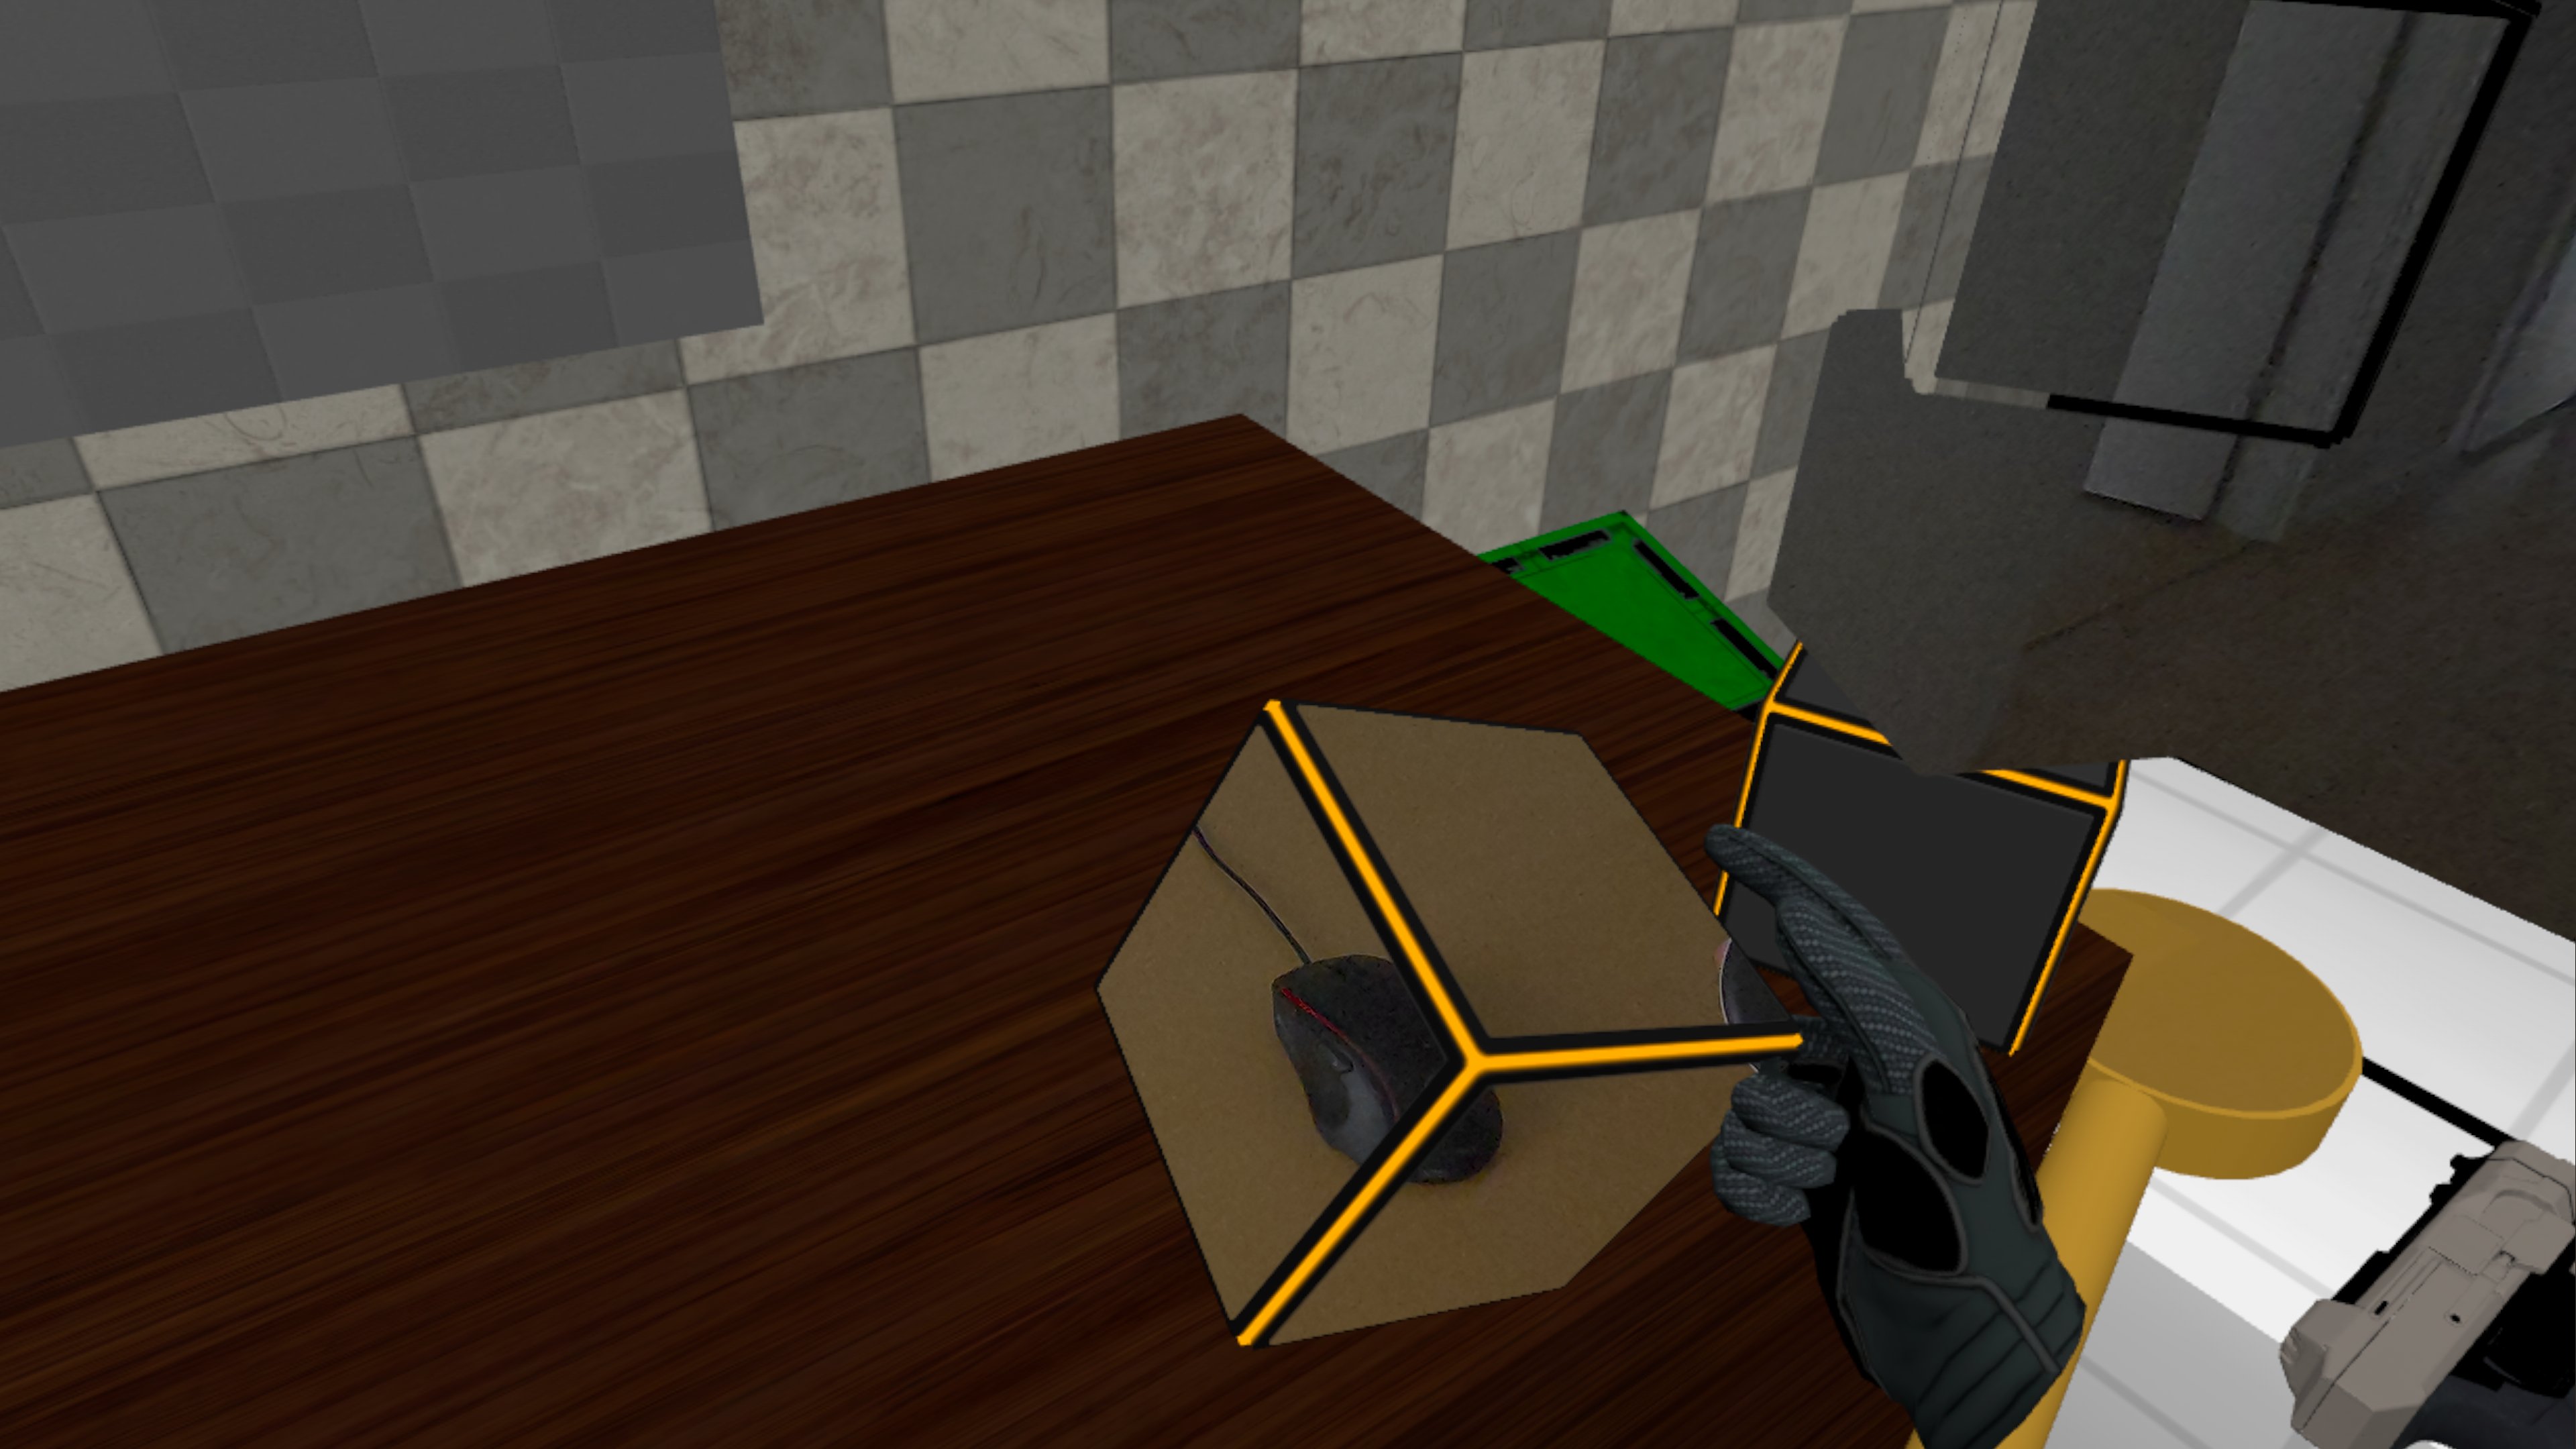
Which is exactly the intended effect we wanted to have.
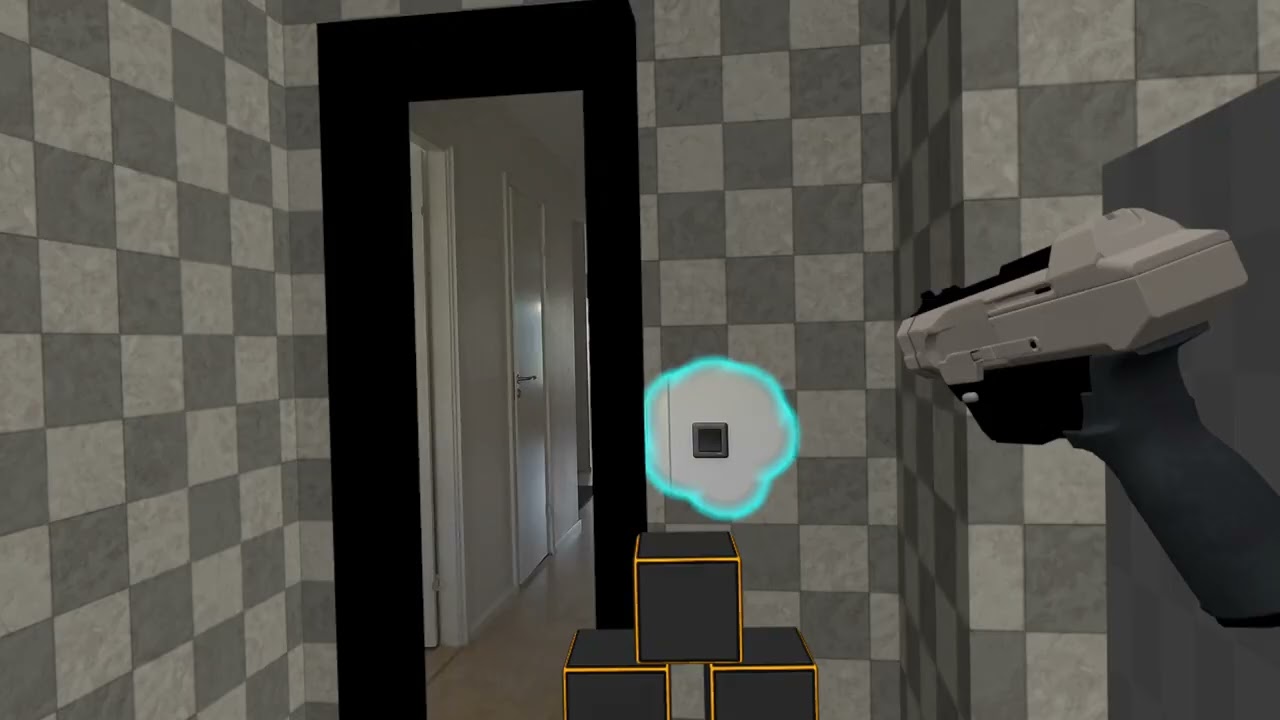
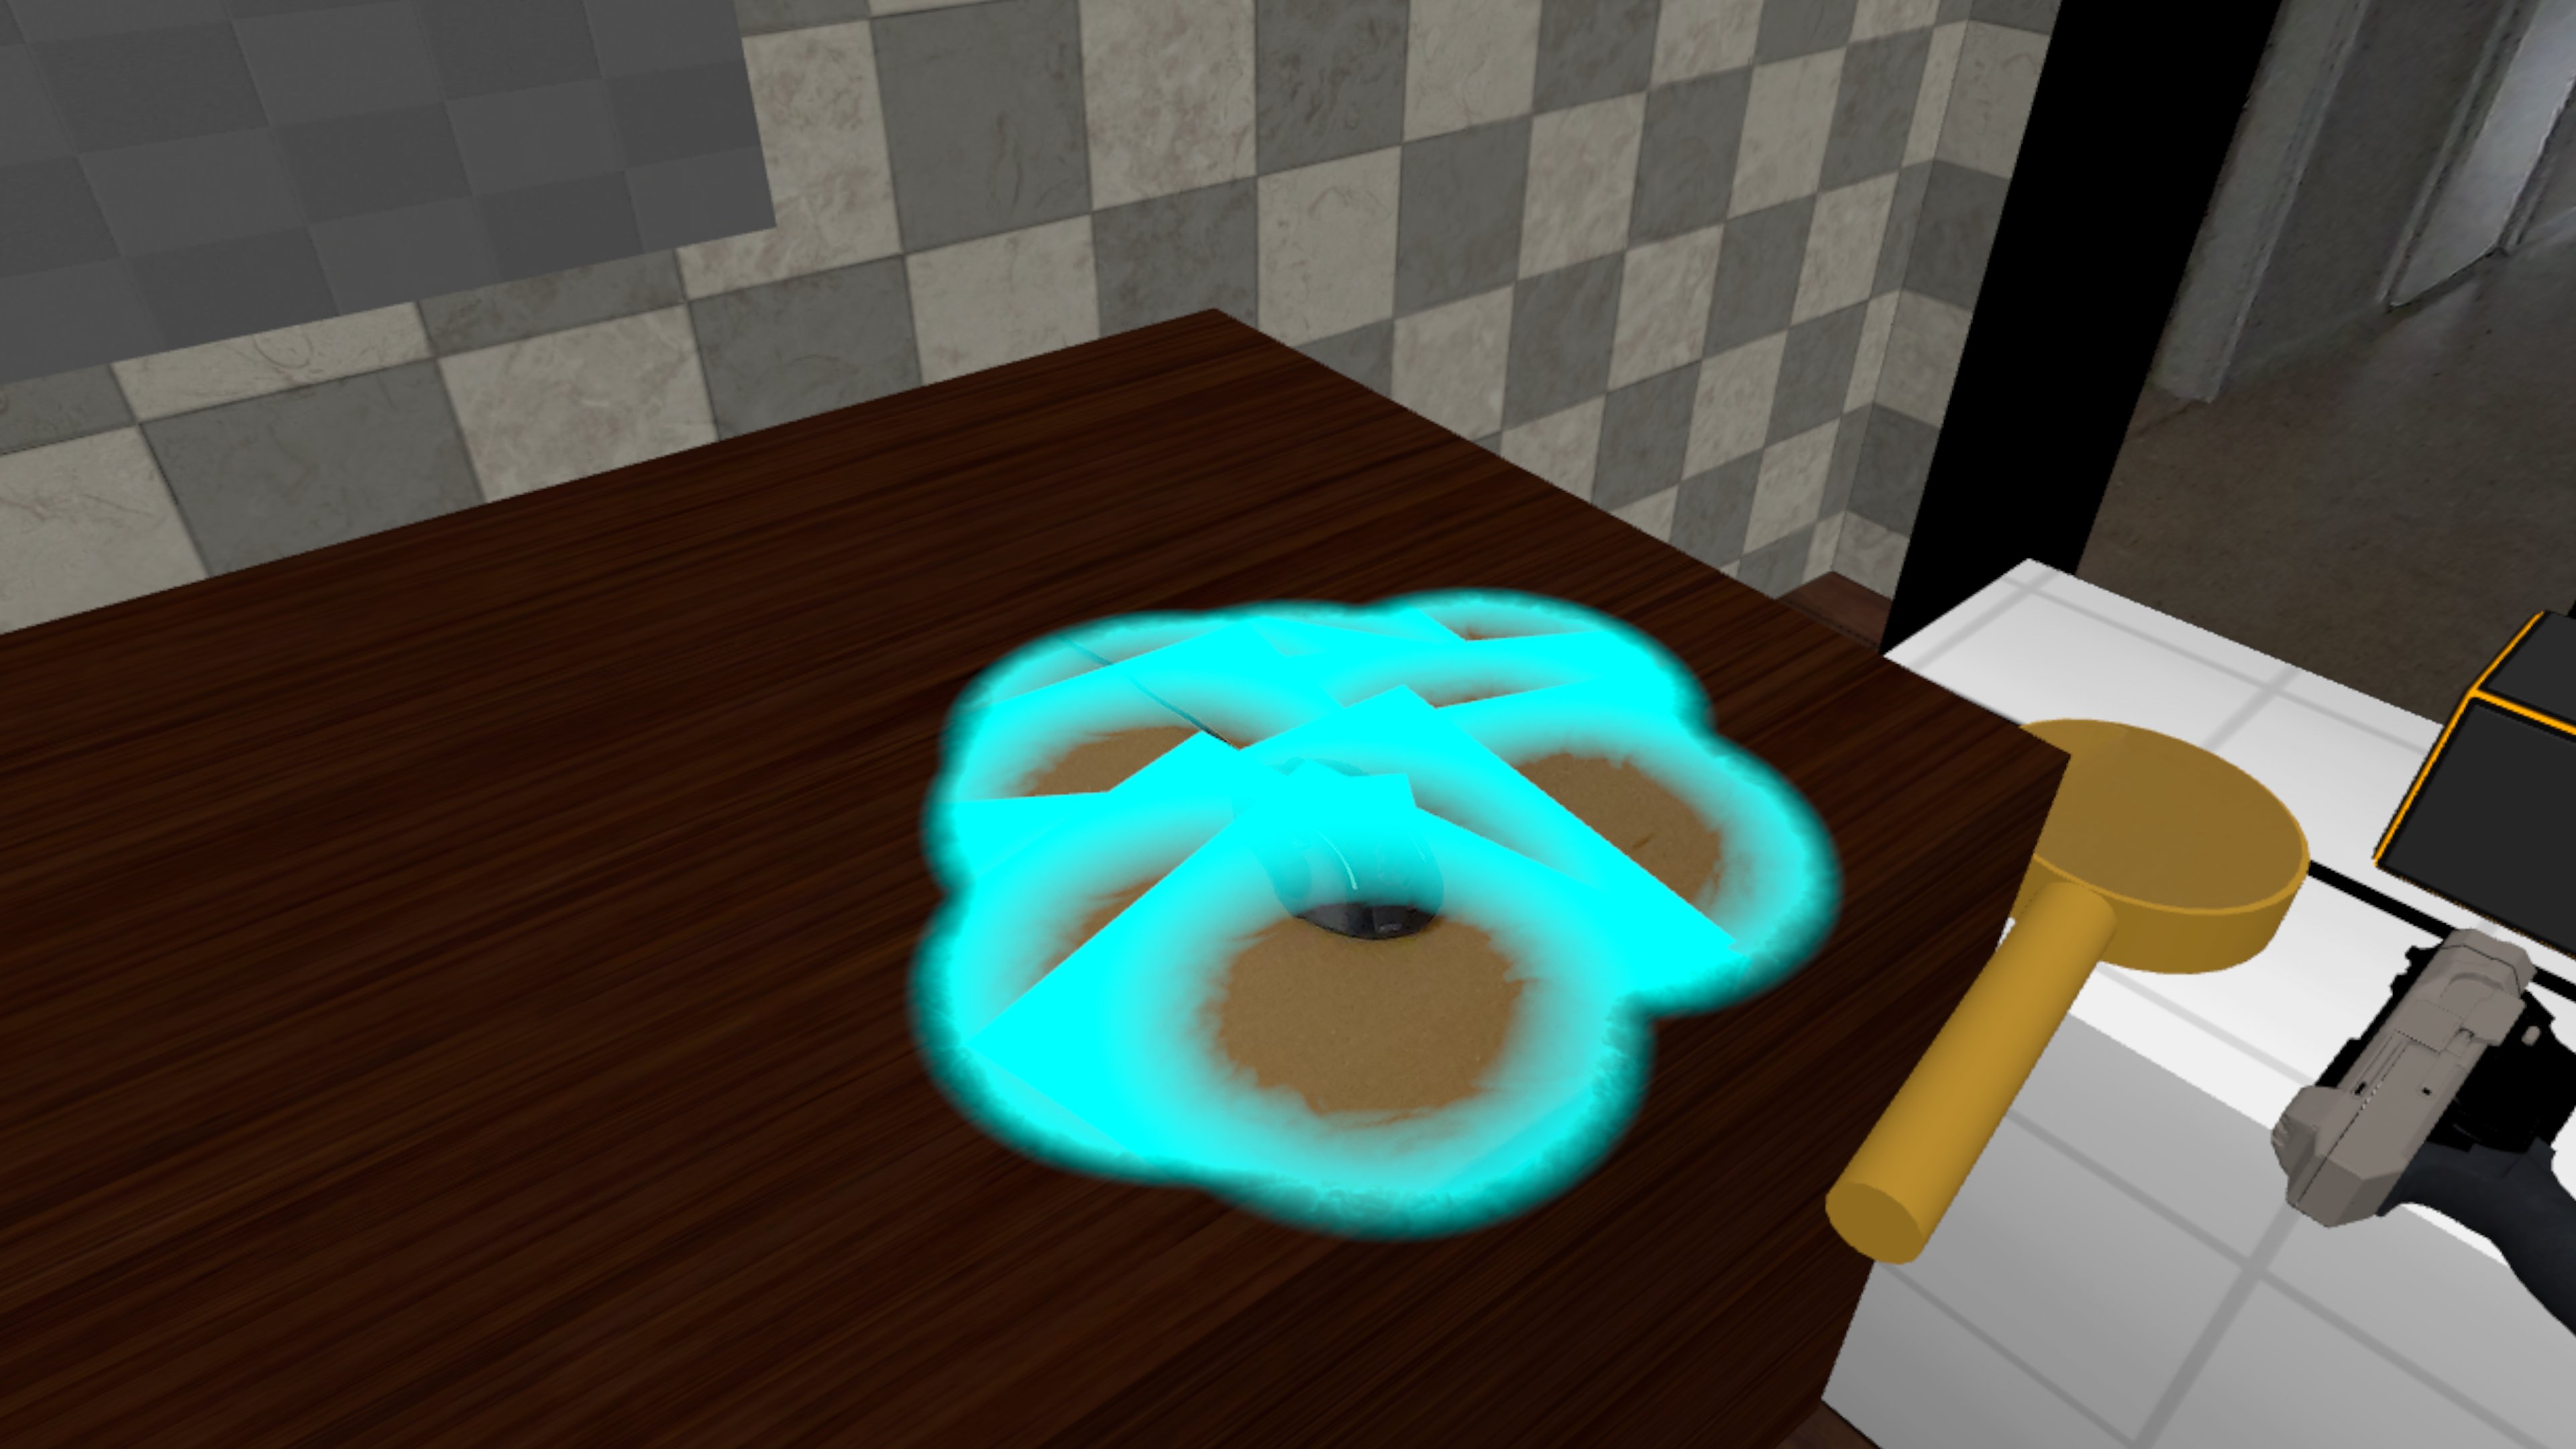
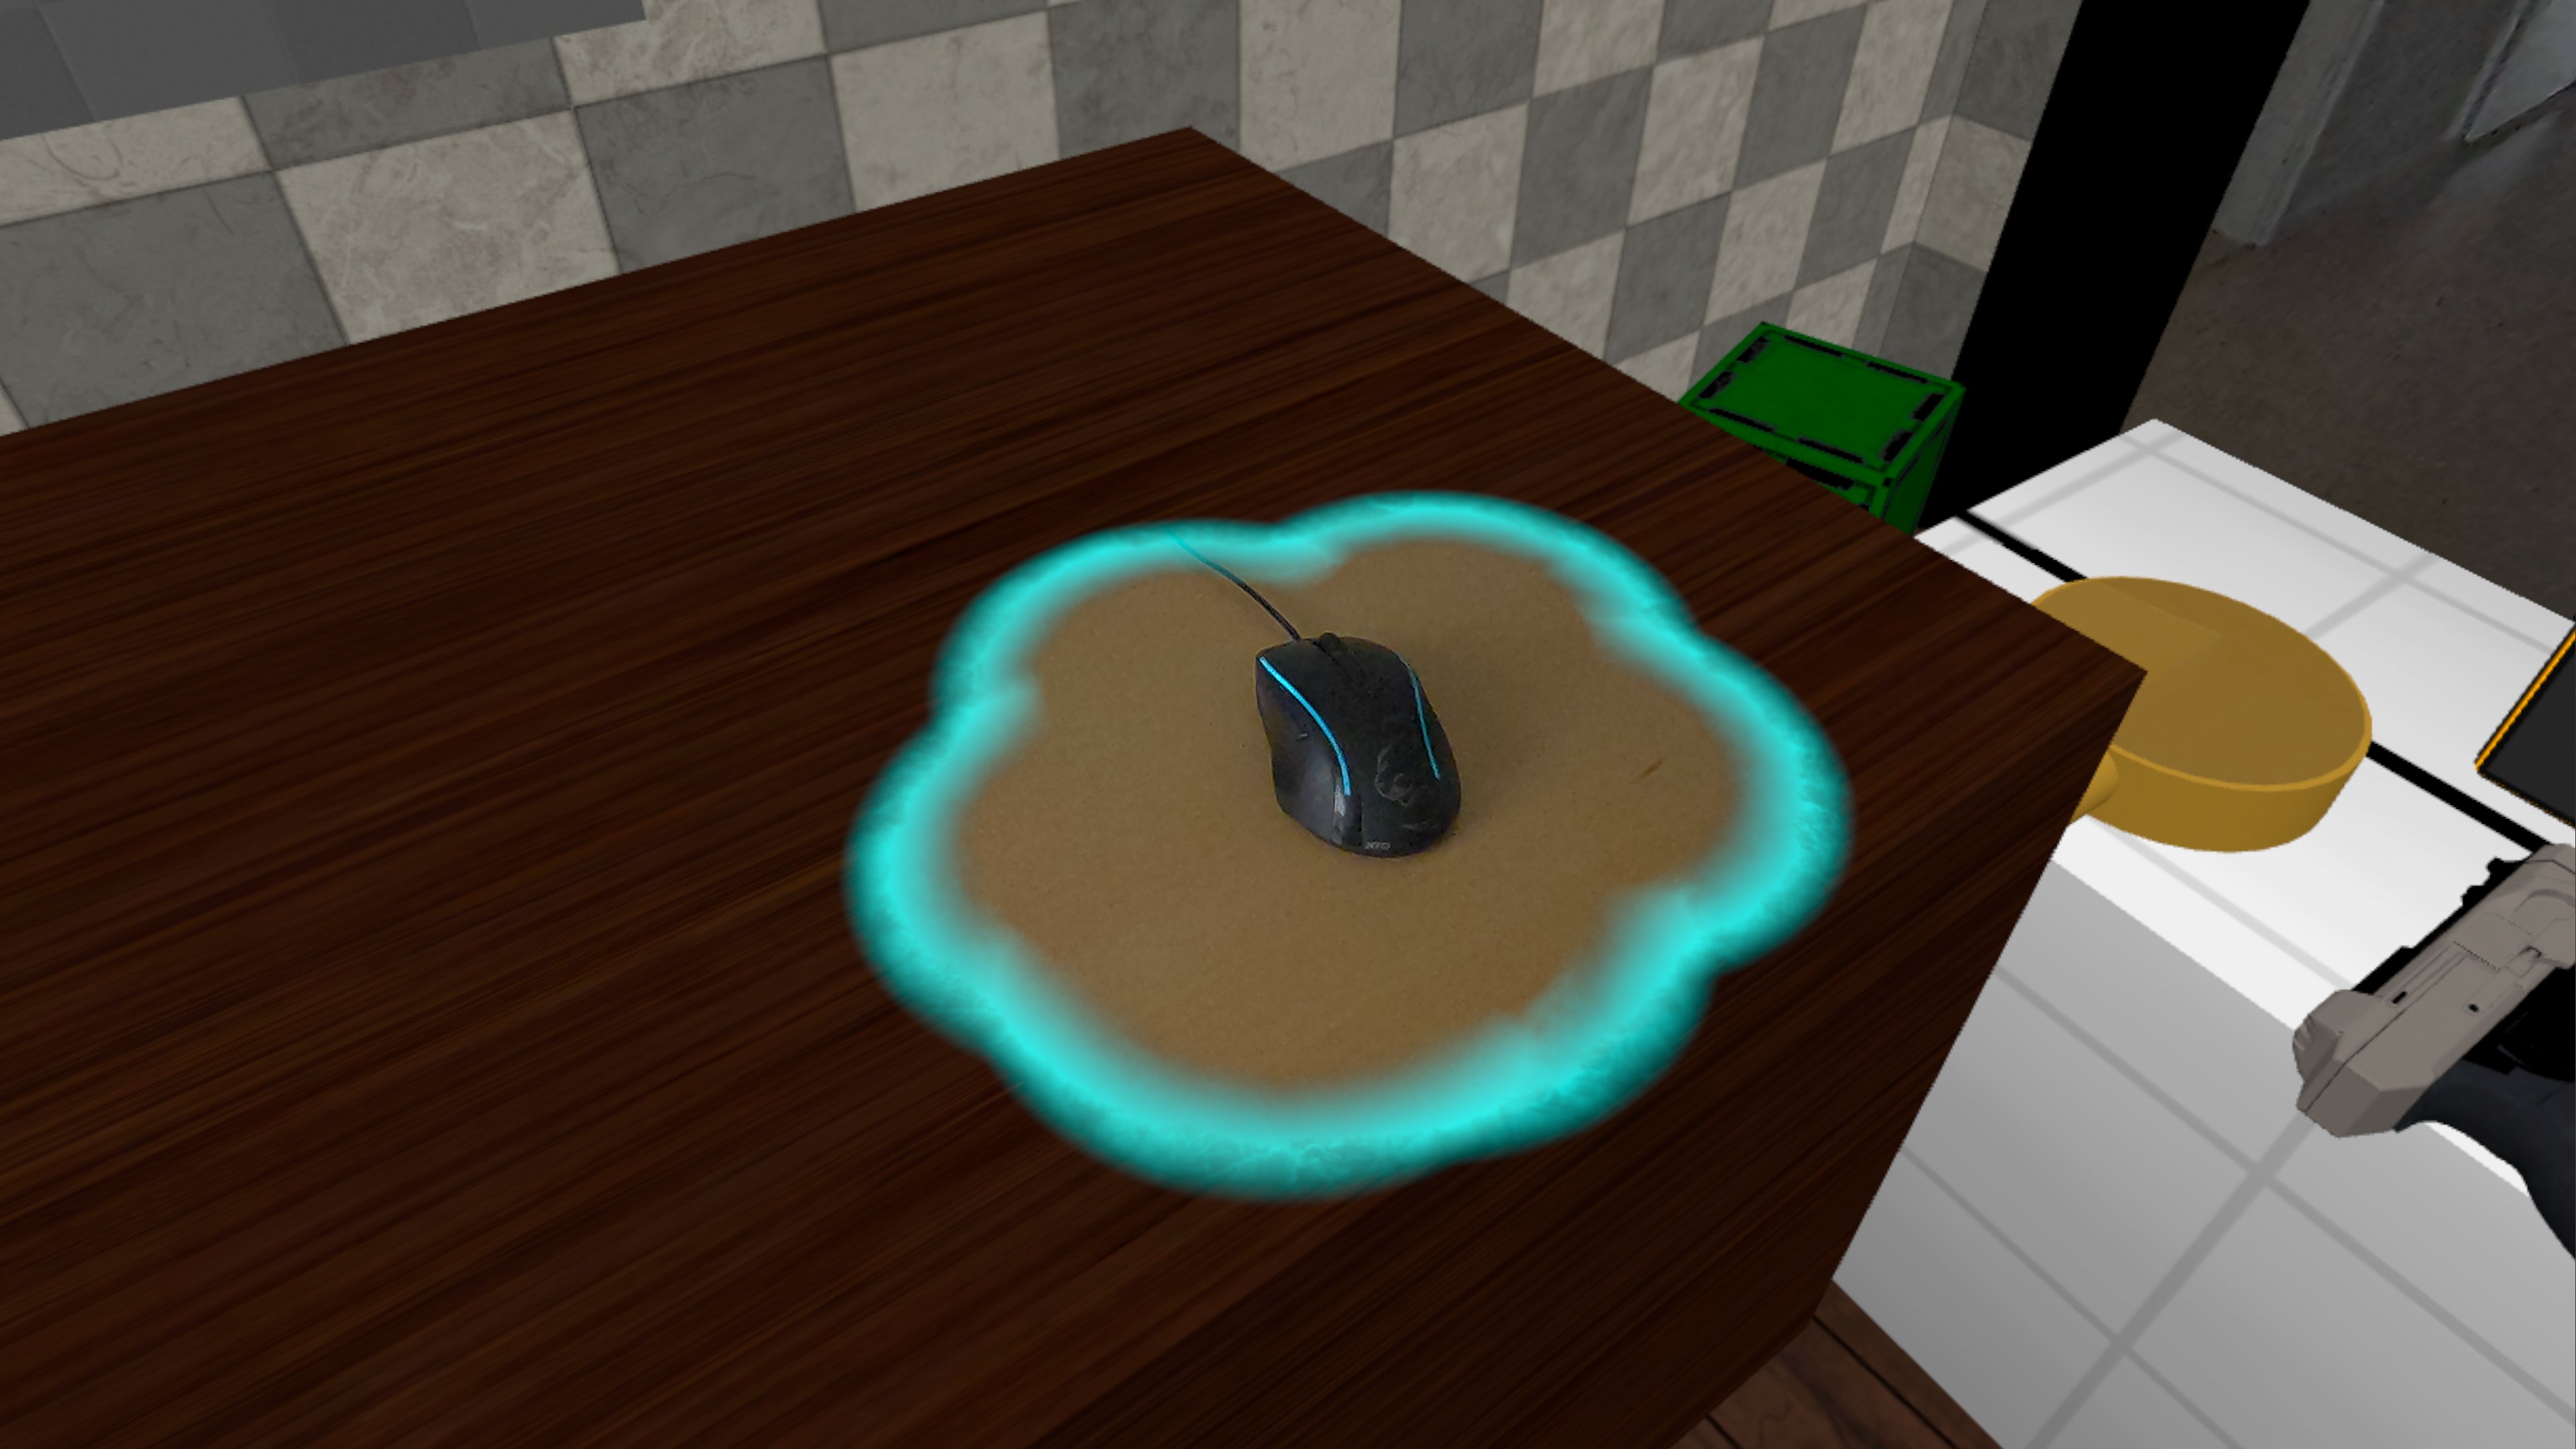
Overlapping Passthrough Material with a Dynamic Border
As an example with a bit more interaction, we've enhanced the projectiles that can be shot with a gun.
When a projectile hits a generated mesh (such as a wall, ceiling or floor), it will spawn a square plane aligned with the impact point, and destroy itself. After a few seconds, the plane will scale down and finally disappear.
The Material setup is similar to the cube from the previous section:
Materialis set to the border material, which renders a flowing blue/white border between the virtual and real worldOverlay Materialis set to the Passthrough material, which enables Passthough on the inside of the border with a similar gradient
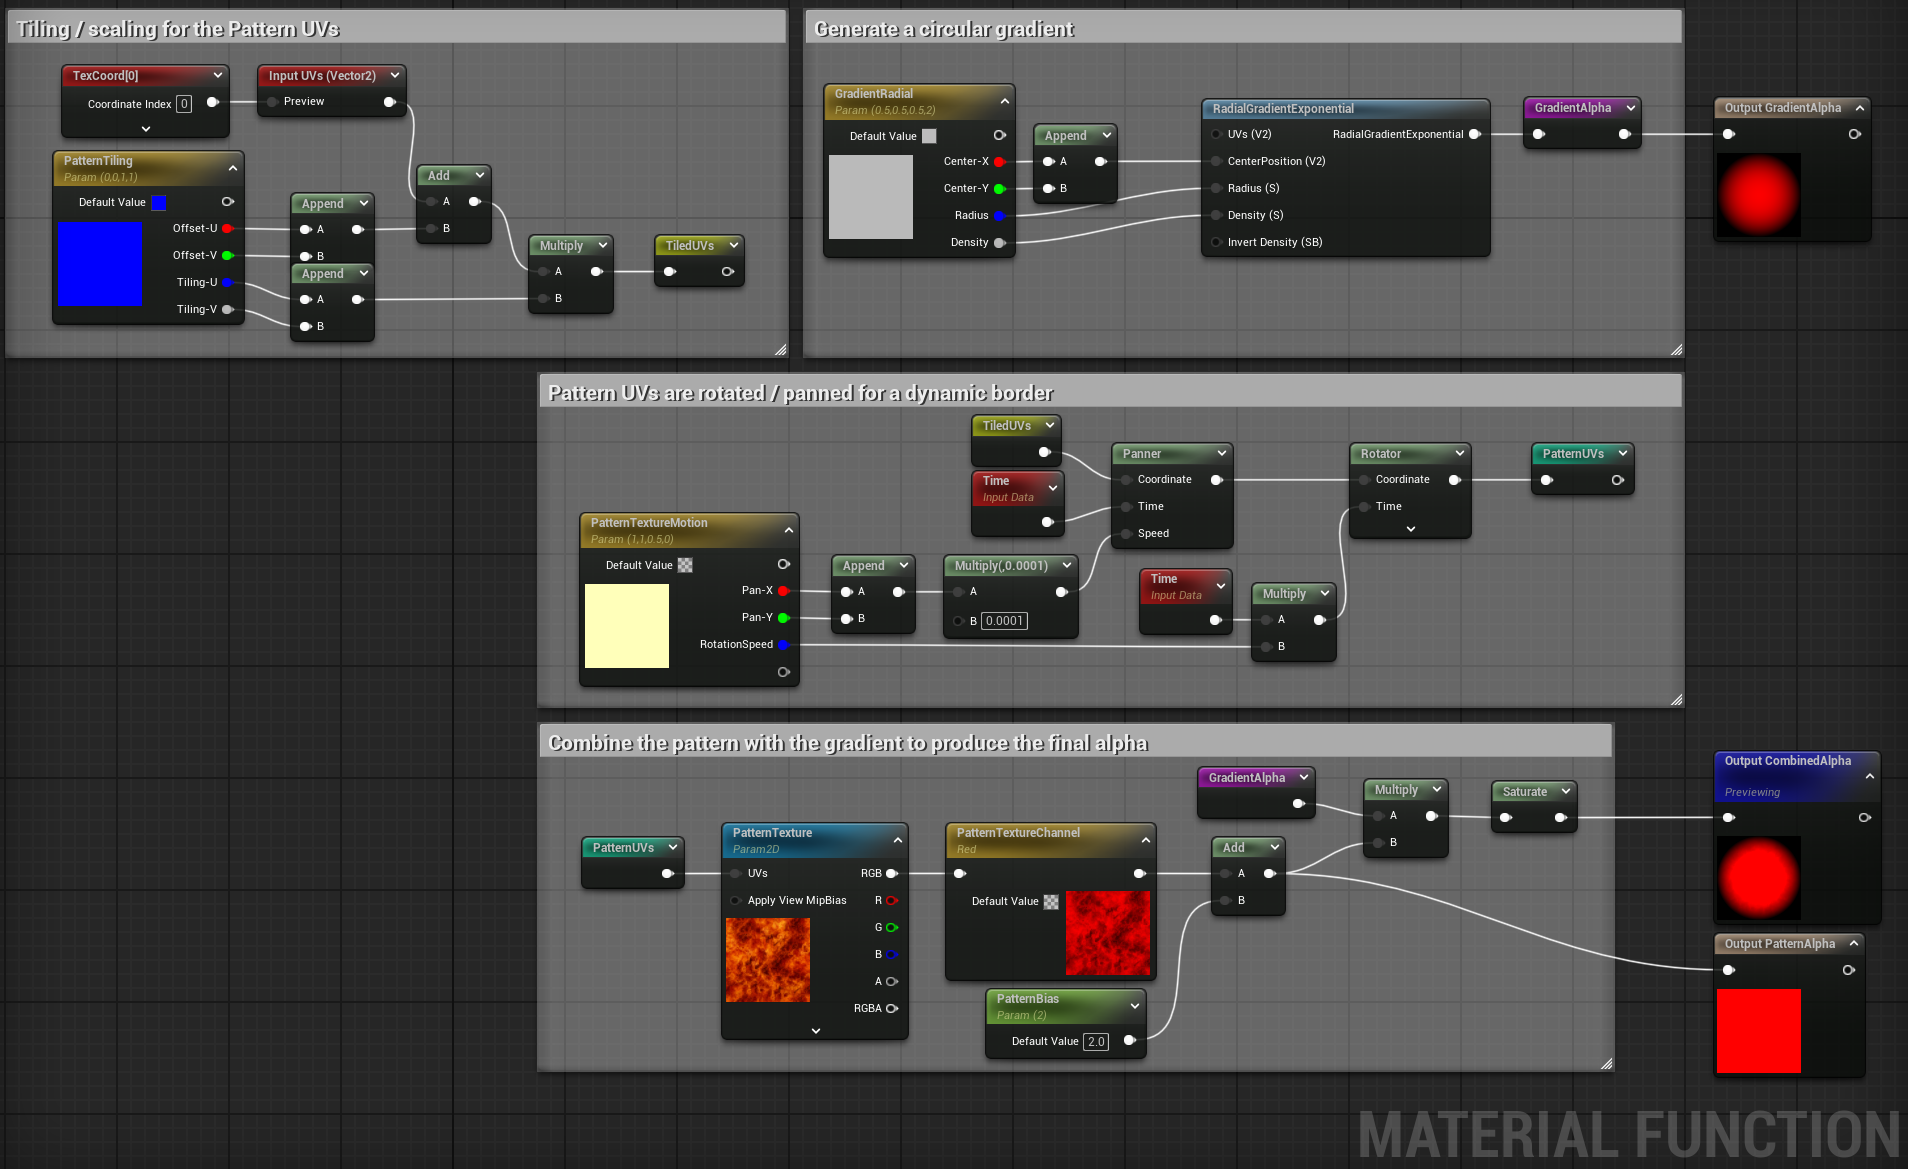
The final effect can be seen in the video below, where we can shoot multiple projectiles around the same spot on the wall, composing an area with passthrough enabled, surrounded by a blue border.
Clicking play will embed the YouTube player and may set third-party cookies and collect data from YouTube.
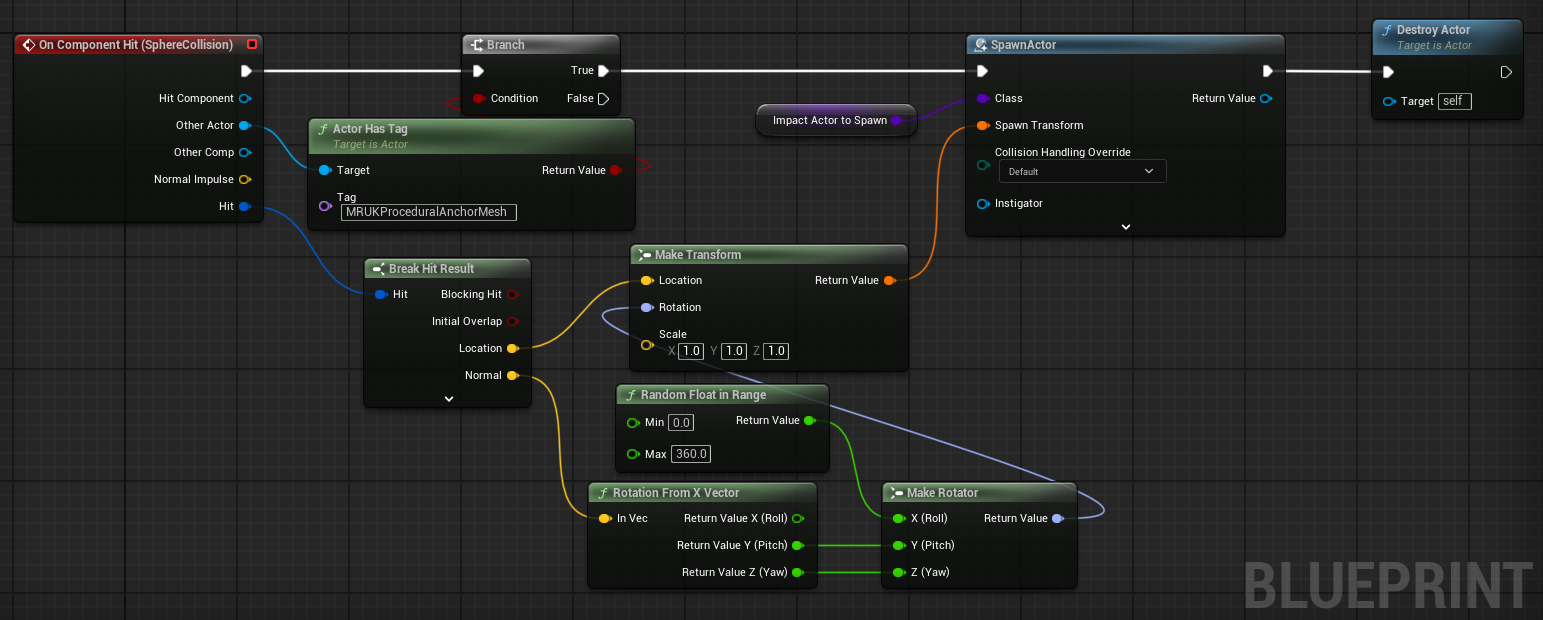
In the projectile Blueprint to spawn the plane when it hits a generated surface, the OnComponentHit event provides all the info we need to properly place and align the plane.
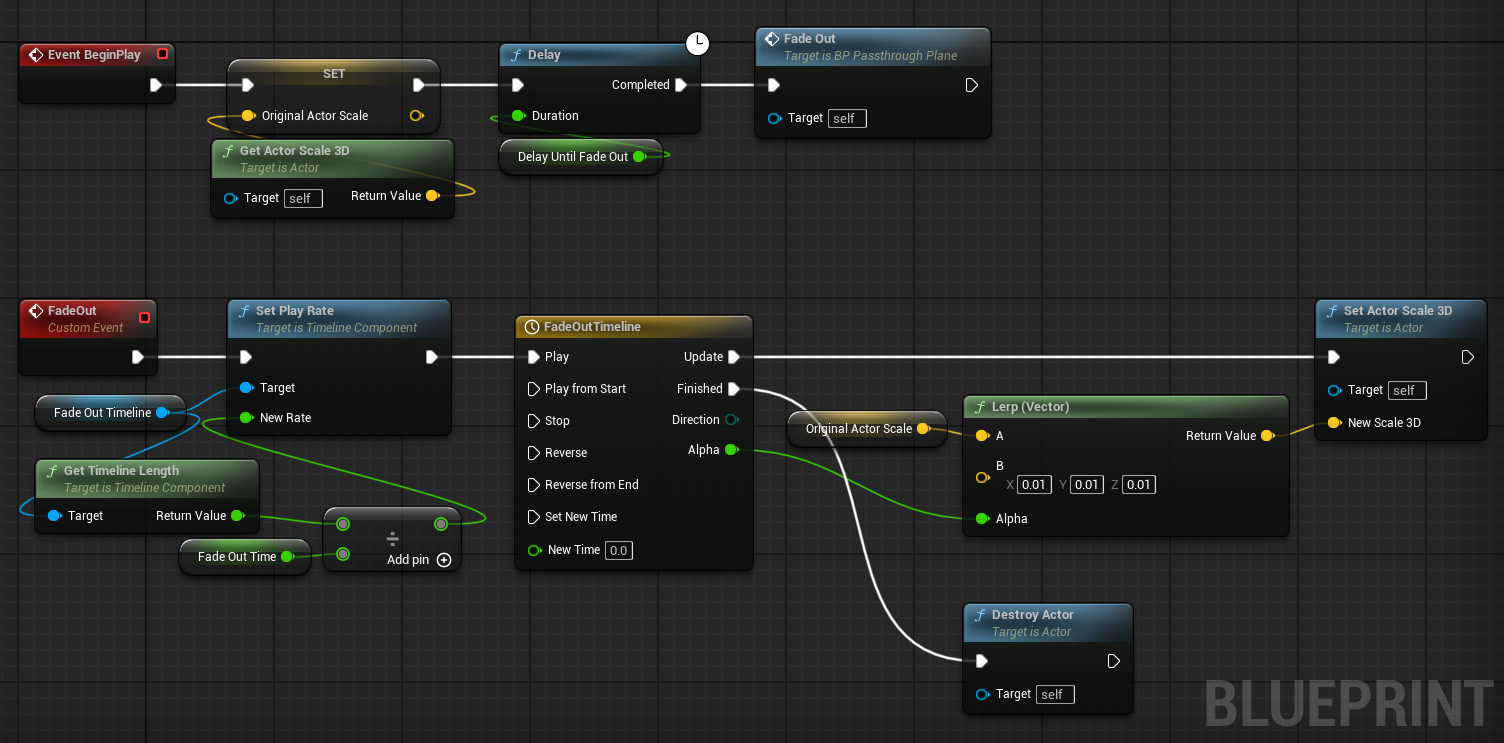
In the plane Blueprint we make sure that after a brief delay a timeline is played to shrink the plane, after which it is fully destroyed.
In order for the overlap of multiple planes to work properly, we need to change the Blend Mode on the Passthrough Material from Translucent to AlphaHoldout. This way, the Passthrough alpha from overlapping planes is properly merged, instead of overwriting the Passthrough alpha for each plane (which makes the blue borders visible inside of where the planes overlap, and even shows parts of the border that would normally be completely invisible).
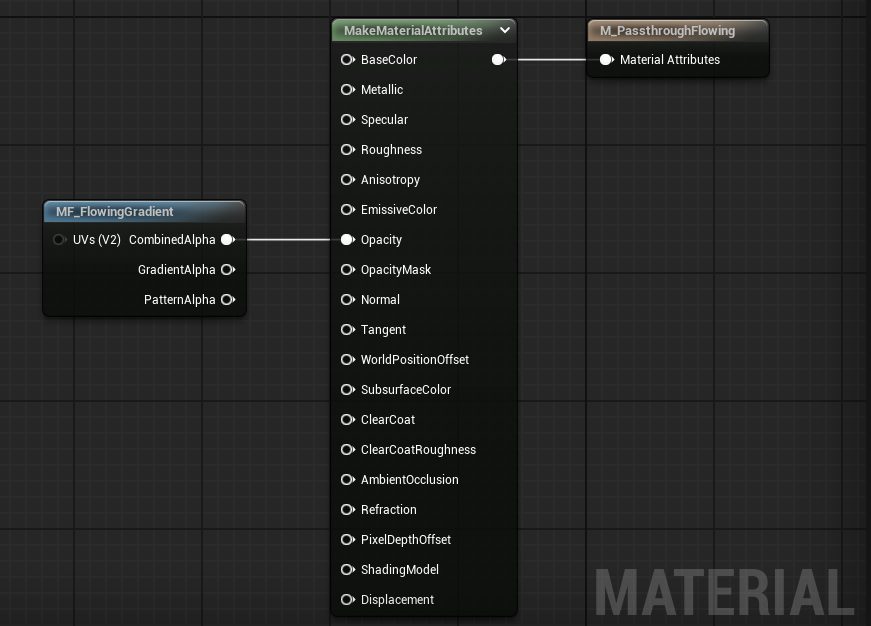
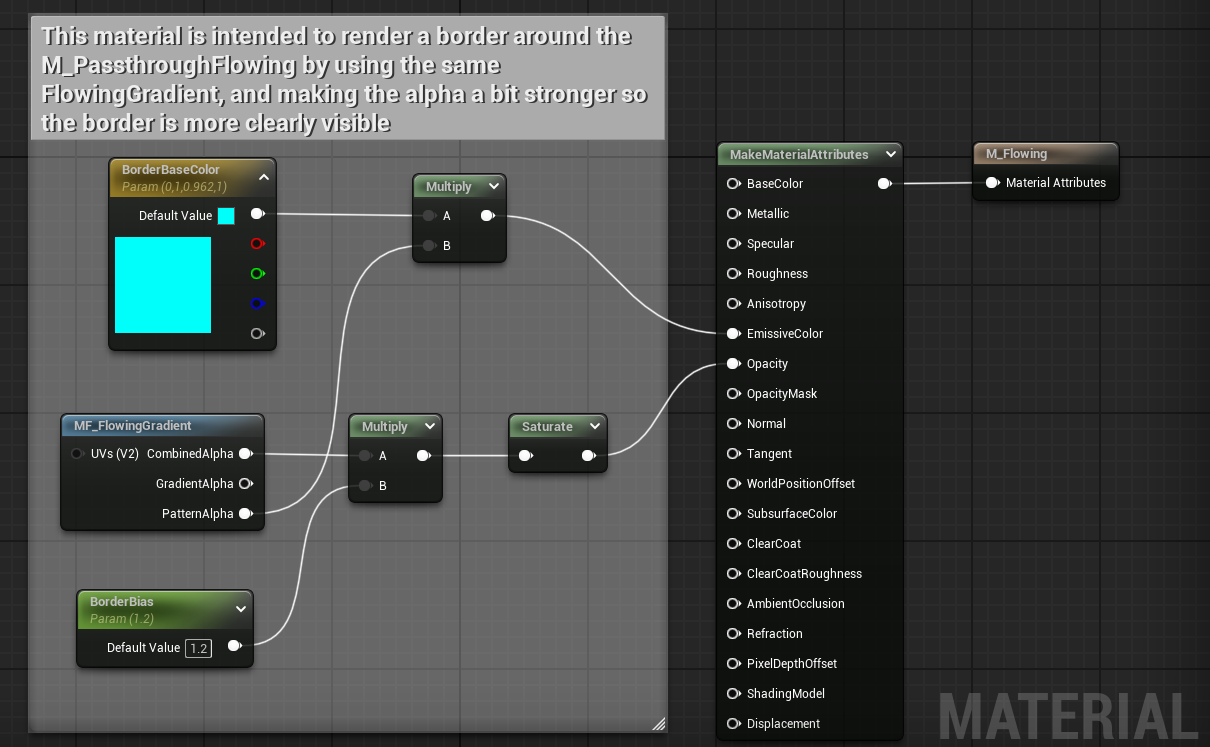
The material graphs for the passthrough and border materials use the same Material Function we created to generate a circular border with some animation to make it more dynamic.
Conclusion
Mixed Reality is an exciting way to create unique experiences that blend the real and virtual world. Passthrough Materials make the blend really dynamic, opening new possibilities to create amazing experiences.
We at Immerstory are excited to support our customers with their immersive experiences, and look forward to share more exploration progress soon.
What immersive experience would you like to see? Let us know!
Additional Resources
Documentation for the MetaXR plugin, specifically the Mixed Reality Utility Kit which was used for this demo, can be found here
Sound effects in the demo app have been thankfully sourced from Sonniss GameAudioGDC