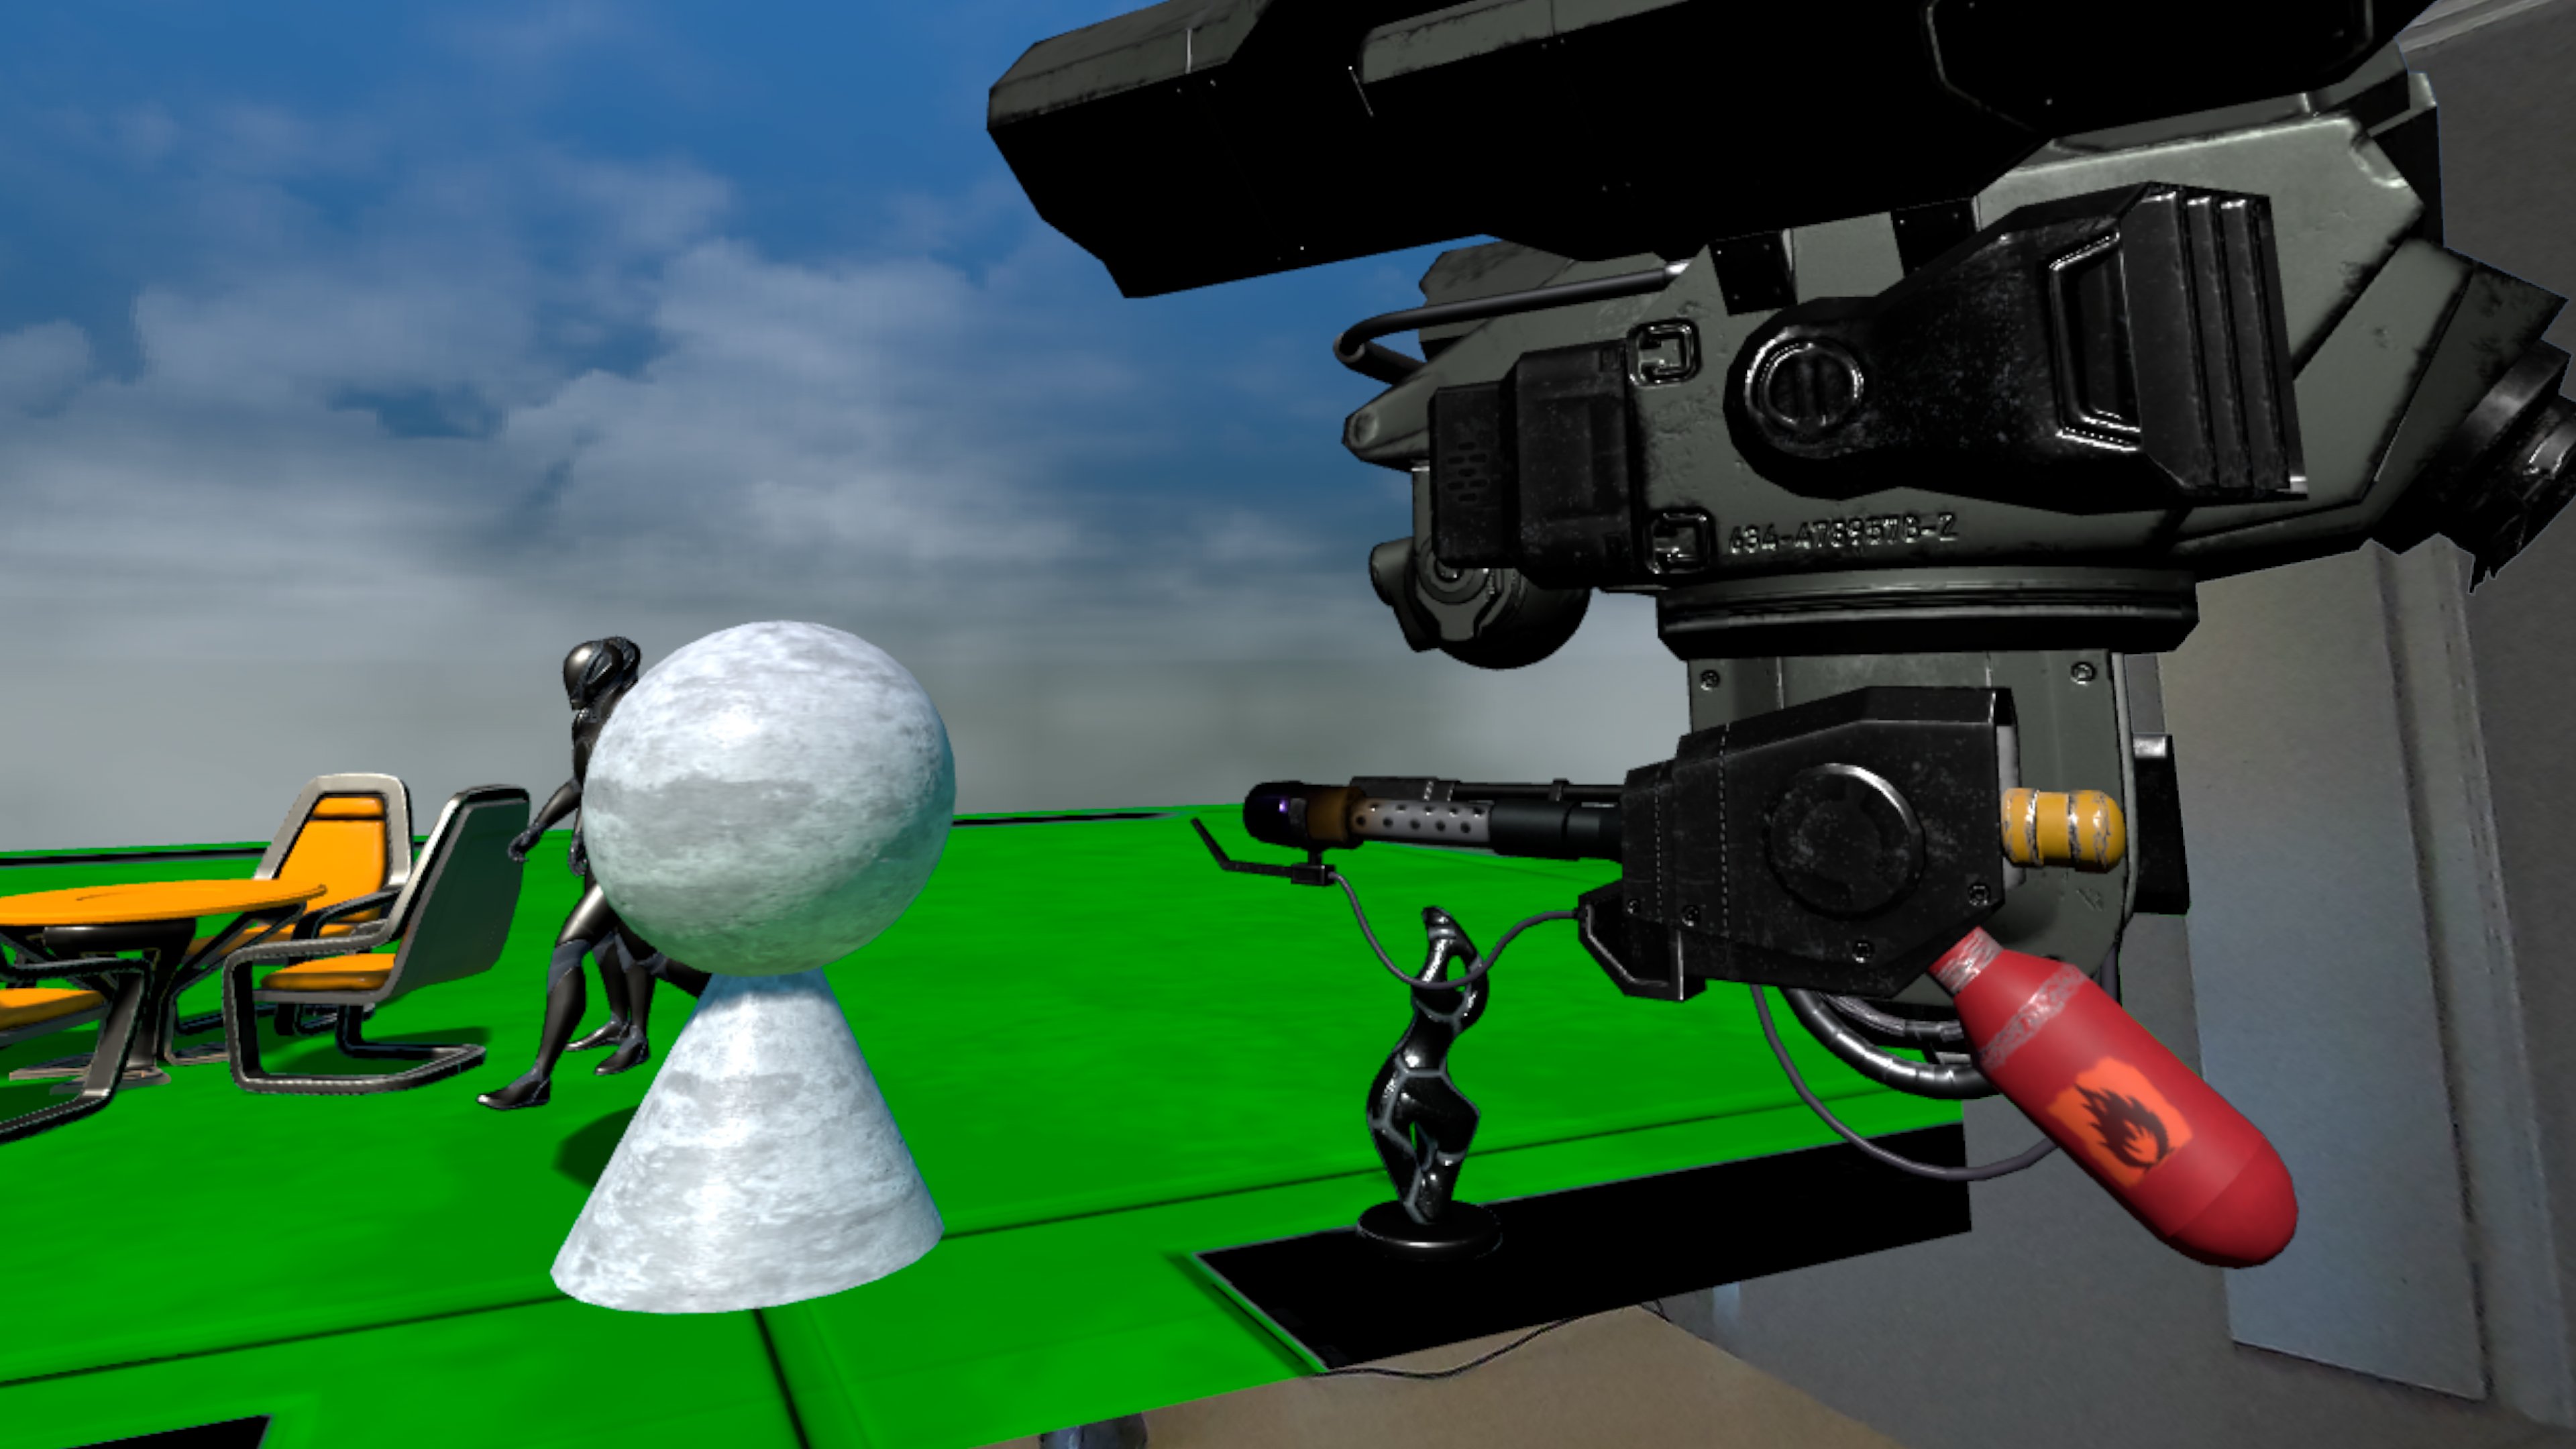

In this post, we add procedural animations to the player controlled drone we've built in the previous devlog blog post. We define procedural animations so it feels more natural during movement and aiming.
The drone will be semi-autonomous, it will periodically scan for targets and automatically lock on the best target with its camera and gun.
Tech Stack
For this exploration, we're using the following tech stack:
We continue from the setup we've discussed in the previous blog post Setting up a Drone in Unreal Engine. If you want to follow along, some basic knowledge of the tech stack is recommended, especially Unreal Engine concepts.
Skinning the Mesh
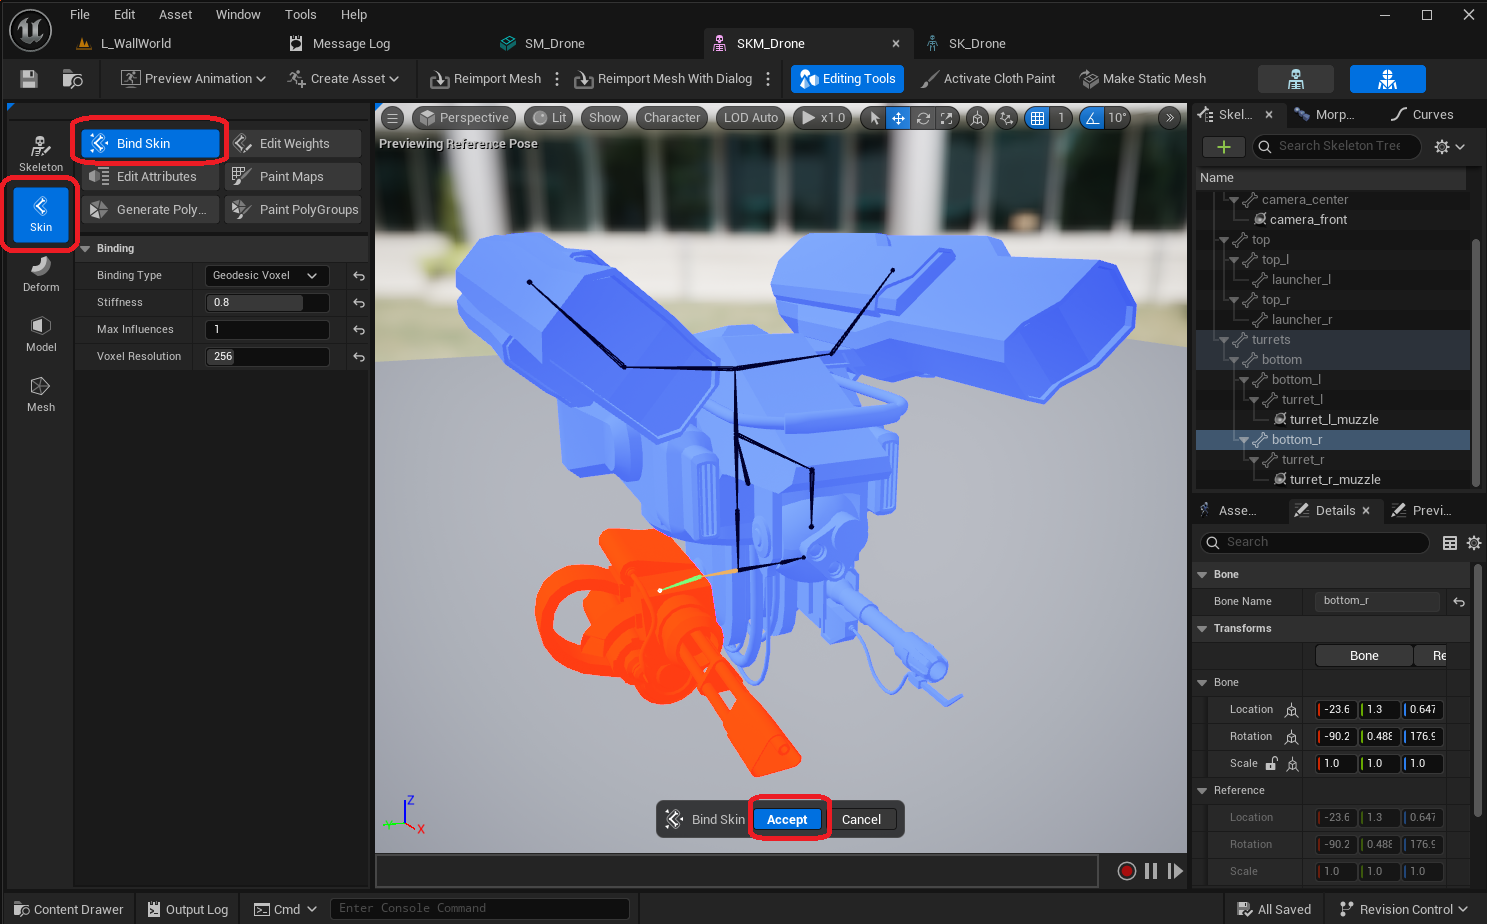
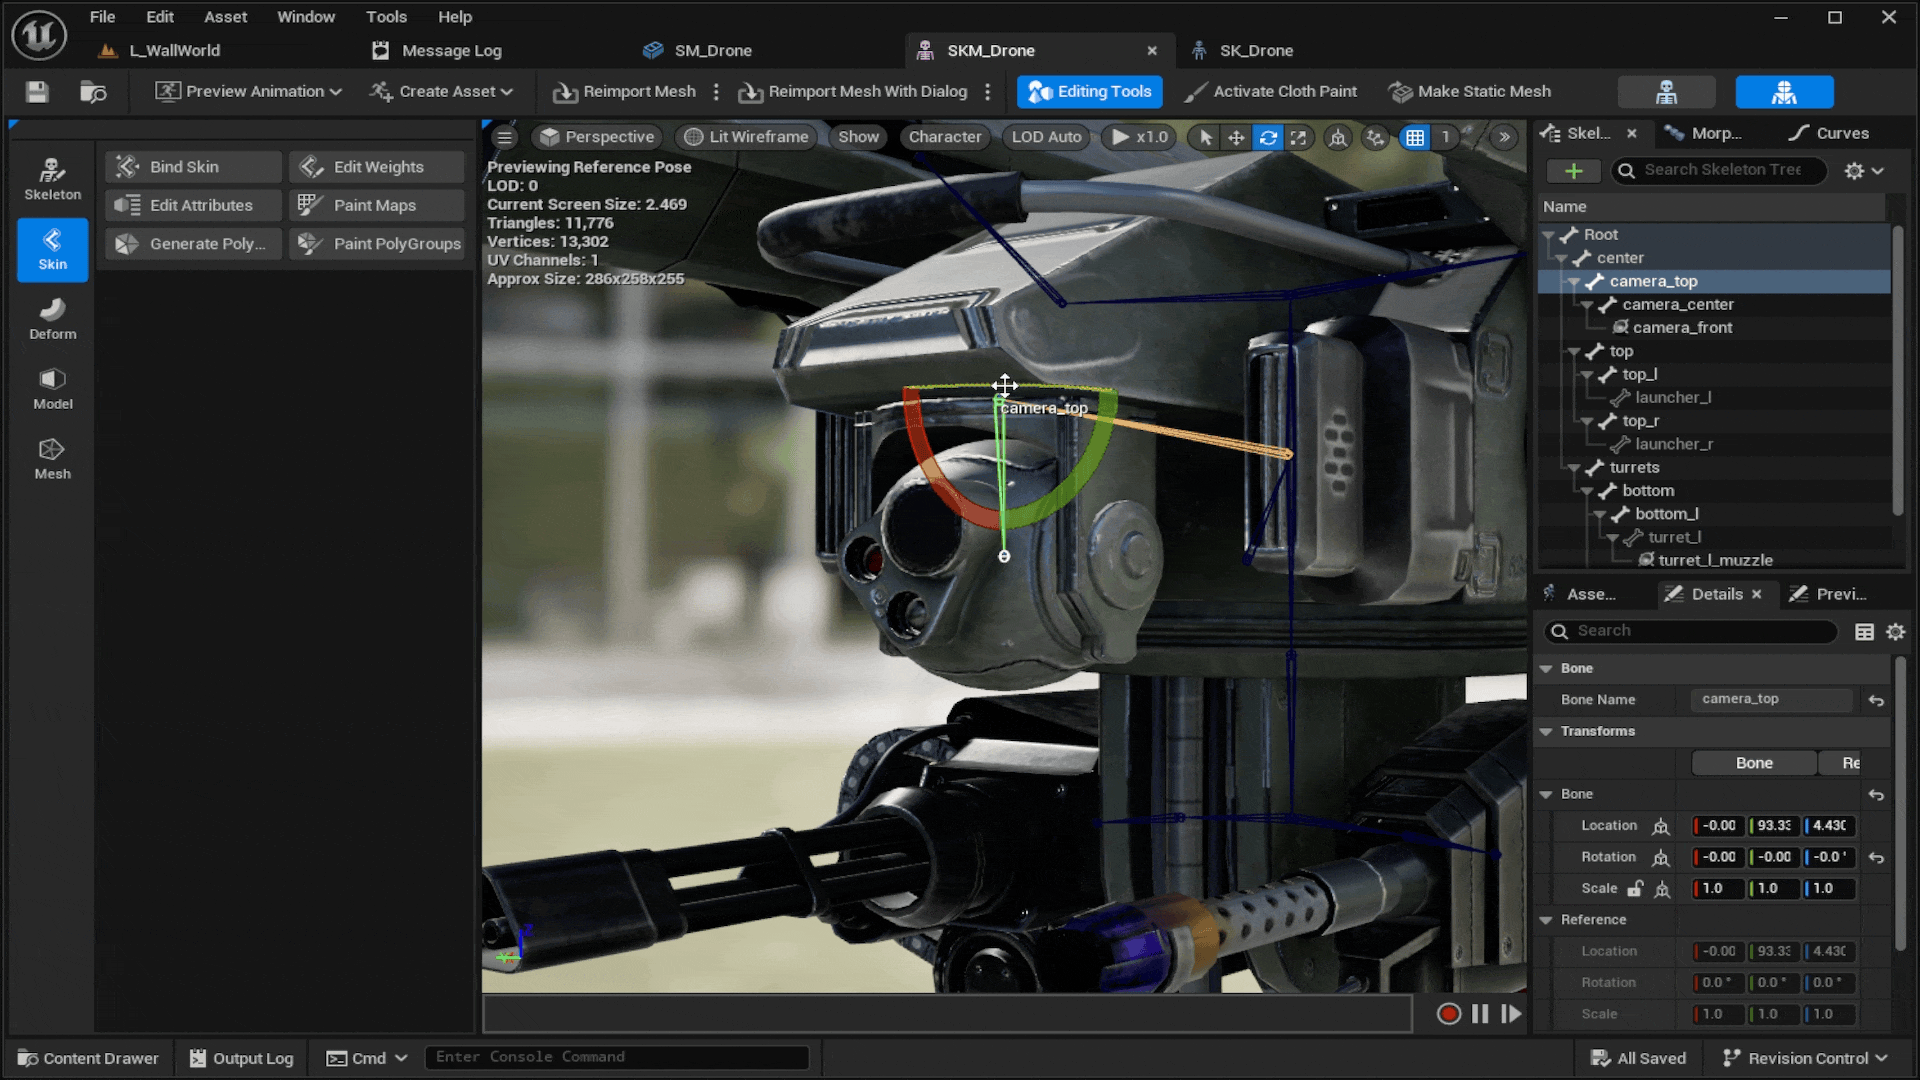
In order to add animations to the mesh, we need to define what parts of the mesh are influences by each of the bones. This is important so that when we for example rotate a bone, the correct part of the mesh rotates with it.
We use the Bind Skin feature of the Skeletal Mesh editor for an initial assignment of bone influence using the following settings, which already gives quite a good initial result:
Binding Typeis set toGeodesic Voxelso the mesh shape is taken into consideration (instead of applying simple closest distance between bone and vertex)Stiffnessis set to0.8so that closest bones have the most influenceMax Influenceis set to1so that each vertex will be influenced by at most 1 boneVoxel Resolutionis set to256
These settings are used to ensure that the mesh sections have relatively hard edges between the bones, since the mesh is mechanical with non-stretching materials: we don't want to stretch or compress parts of the mesh when we rotate it, which would be more appropriate for organic meshes such as humans or animals.
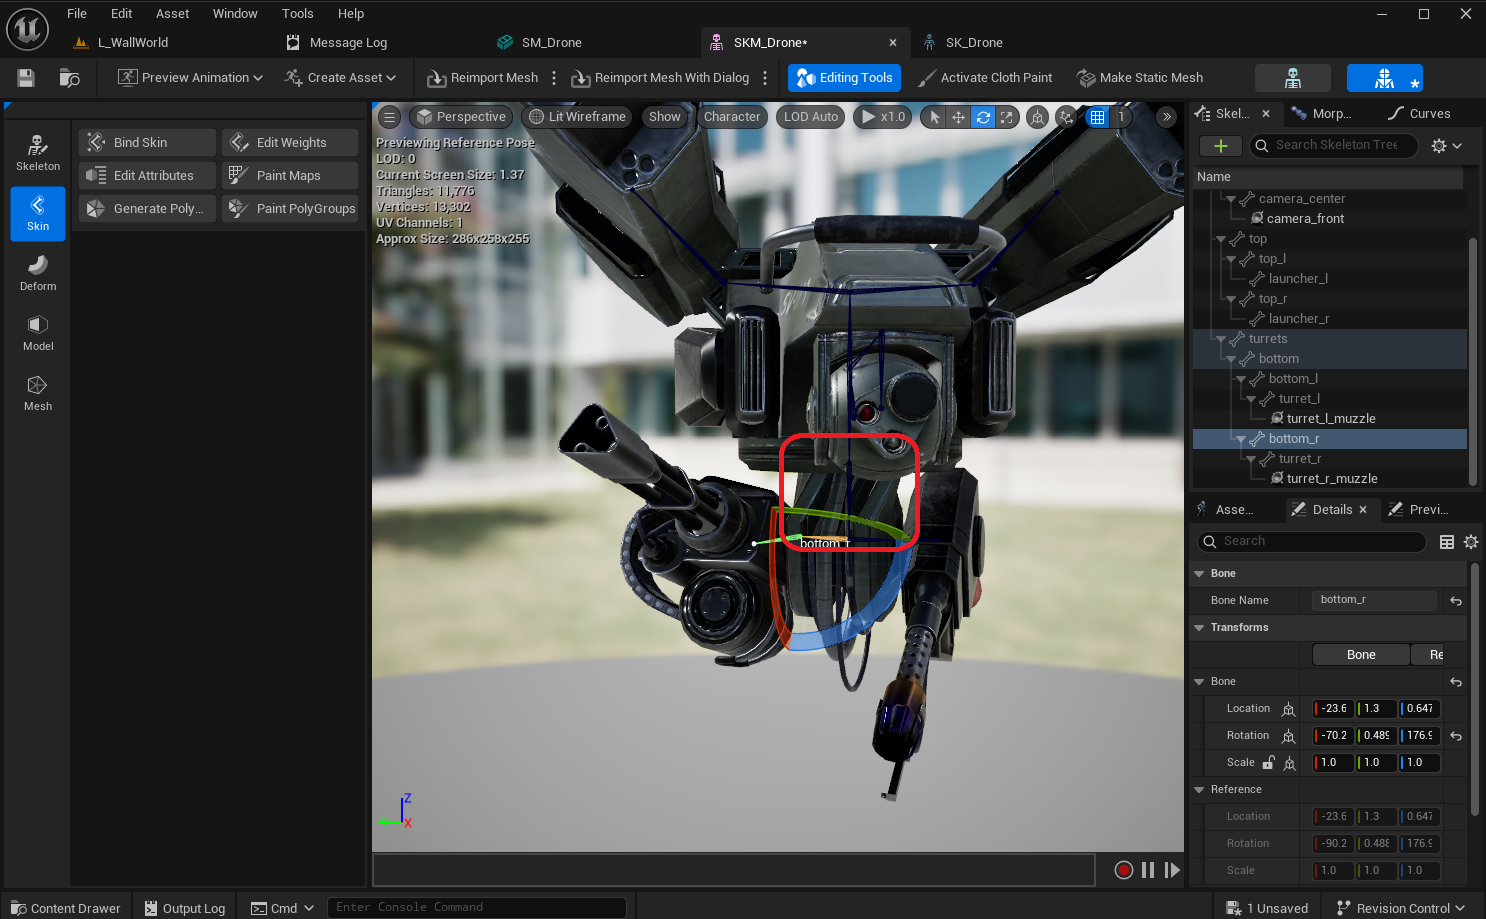
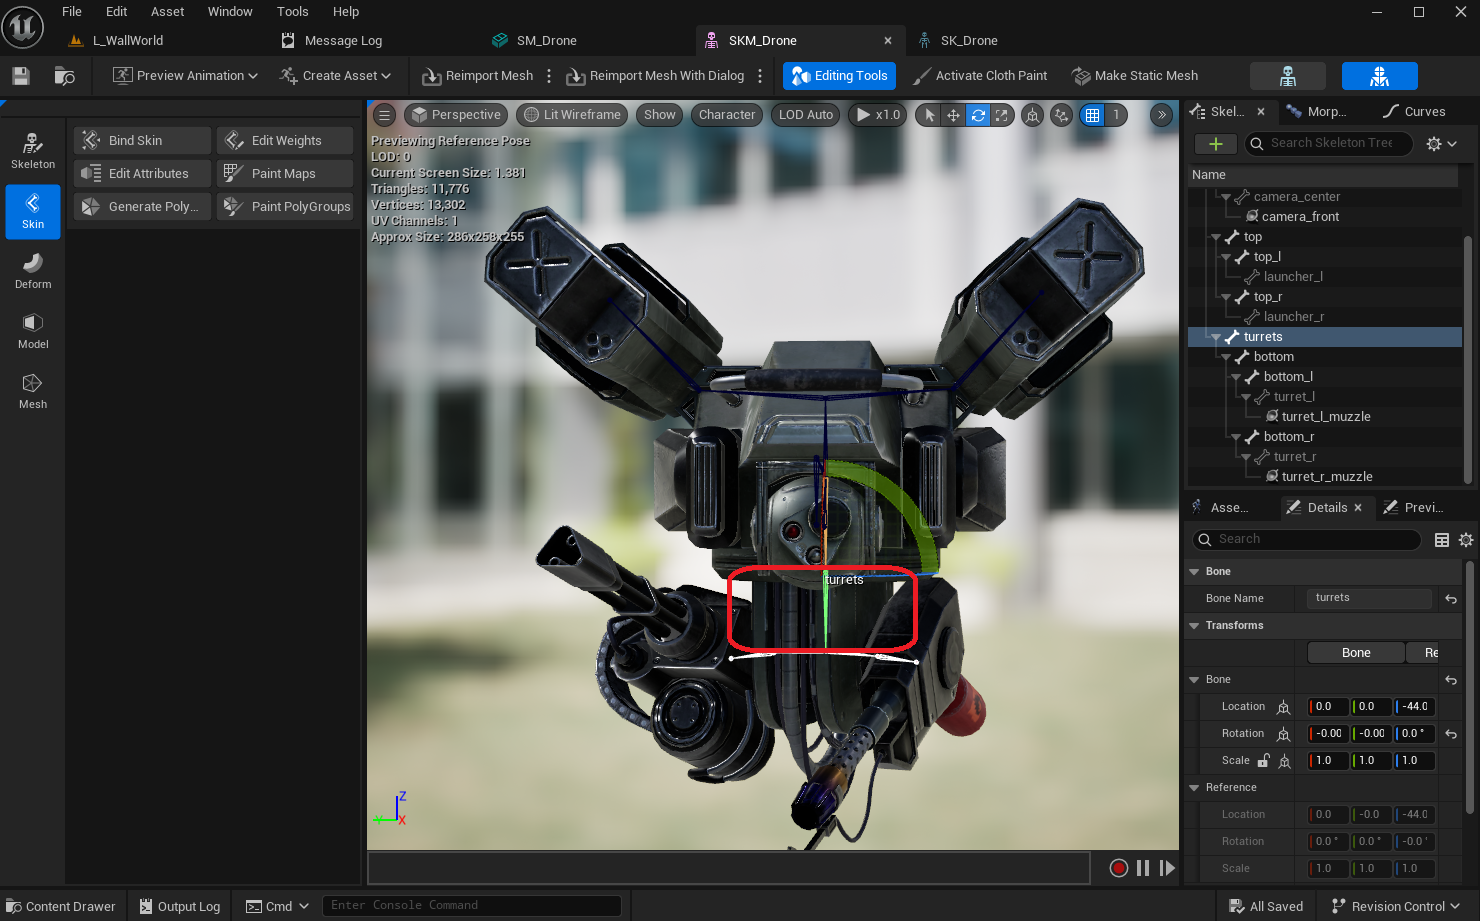
While the initial assignment looks quite good for the gun and flamethrower, there is a clear problem for the turrets bone, which becomes clear when we rotate it: some parts of the mesh are stretching and bending, which is not what we intend.
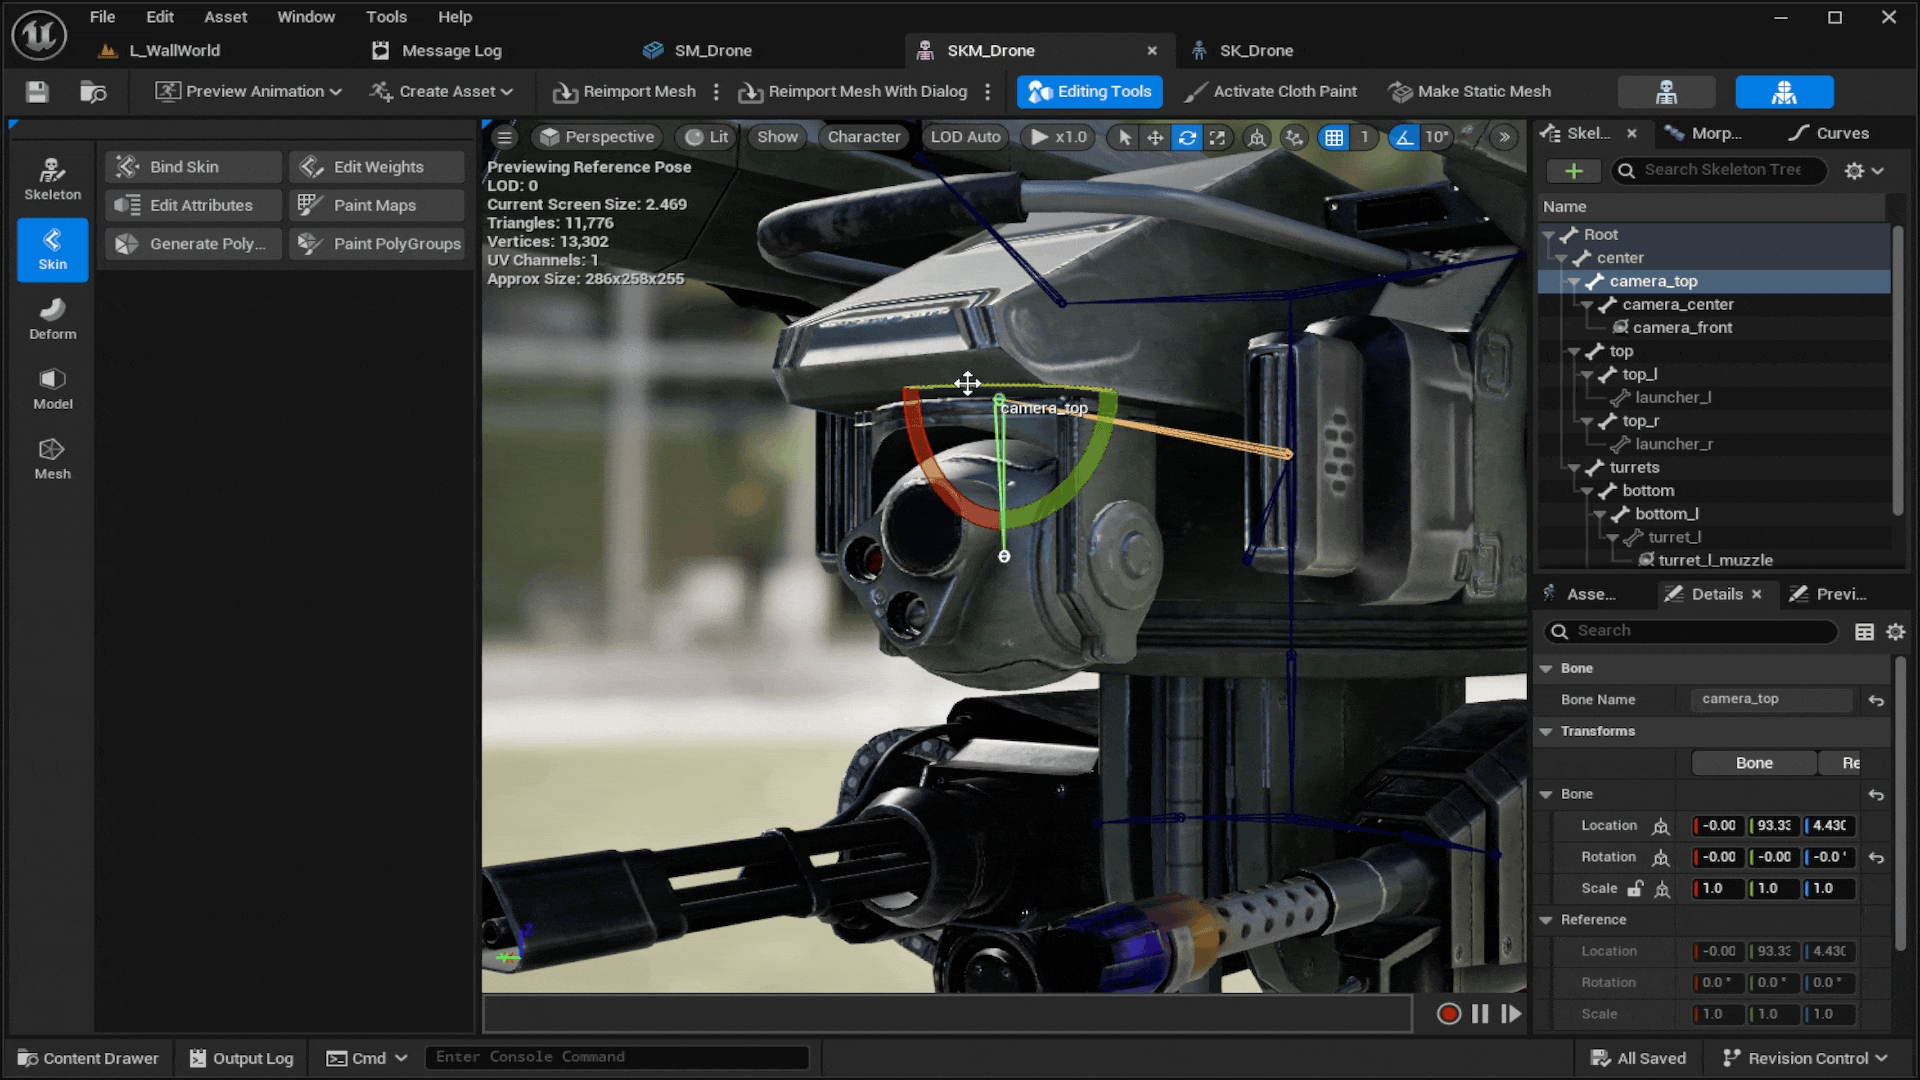
Another problem becomes visible when we rotate the camera_top bone, where the holder-structure of the camera-sphere clips through it while stretching.
Clearly we need to do some manual fine tuning, and make sure each bone fully and only affects the intended vertices of the mesh. For this, we use the Edit Weights feature of the Skeletal Mesh editor, which offers a variety of tools to adjust the bone influence on the mesh.
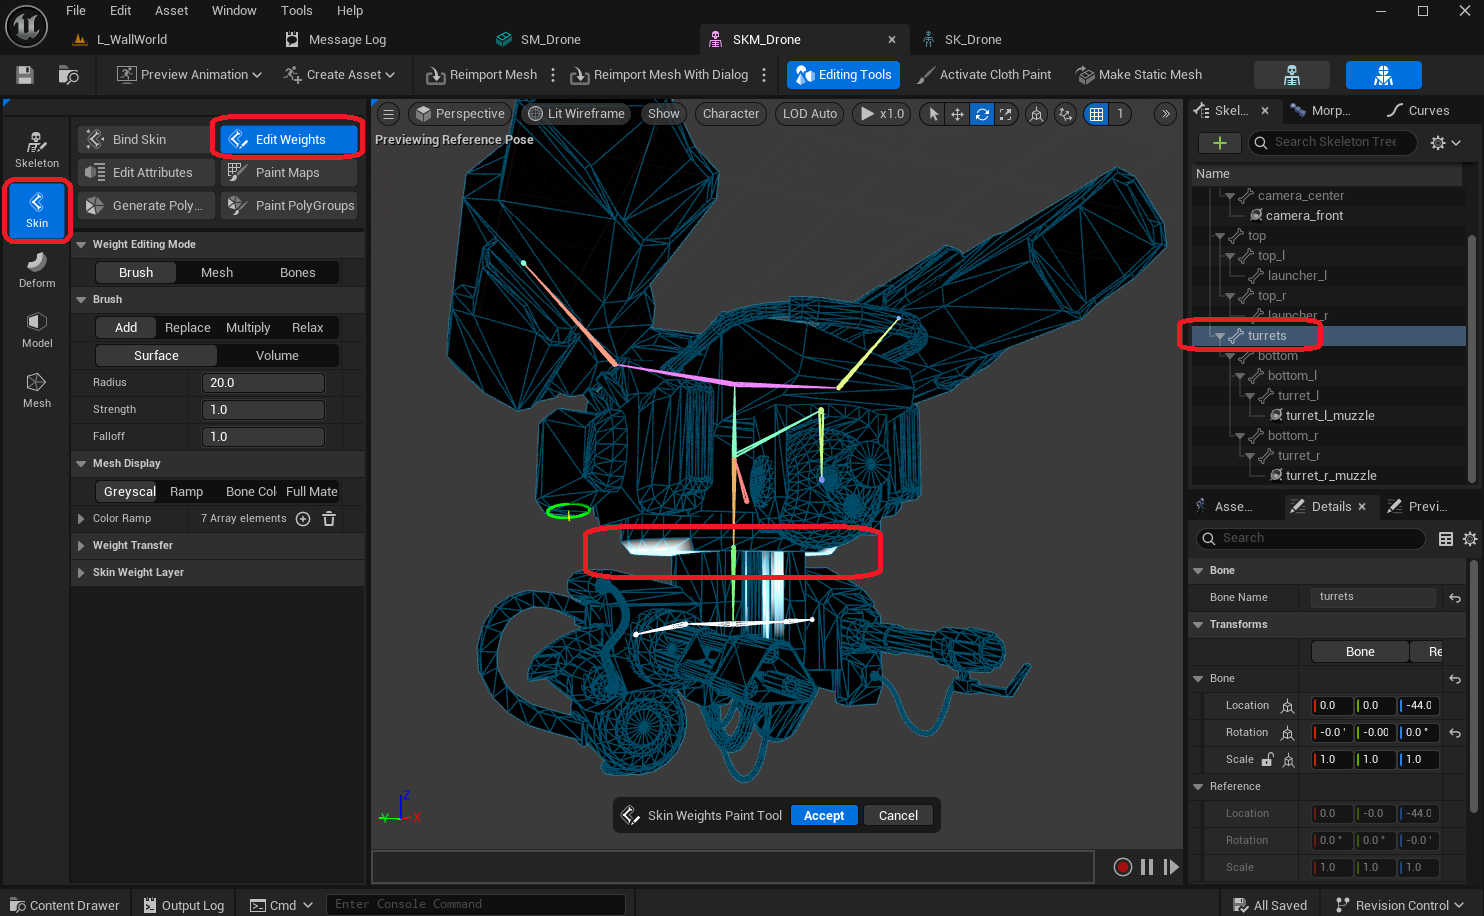
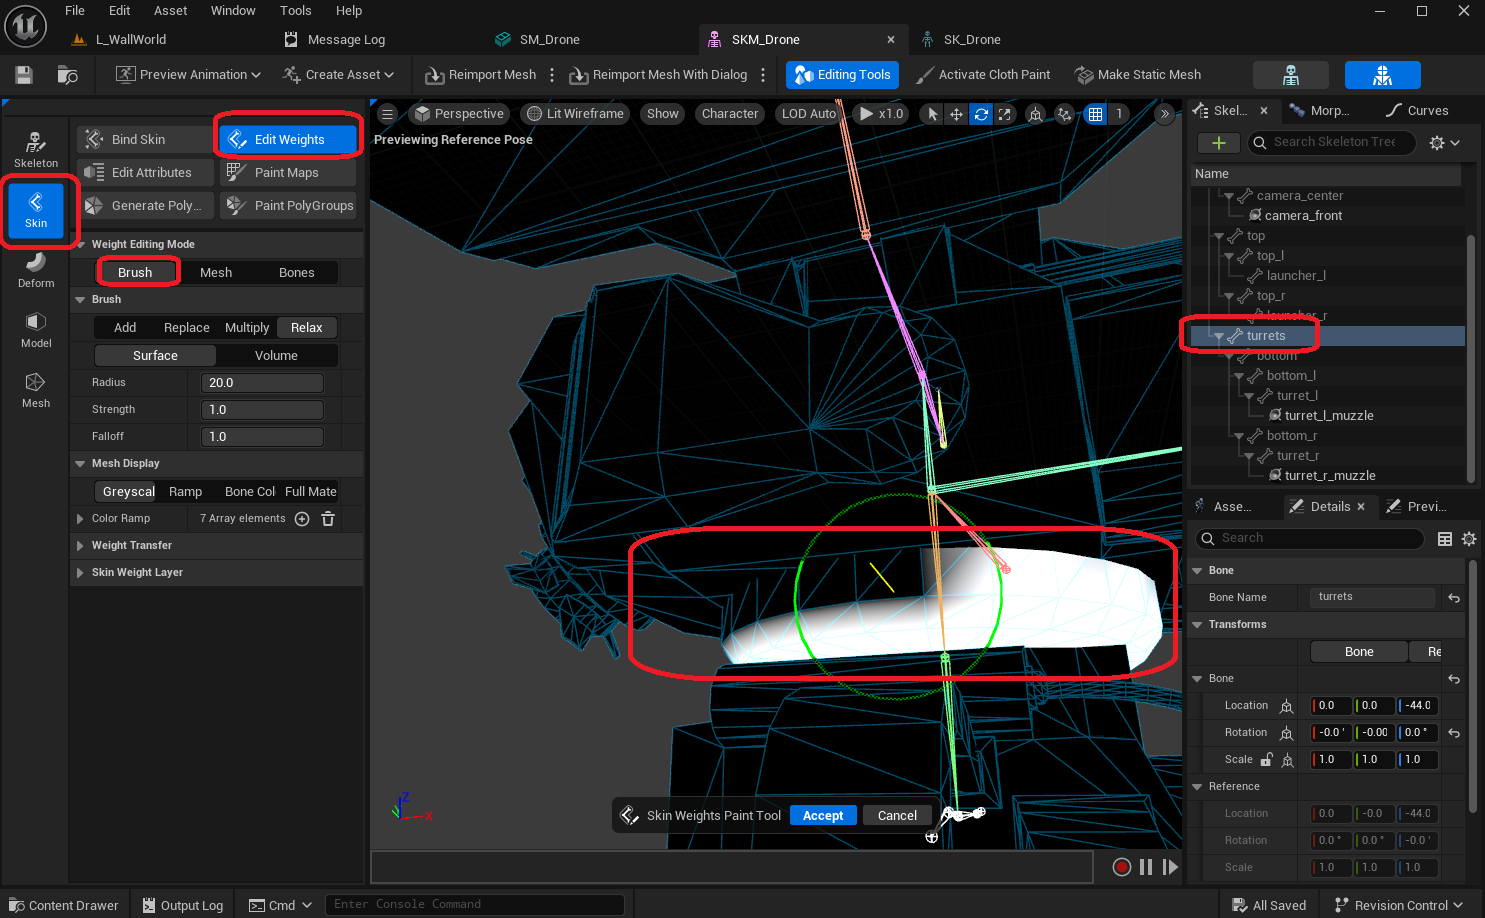
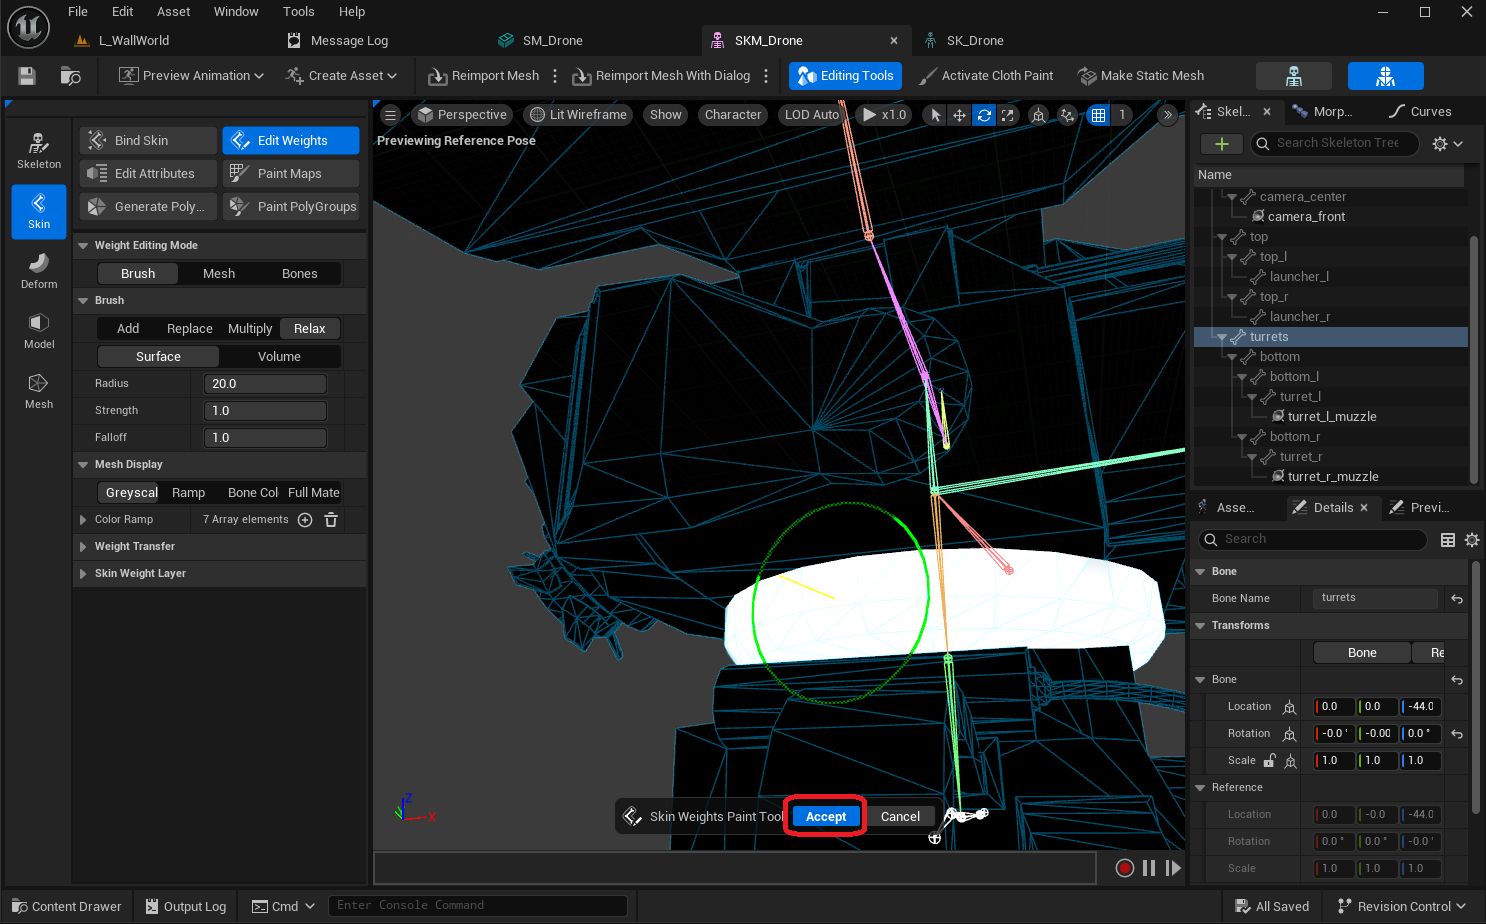
The Mesh tool is very convenient for cleaning up unwanted bone influences for a selection of vertices by setting the desired bone's influence to 1.0 and removing all undesired bone's influence.

Bounce Procedural Animation
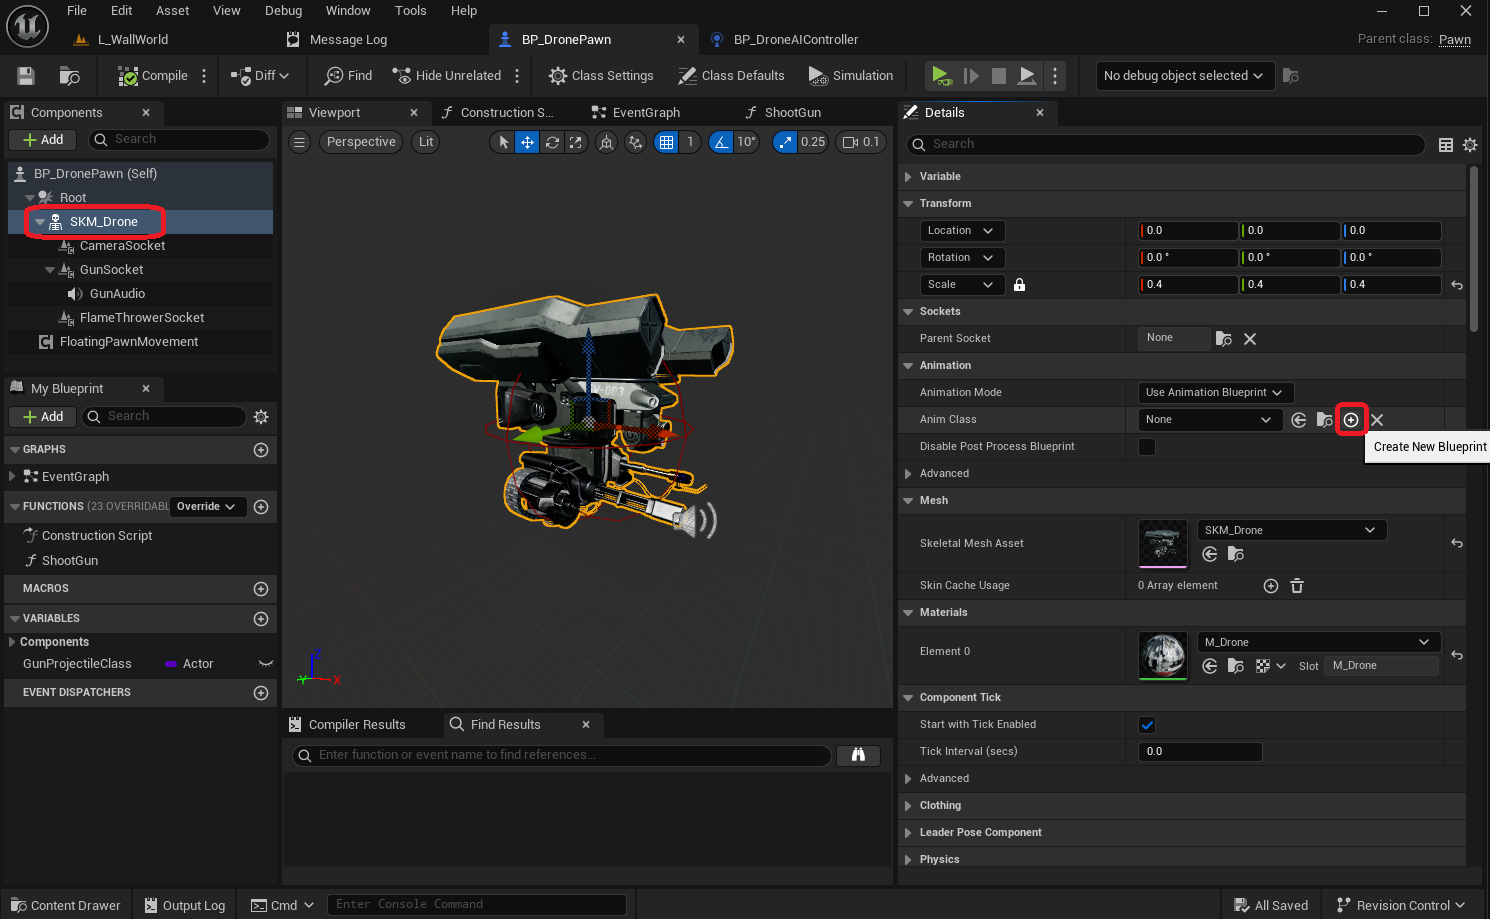
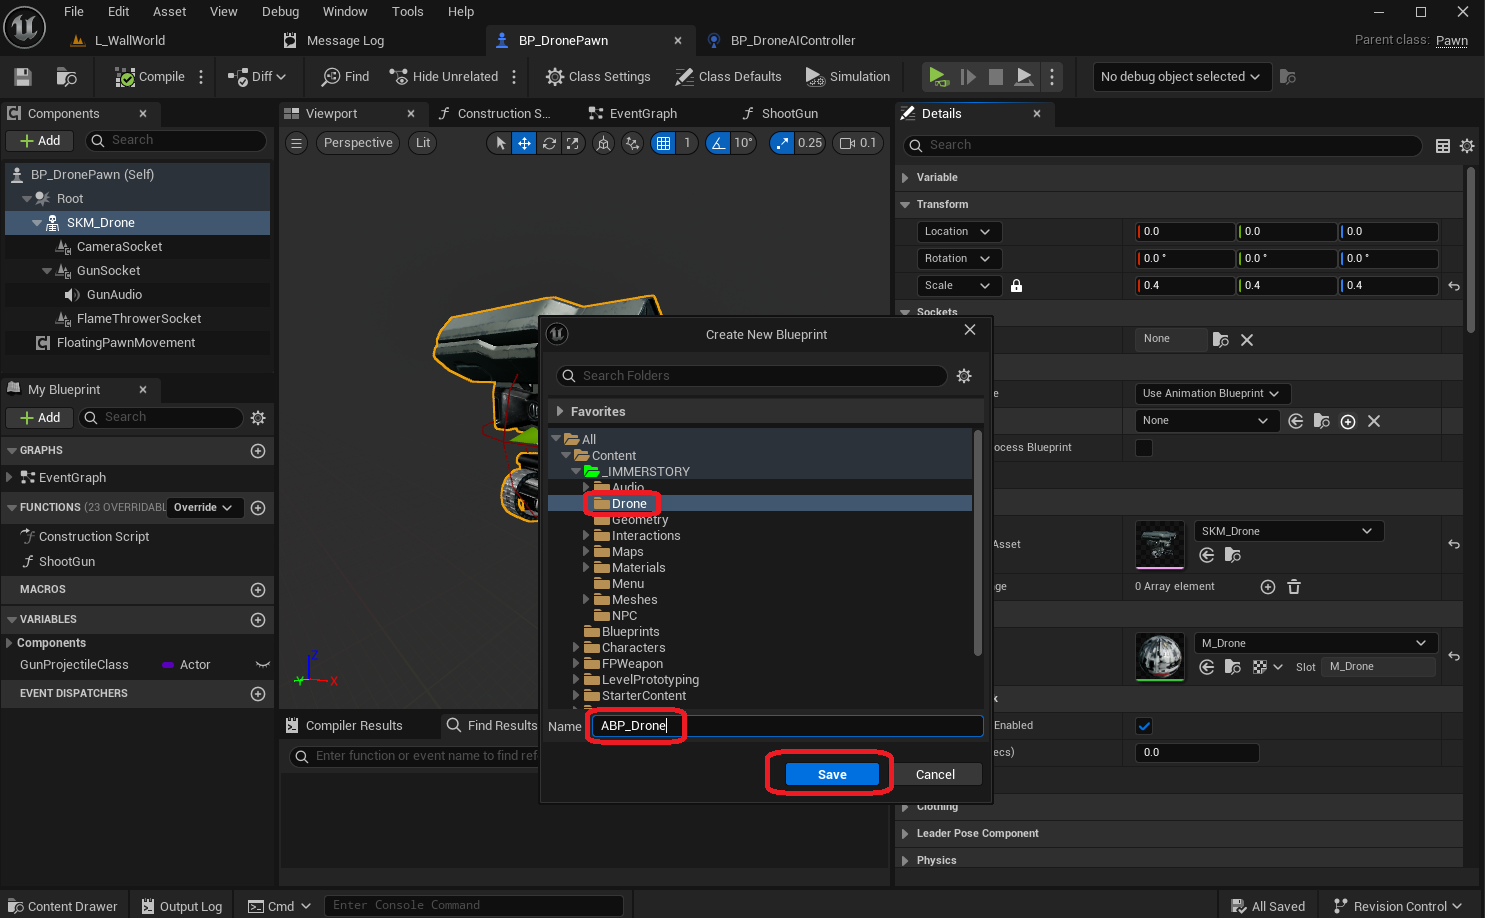
In order to add a little bounce to the drone, so that it has a more floaty feeling, we need to create an Animation Blueprint and assign it to the skeletal mesh component in the drone pawn.

Now we can implement the bounce animation in the animation blueprint. Typically such procedural animation are implemented in 2 phases:
- A setup phase in the animation blueprint event graph, using the event
Update Animation, where game data can safely be accessed - A pose phase in the animation blueprint anim graph, which typically runs on a different thread, where game data cannot be safely accessed
For the bounce animation, we make the following additions / changes:
- We add a variable
BounceOffsetof typeVector, where we will store the current bounce offset - We implement a function
UpdateBounceOffset, which updates theBounceOffsetvariable every frame, based on a sinus curve between-5.0and+5.0in the Z-axis - In the event graph, we call the
UpdateBounceOffsetfunction every time the eventUpdate Animationhappens - We transform the
centerbone in the anim graph based on theBounceOffsetvariable, and use that as input for the final pose
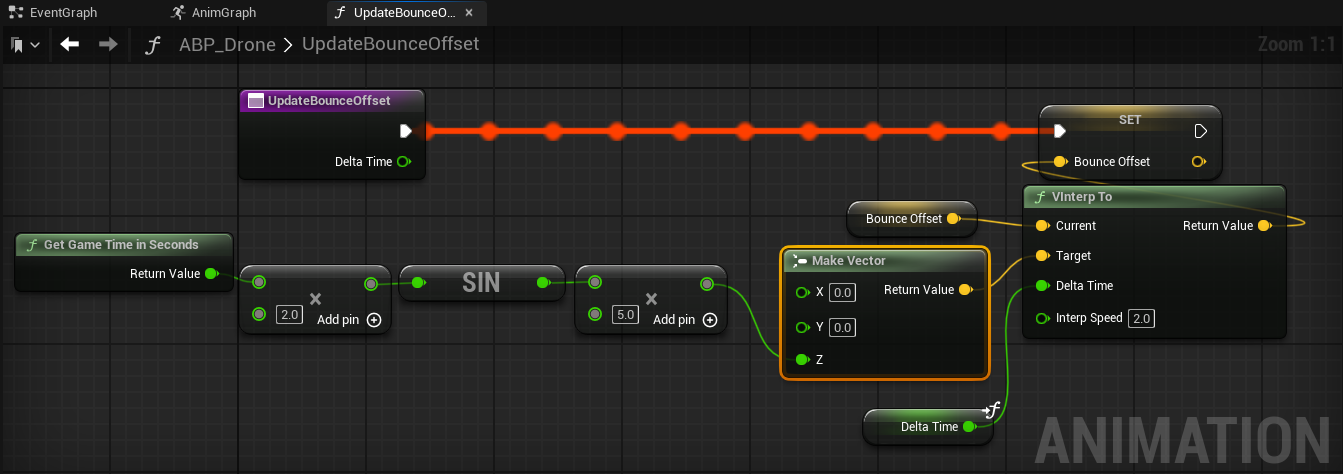
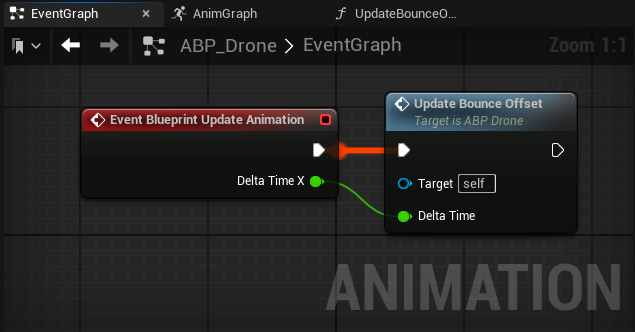

We cache the pose as BouncePose, so we can easily use it as the starting pose for subsequent animations, such as leaning and aiming.
The final bounce animation can be seen in the image below, which looks already quite a bit more floaty than before.
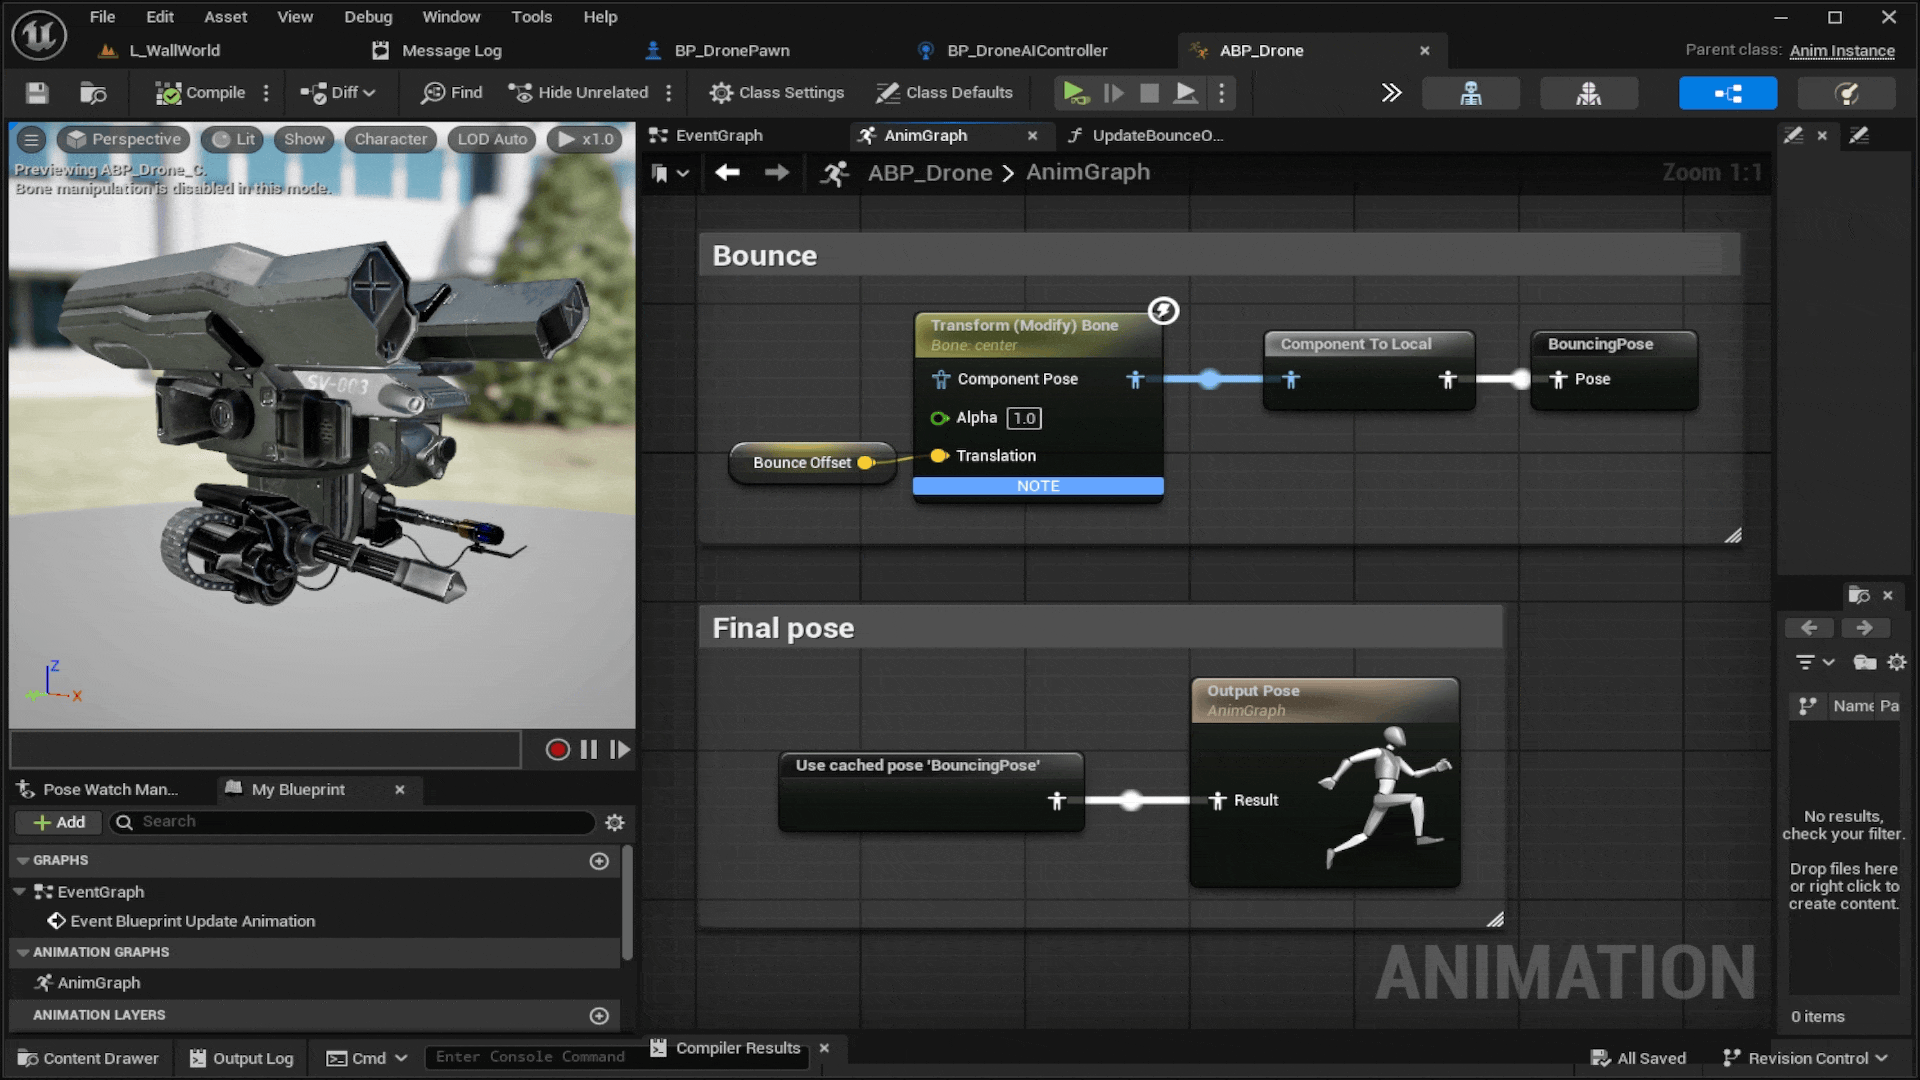
Of course we could make the bounce a little more random / varied, but for now the current implemention is sufficient.
Lean Procedural Animation
In order to add a bit more realism to the drone movement, we will lean the drone when it moves in a certain direction. For this, we will estimate the force (or rather the acceleration, by ignoring drone mass) that the drone is emitting in order to move into a given direction with a given velocity, based on the following parts:
- Gravity in order to keep the drone floating, which is
-980 cm/sec2in the Z-axis - Acceleration, which is the delta velocity between 2 animation frames
- Drag based on the velocity, i.e. the force required to sustain a given velocity considering air resistance
Combining these 3 factors results in a final force vector, based on which we can calculate how much and in which direction we should lean the drone, assuming that the drone thrust is always pointing down.
Please note that for simplicity, we make a (very) rough approximation for drag, as our goal is a good game feel, rather than physical accuracy. Even then, the calculation is not trivial, and some time goes into fine-tuning the numbers, especially on how to balance acceleration vs drag influence on the final lean.
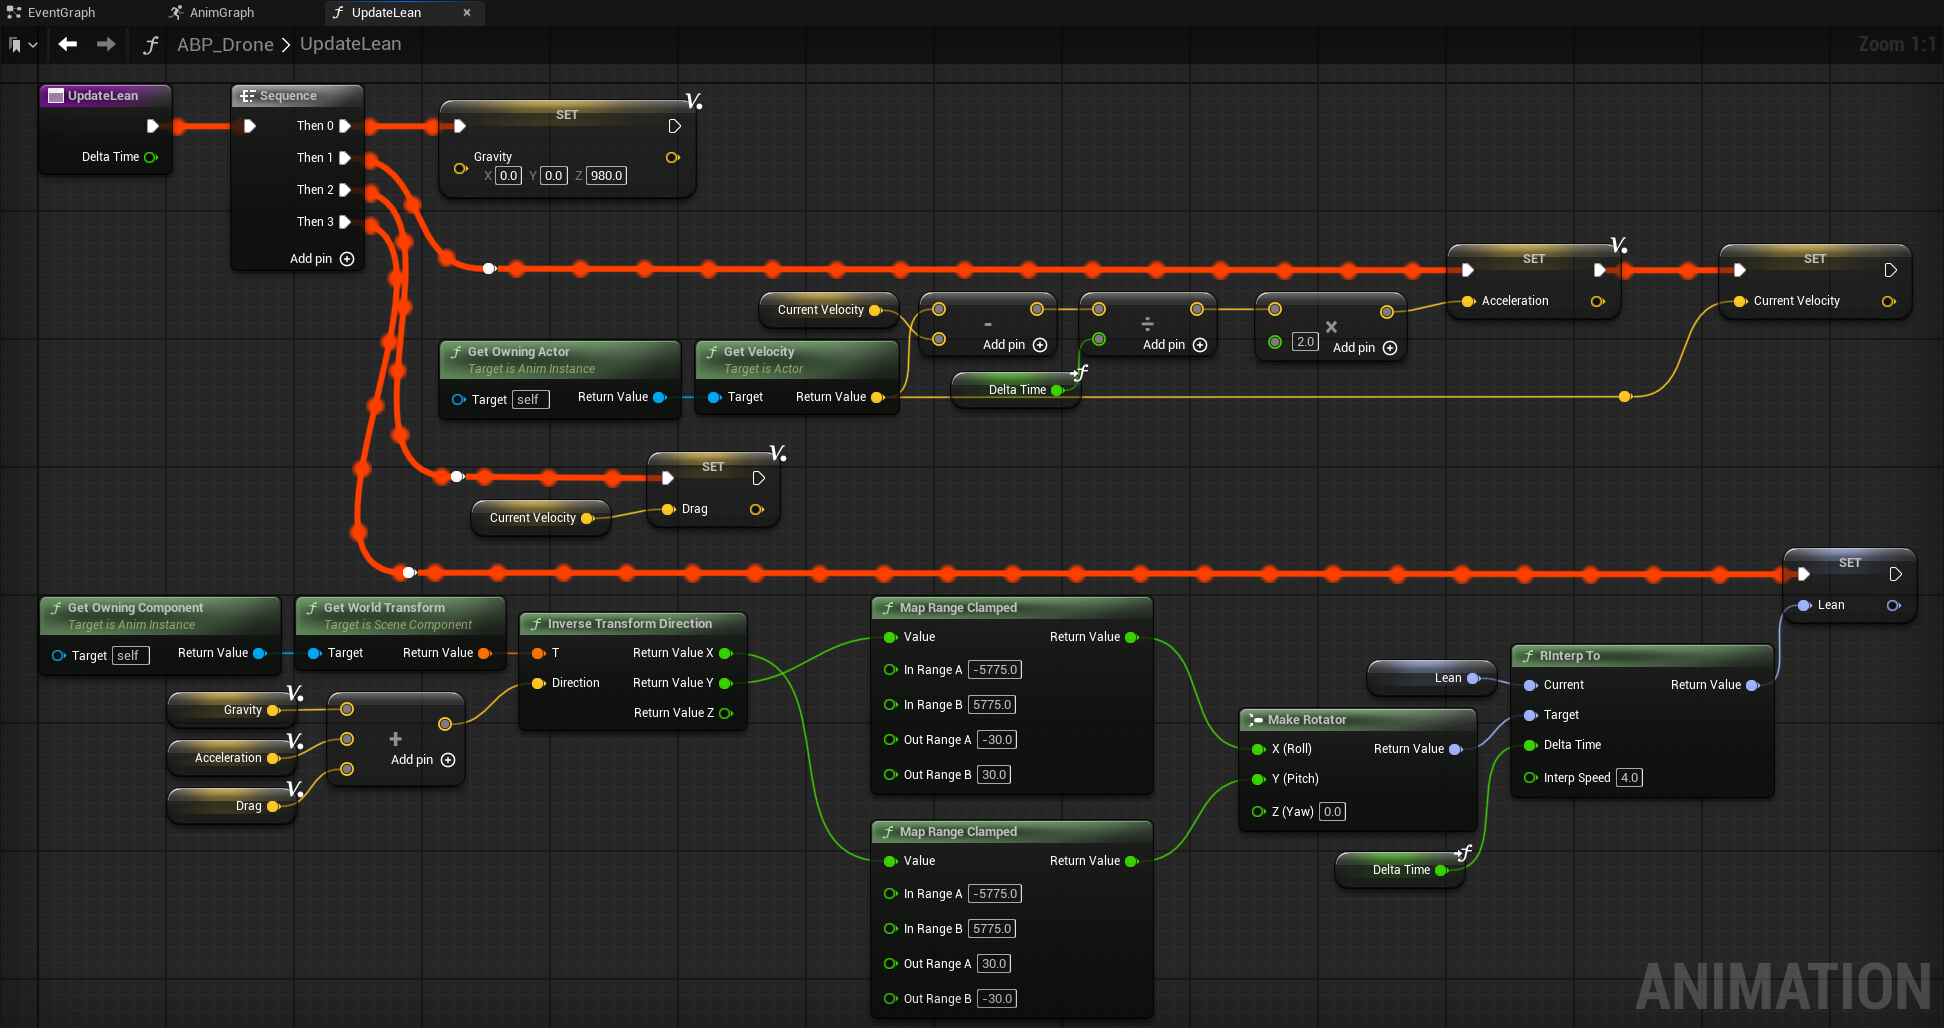

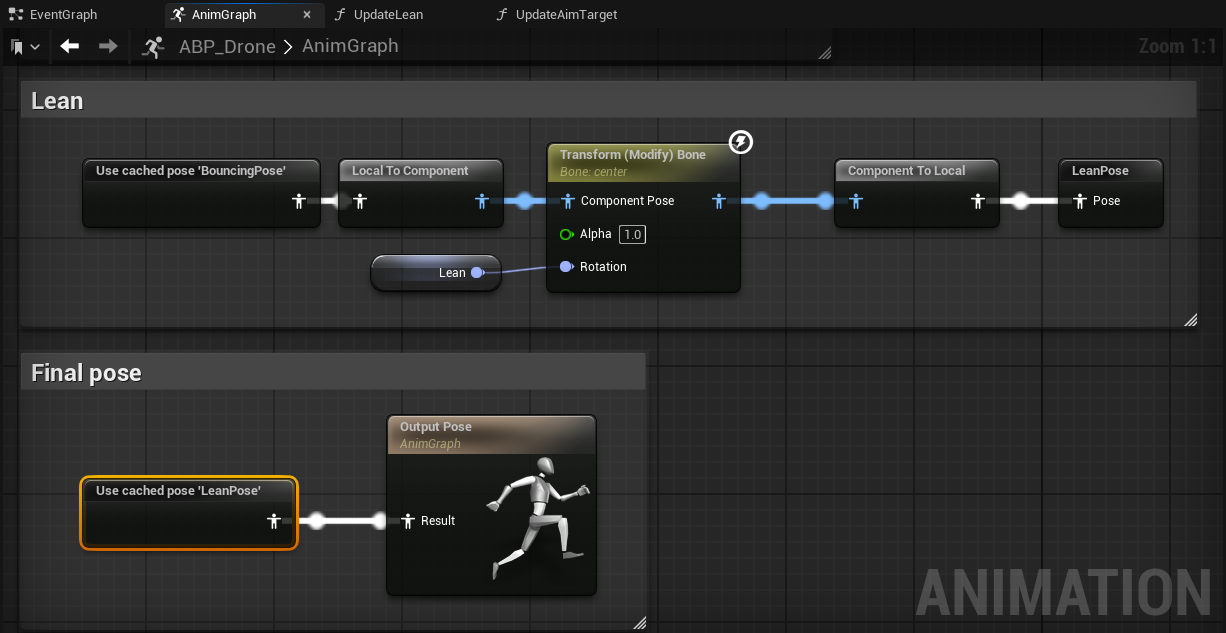
When we move the drone around now, it has a significantly more dynamic feel to it, as can be seen in the video below.
Clicking play will embed the YouTube player and may set third-party cookies and collect data from YouTube.
Aim Procedural Animation
In order to let the camera and turret follow a given target, we will extend the animation blueprint to calculate and apply the proper rotations, and the pawn to control what the current aim target is. When there is no actual target selected, it will default to a default target location in front of the drone. This will ensure that the turret and camera are always focused in a given direction, even if we lean or bounce the drone itself, which looks pretty cool.
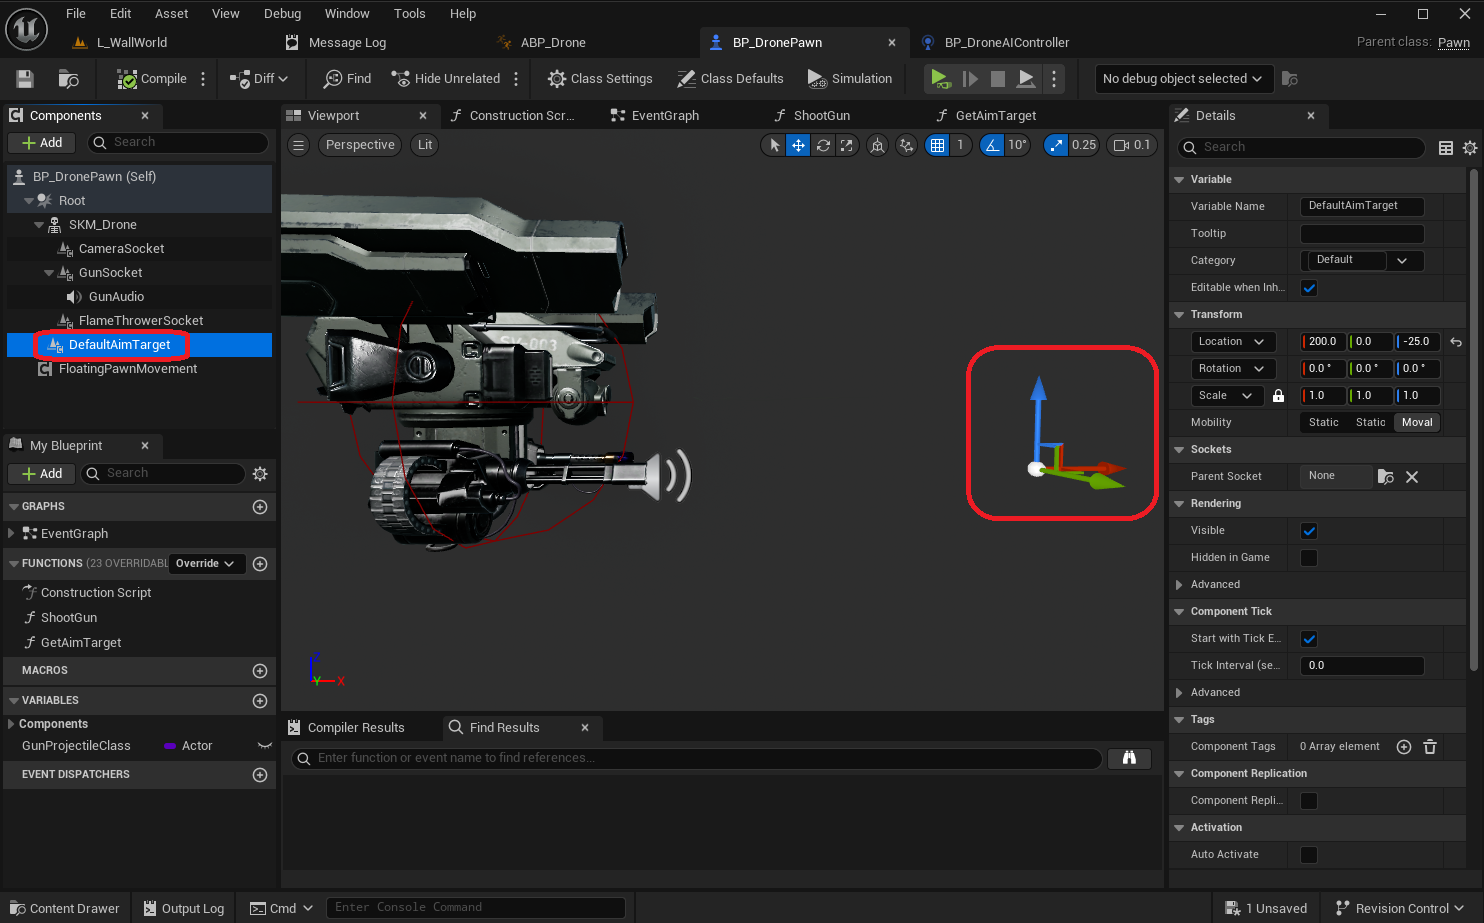
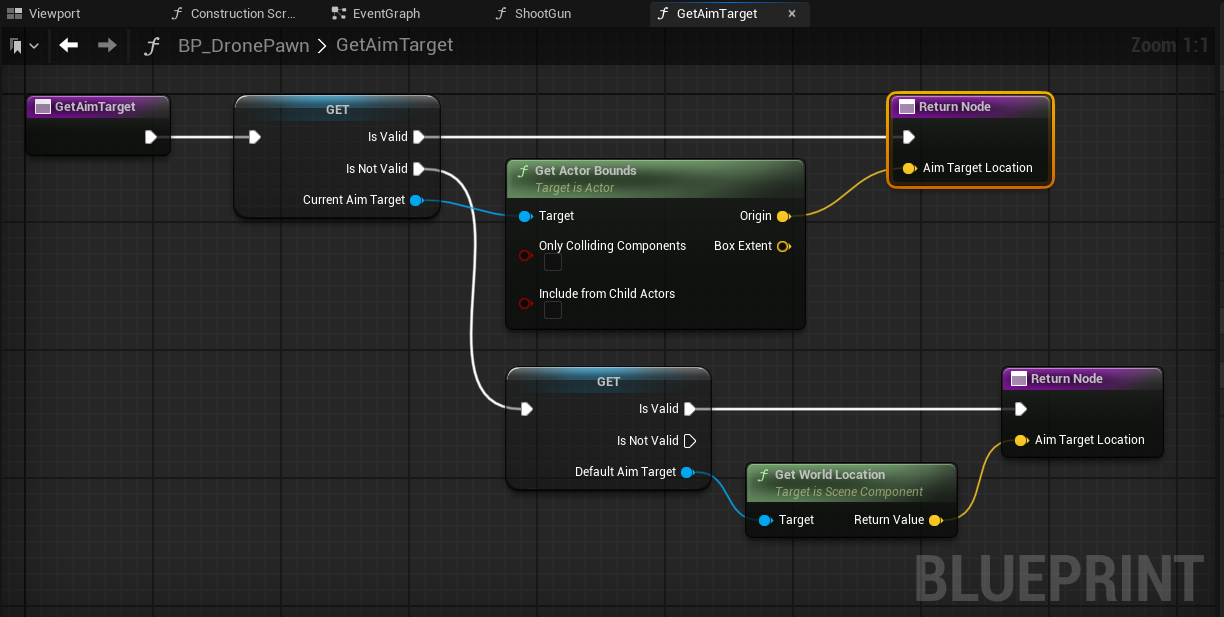
First, we'll add a Scene Component to the drone pawn, which represents the default aim target, in case there is no actual target selected. Next, we add a function GetAimTarget, which will be used by the animation blueprint to fetch the location of the current aim target.

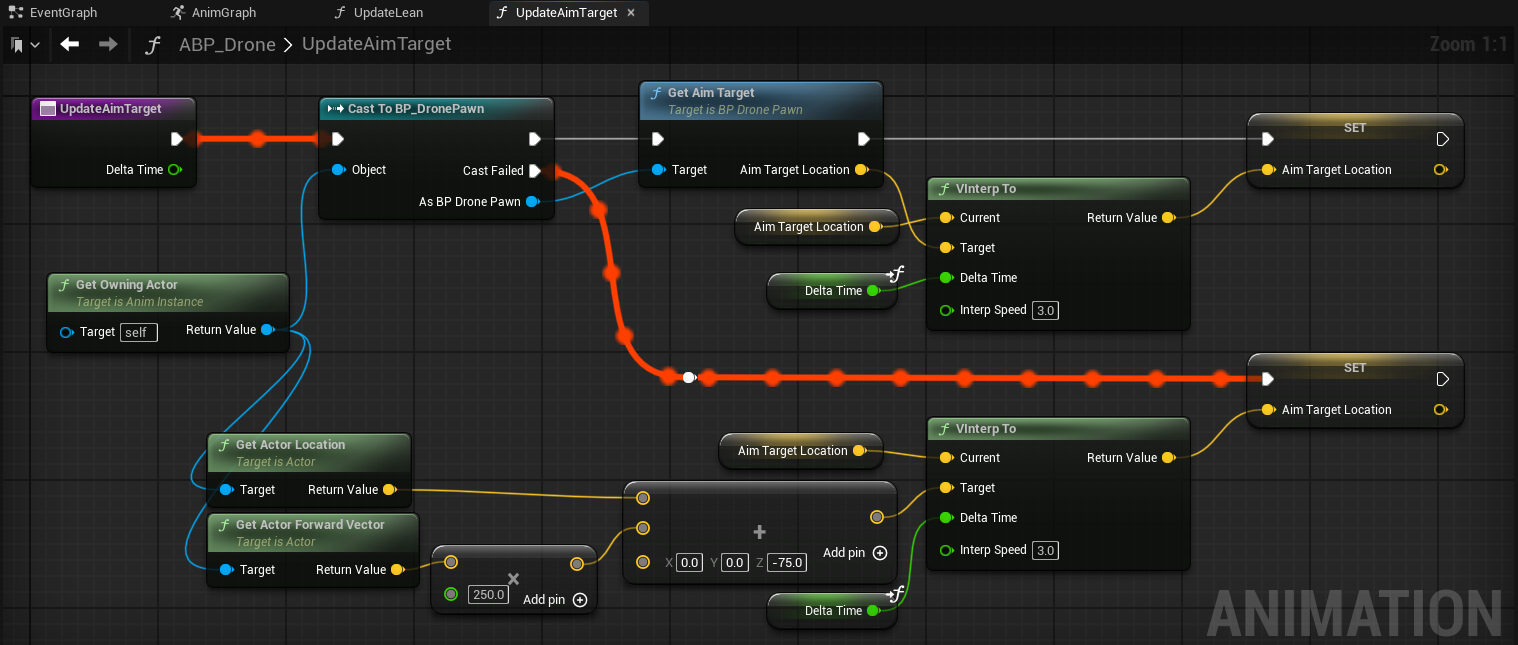
Now we extend the animation blueprint to store the current aim target location, based on the value provided by the pawn. We use VInterpTo to ensure any change in aim target location results in a smooth transition, which makes the adjustments feel more realistics.
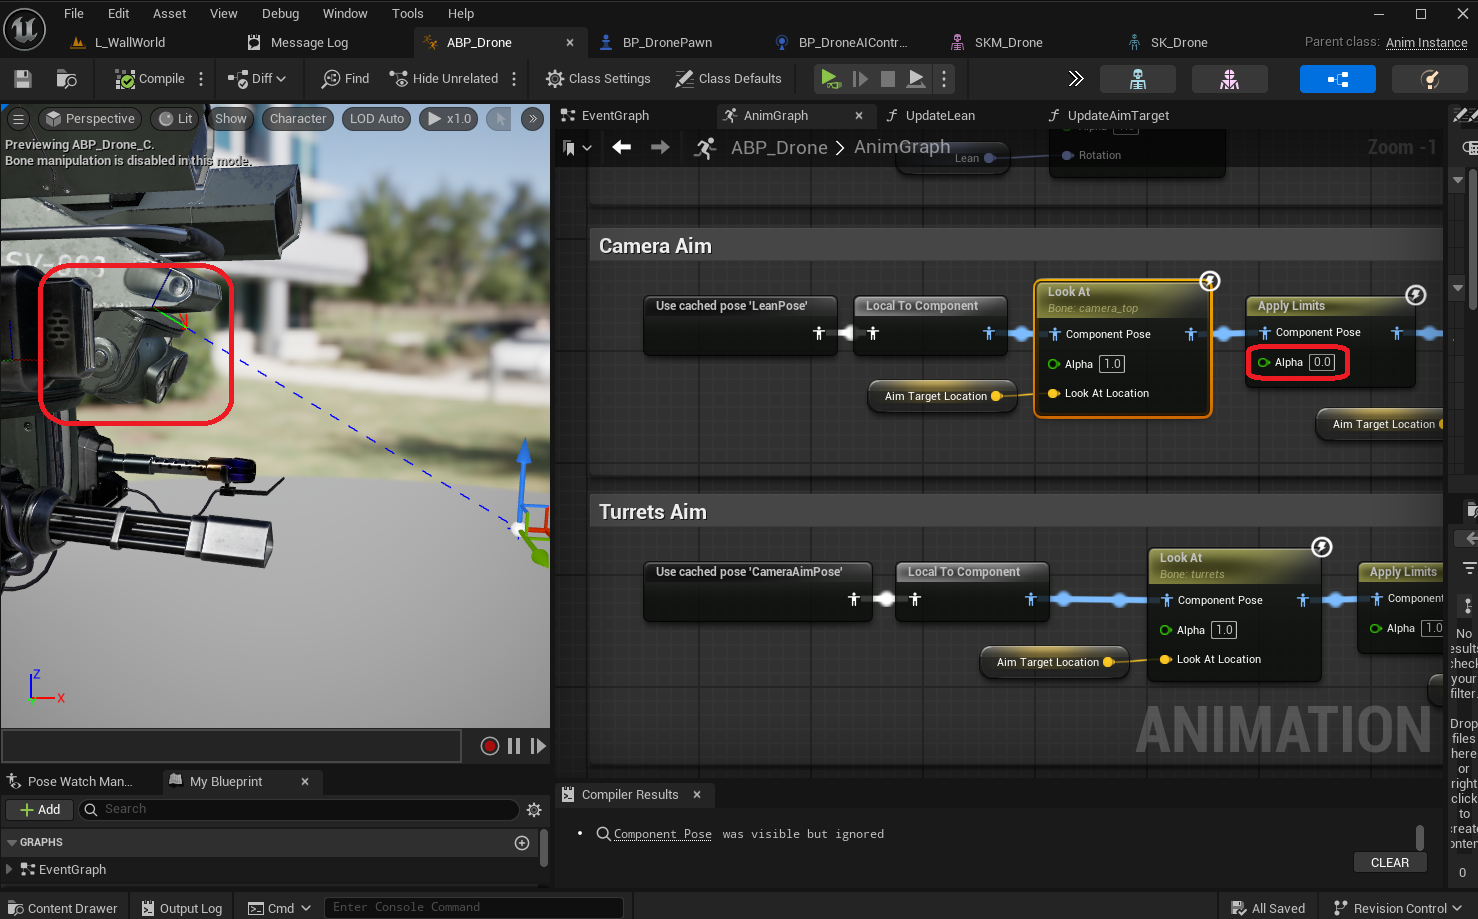
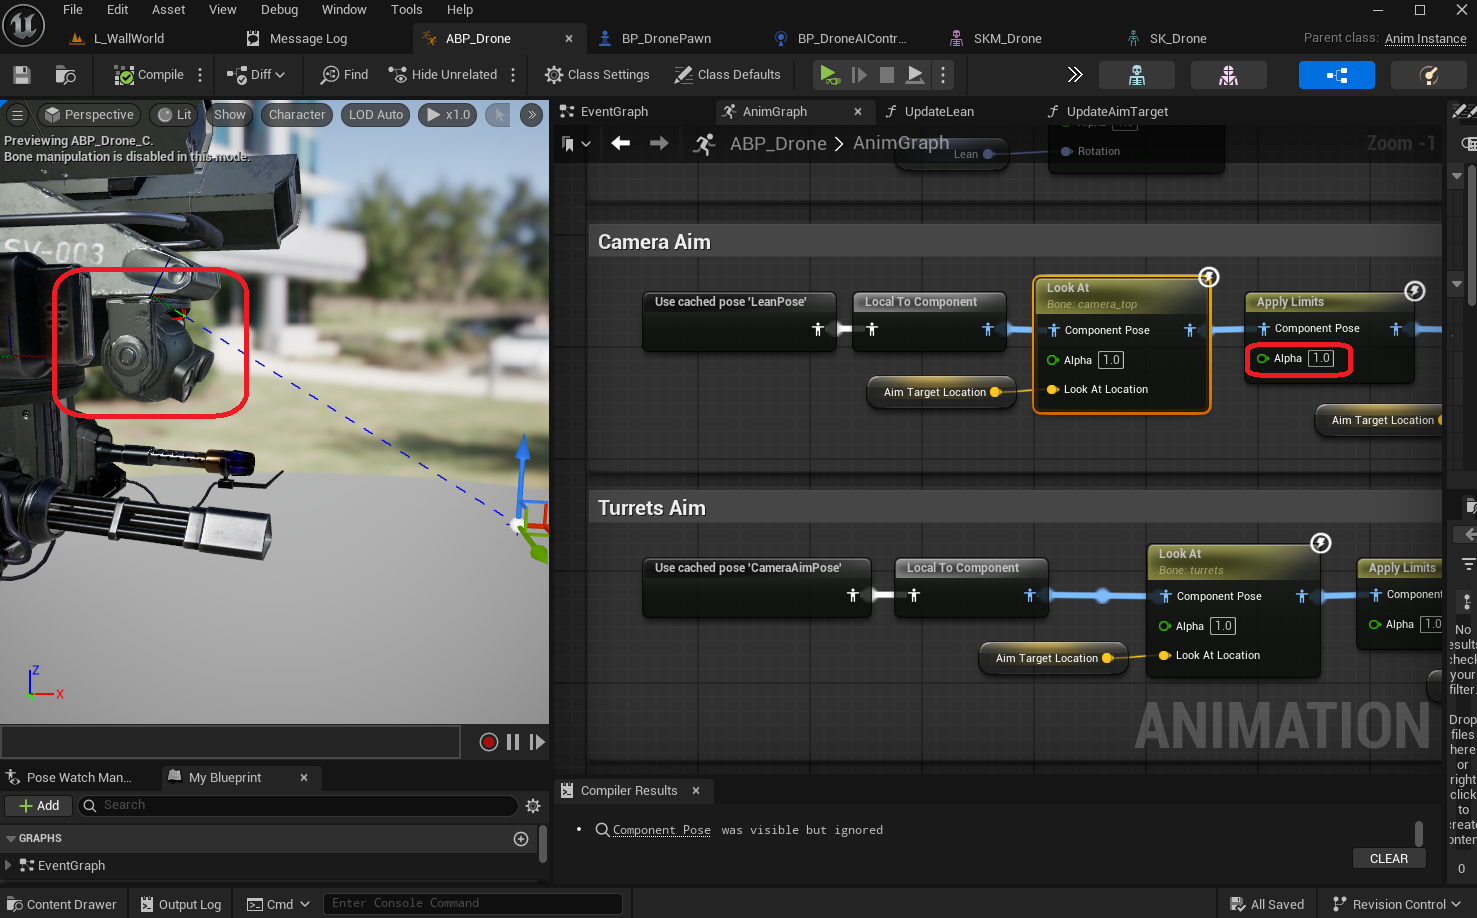
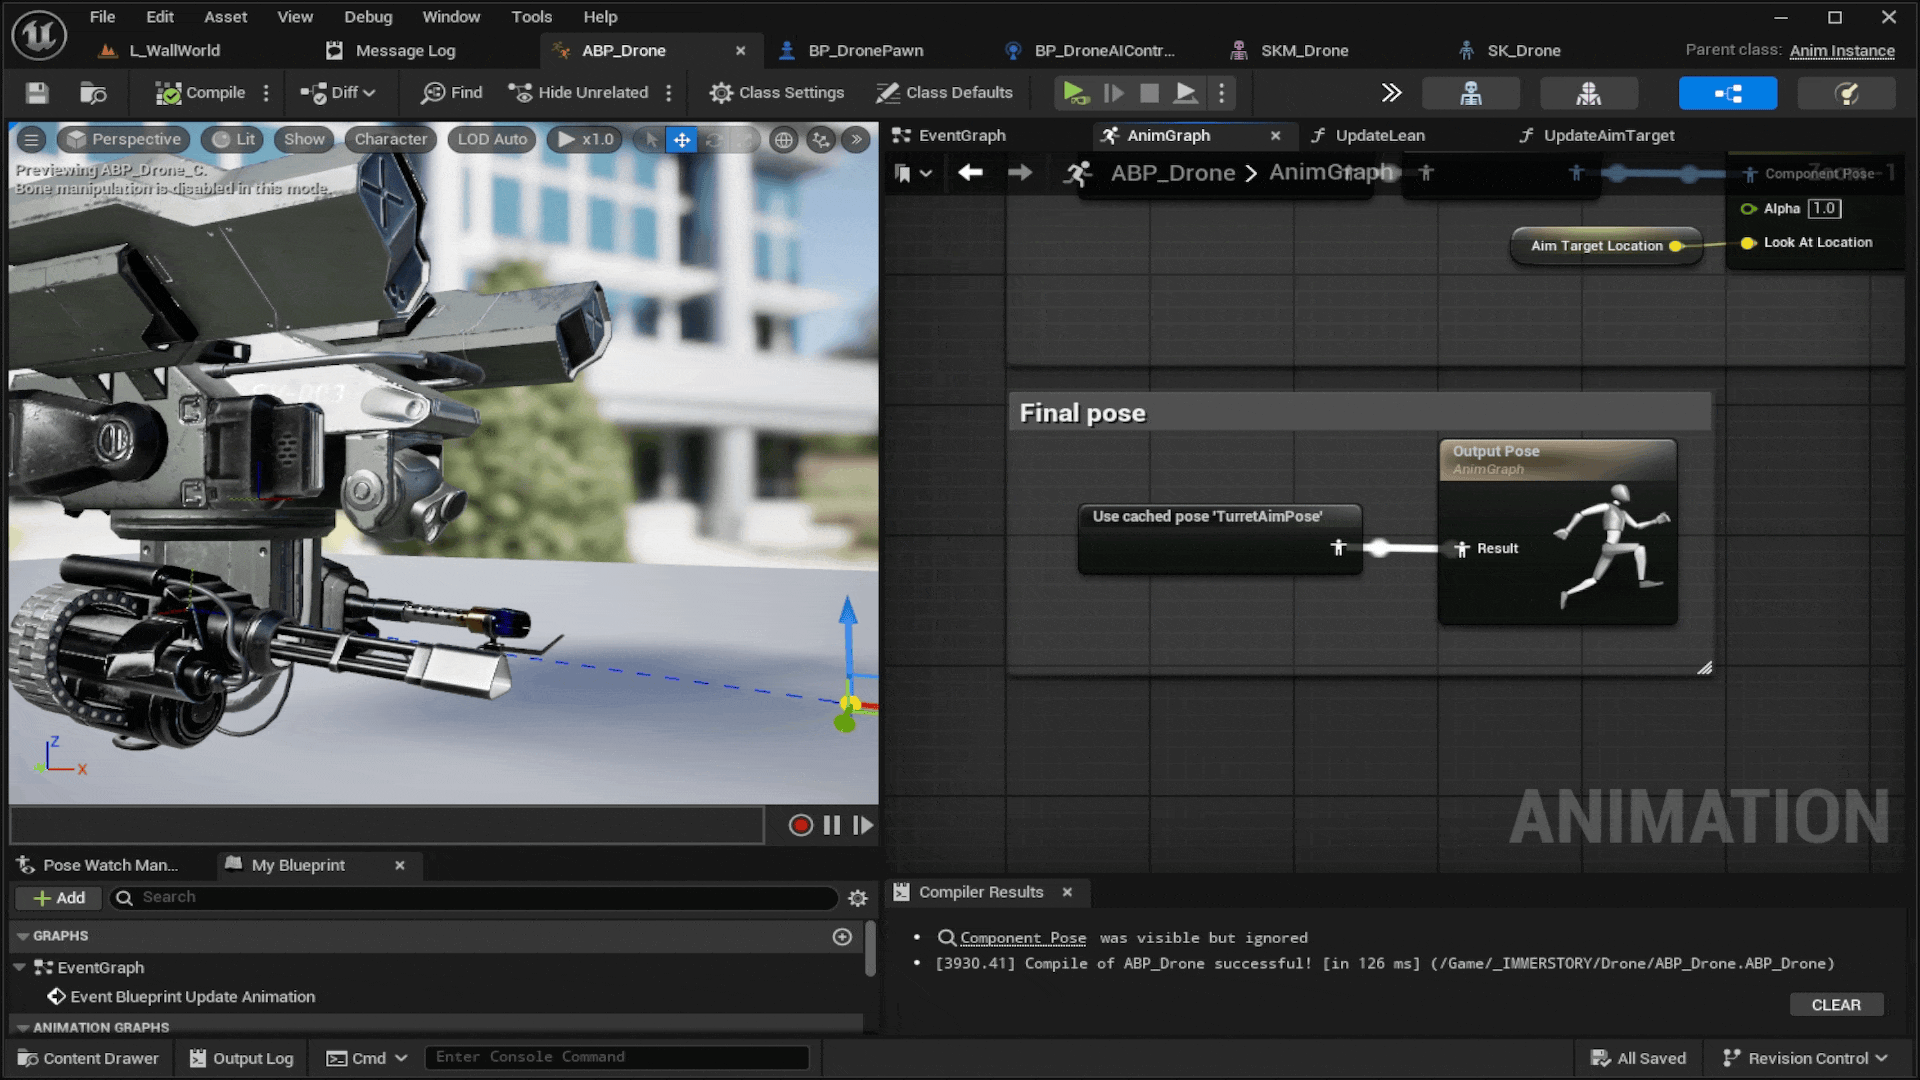
In the animation graph, we use a number of LookAt functions to rotate the relevant bones to the aim target location, followed by an Apply Limits function to restrict the bone rotation to a single axis. This ensures the rotation only happens in the desired axis, and within desired limits. Otherwise, the bone would rotate in a way that does not match the intended mechanical axis.


The following images show the importance of the Apply Limits to ensure rotation happens only in the desired axis.
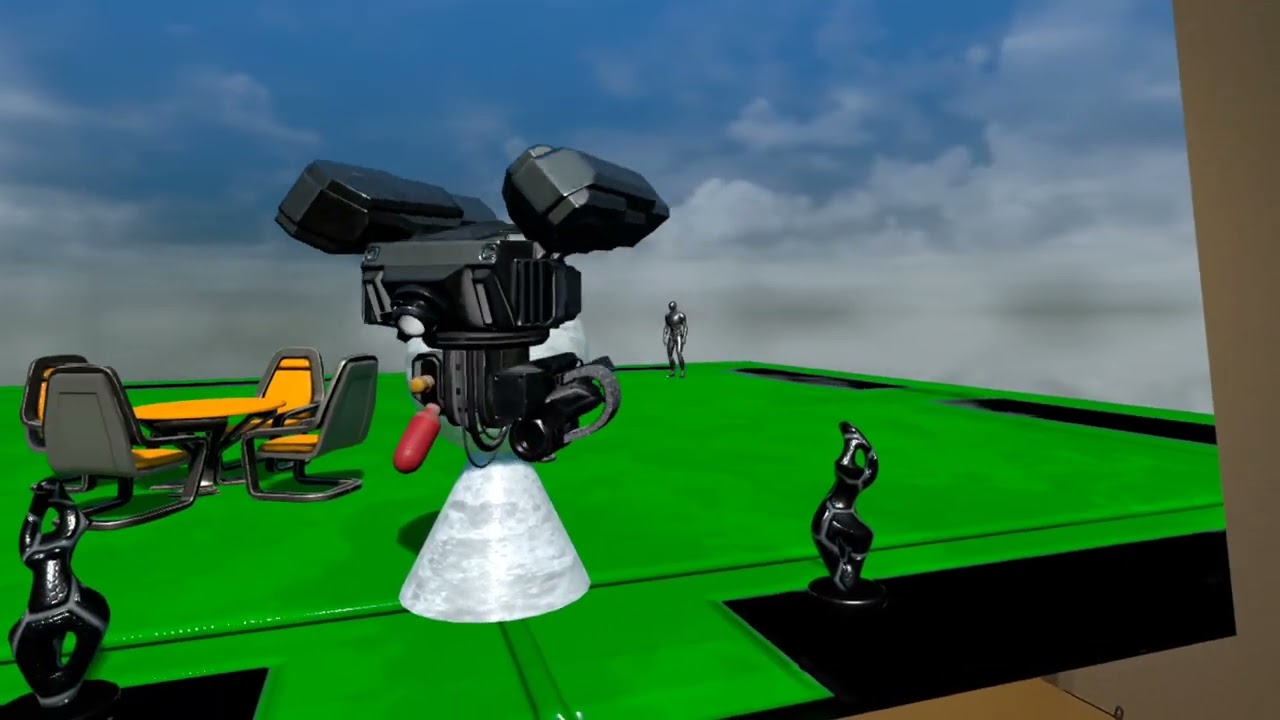
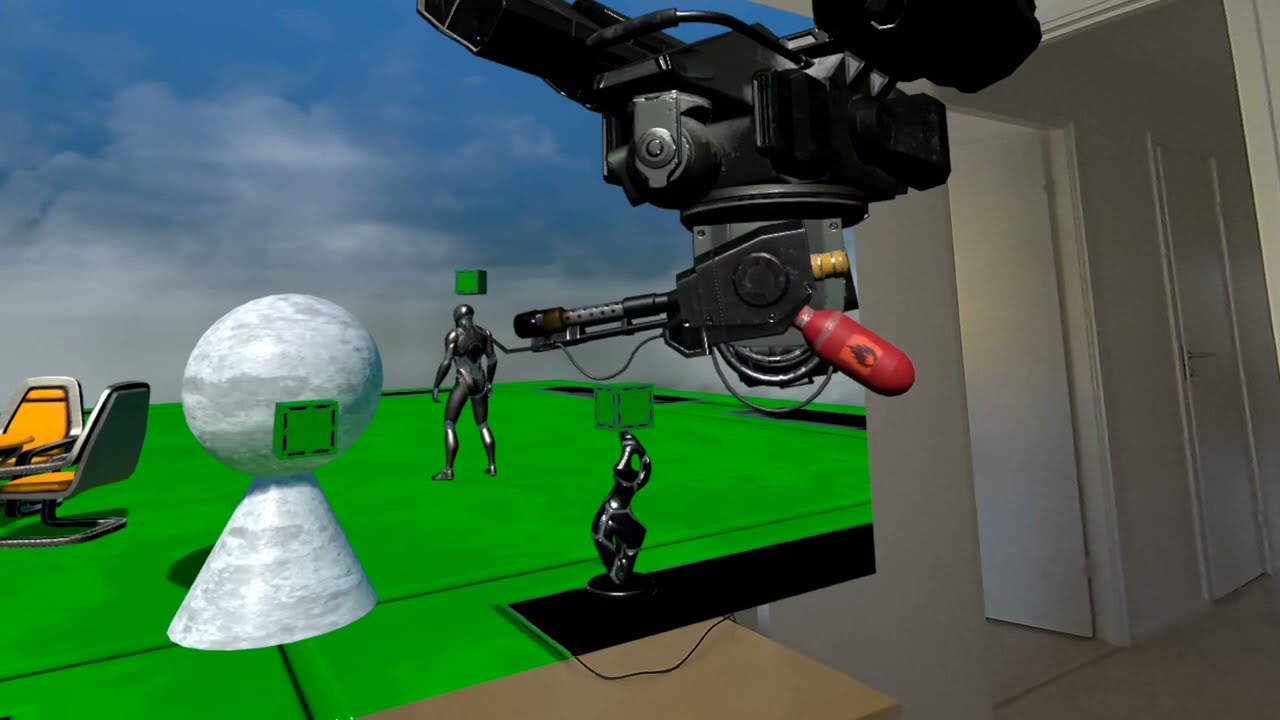
The resulting effect can already be observed when the drone is idle, as the default bounce already lets the camera and turret follow the default aim target, as can be seen in the image below.
An alternative implementation for the aim could be to make the camera and gun/flamethrower separate meshes, and connect them via sockets to the drone. While this results in extra draw calls for the meshes, it would simplify the animation blueprint, and allow for a more modular drone setup, where you can attach different components to those sockets for customizability.
Autonomous Target Seeking
Now that the drone can follow a target, we can extend the drone pawn to periodically look for potential targets, and automatically select the best one, if one is available.
For this, we make several changes in the pawn blueprint. First, we add a function ScanForAimTarget that checks the area in front of the camera for potential targets, and stores the best one in a new variable CurrentAimTarget.
Please note that:
- We consider any
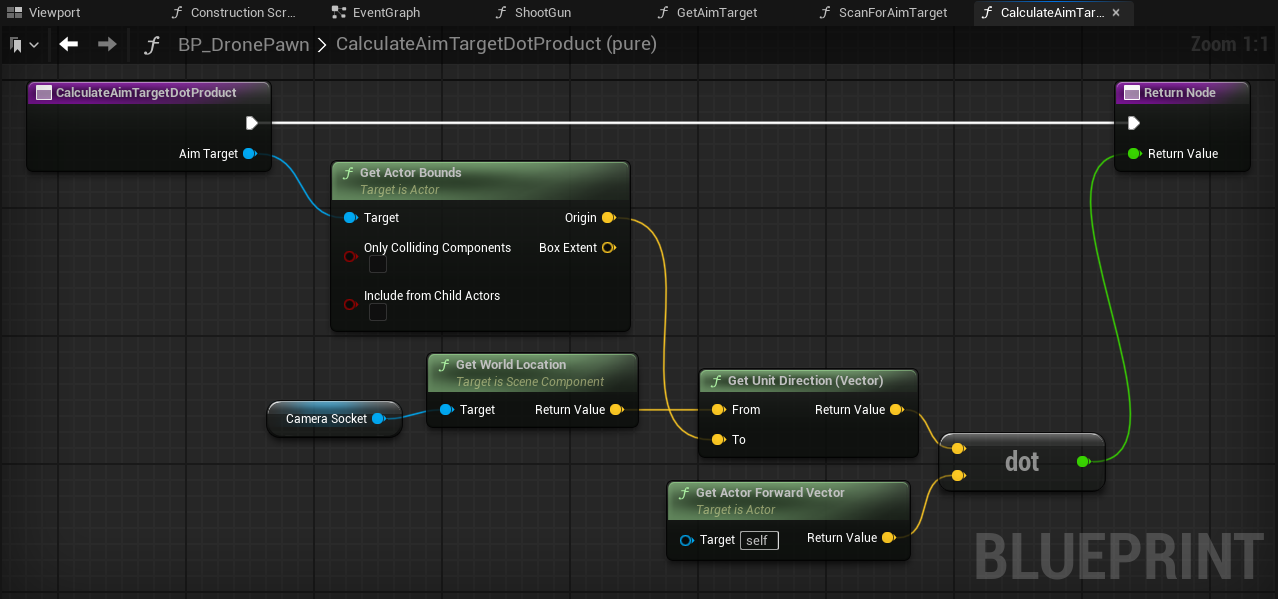
BP_ShootingTargetthat is within 45 degrees in front of the drone as a possible target - For simplicity, we define
the best targetas the one most in front of the drone based on its forward vector - We add a small benefit to the
CurrentAimTargetwhen selecting a new one, to prevent flipping between multiple nearly-as-good targets. Thus, a new target must be a bit better than the current one before we switch targets.
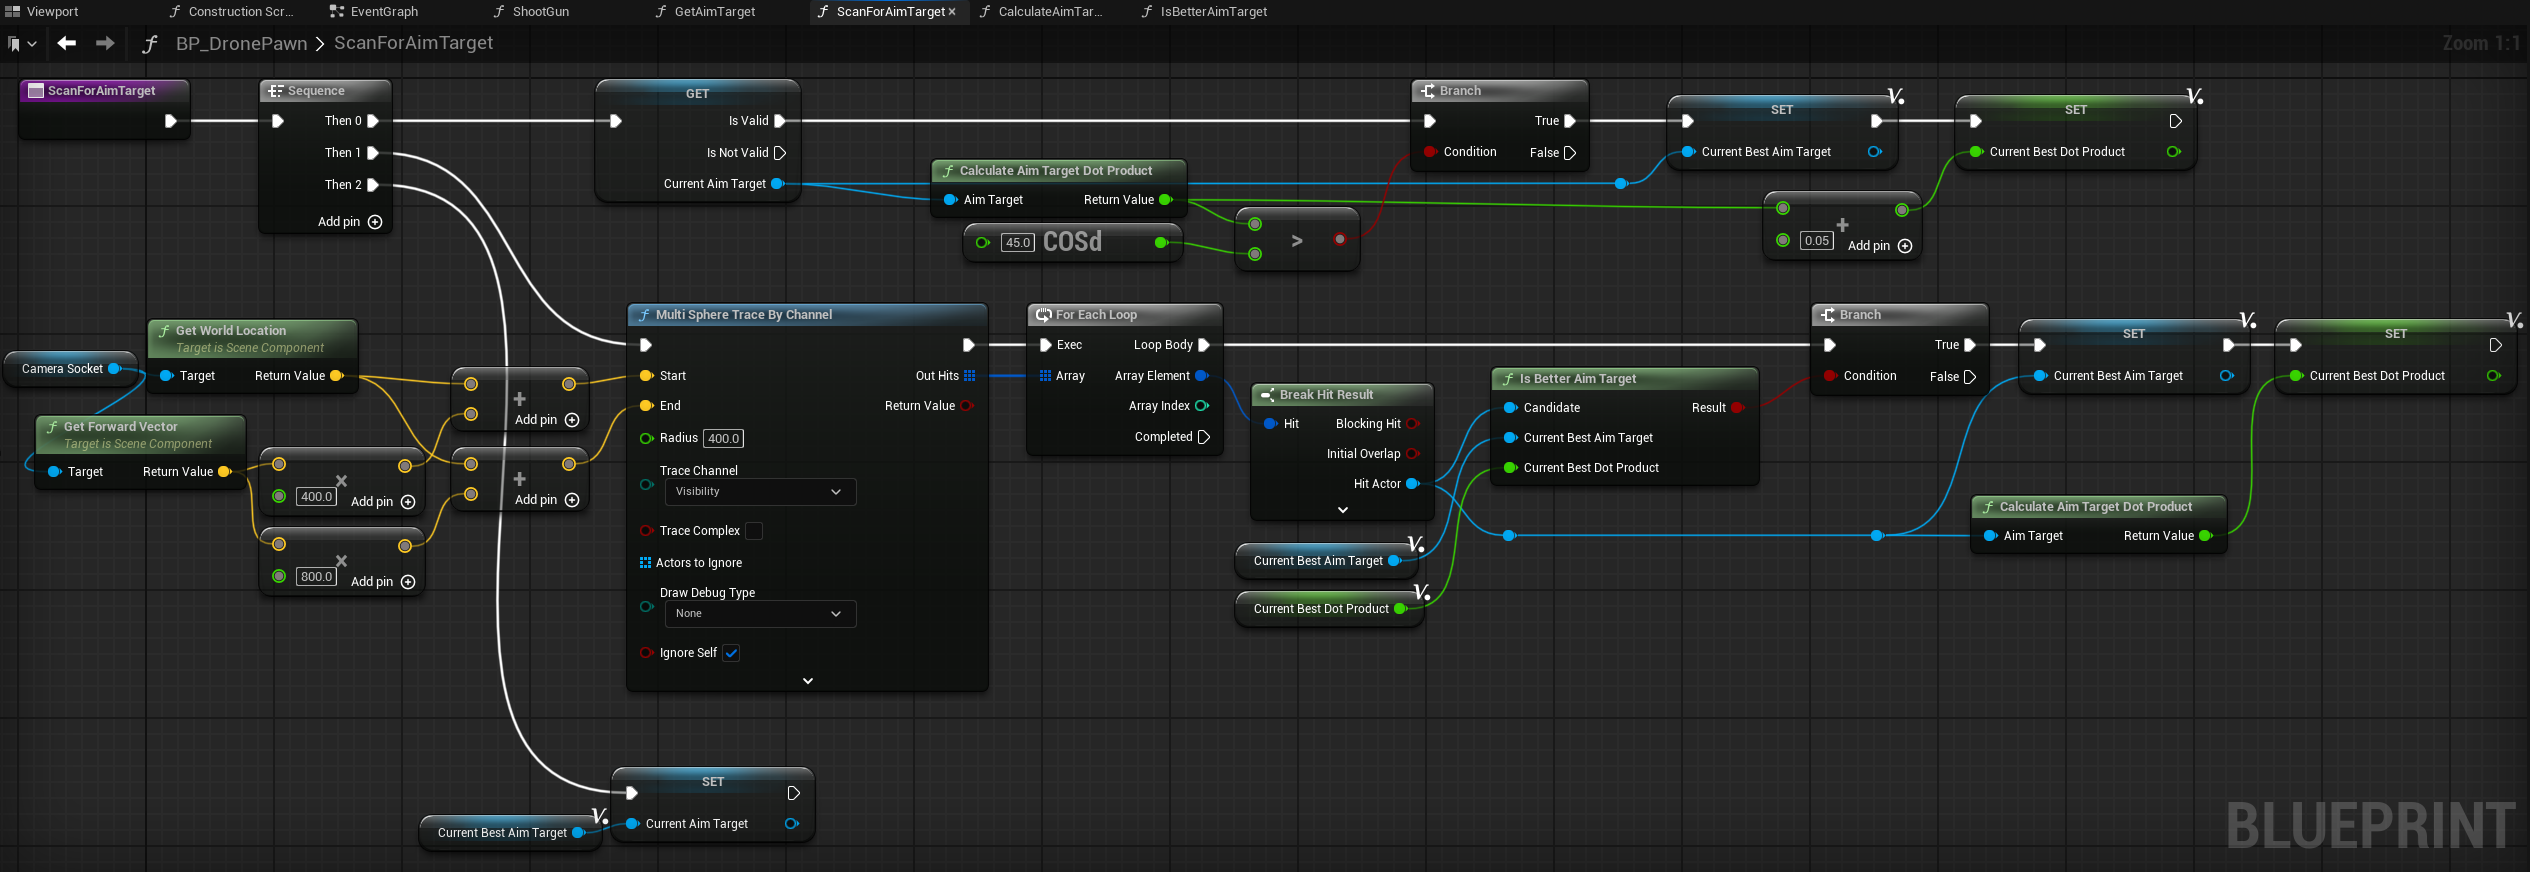

We add a timer that run the ScanForAimTarget a few times per second, so that the drone will regularly check if the current target is still valid, and if there are better targets to aim at.

In order to actually use the CurrentAimTarget for aiming, we adjust the GetAimTarget to return the location of the CurrentAimTarget if available, and the location of the DefaultAimTarget otherwise.
We adjust the ShootGun function to always shoot in the direction of the aim target, otherwise it would typically miss given that in the current implementation the gun is slightly offset from the center. While technically this implementation is not realistic, as the projectile launch direction does not necessarily line up with the gun's true aim, it ensures a significantly better user experience without being immersion breaking. Even now, a projectile may still miss the target, as the projectile is affected by gravity, which is currently not considered in the projectile launch direction calculation.

In order to test the target seeking implementation, we add a few BP_ShootingTargets to the sublevel and see if it works as intended.

Final Result
The final result can be seen in the video below, it looks pretty cool!
Clicking play will embed the YouTube player and may set third-party cookies and collect data from YouTube.
Next Steps
While the drone already looks and behaves pretty cool, many further improvements can still be made, such as:
- Offer alternative control schemes and frames of reference for controlling the drone, depending on the player's preference
- Separate aim targets for the turret and the camera
- Implement mechanics for the remaining drone elements, such as the flamethrower and the rocket launchers
- Add additional drone sounds, e.g. for idling and acceleration
- Add visual effects, such as a muzzle flash when shooting the gun, and an idle flame for the flamethrower
- Fine-tune drone movement behavior, such as max acceleration, max speed and max rotation speed
- Fine-tune aim target follow speed, which currently is relatively slow and may lag behind during faster movement
Conclusion
Adding a player controlled drone to a mixed reality level gives the player more agency in the virtual world, and significantly increases immersion when the drone can cross into the real world as well.
We at Immerstory are excited to support our customers with their immersive experiences, and look forward to sharing more exploration progress soon.
What immersive experience would you like to see? Let us know!
Additional Resources
Documentation for the MetaXR plugin, specifically the Mixed Reality Utility Kit which was used for this demo, can be found here.