
In this post, we look at placing a virtual world aligned with a real wall in Unreal Engine, to provide a mixed reality experience tailored to the player's environment.
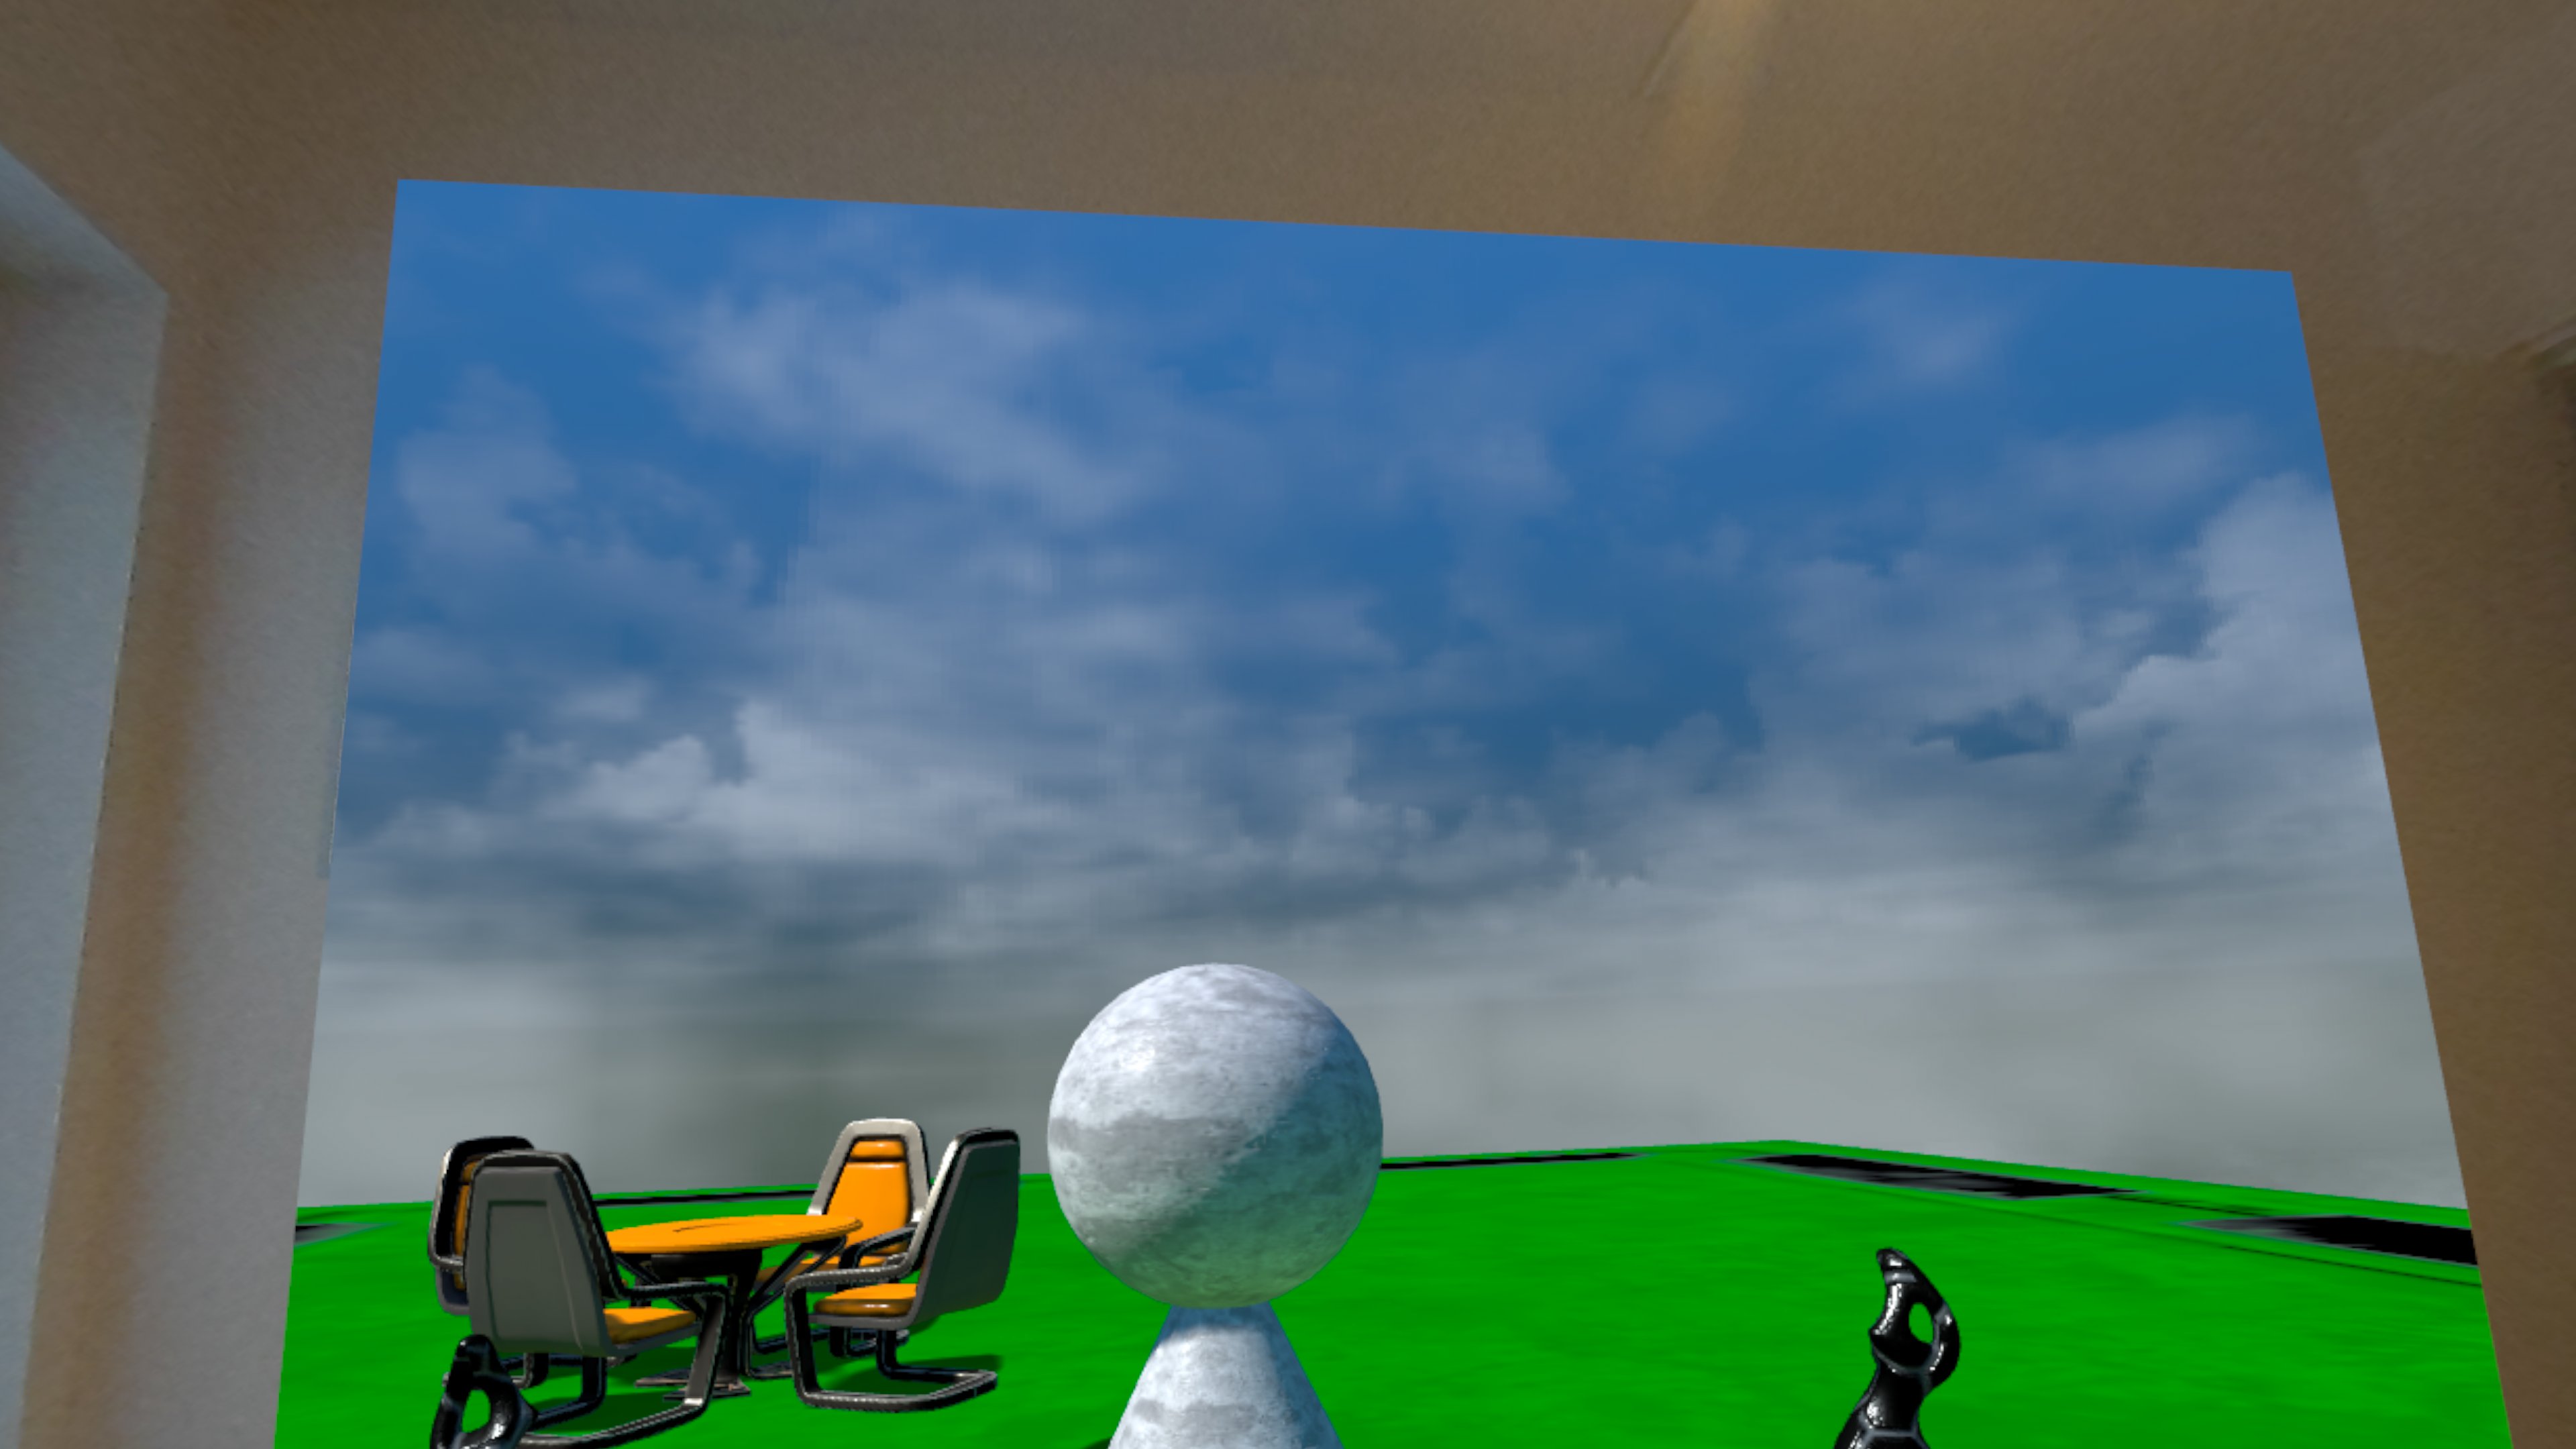
By placing the virtual world aligned with a single wall, and leaving the rest of the player's environment visible via passthrough, we offer a window into the virtual world at a natural location, which lets the player experience the virtual world in a safer way, as they can still see their surroundings in the real world.
Tech Stack
For this exploration, we're using the following tech stack:
We continue from the setup we've discussed in previous blog posts such as First Steps with Mixed Reality and Passthrough Materials.
Final Result
The video below shows the final result of what we're describing in this blog post.

Clicking play will embed the YouTube player and may set third-party cookies and collect data from YouTube.
Setting up the room in full passthrough
In previous blog posts we've configured the room to have virtual representations for the walls, floor and ceiling in the room. Now, however, we want to make sure the whole room is visible in passthrough, regardless of what virtual items are behind the walls.
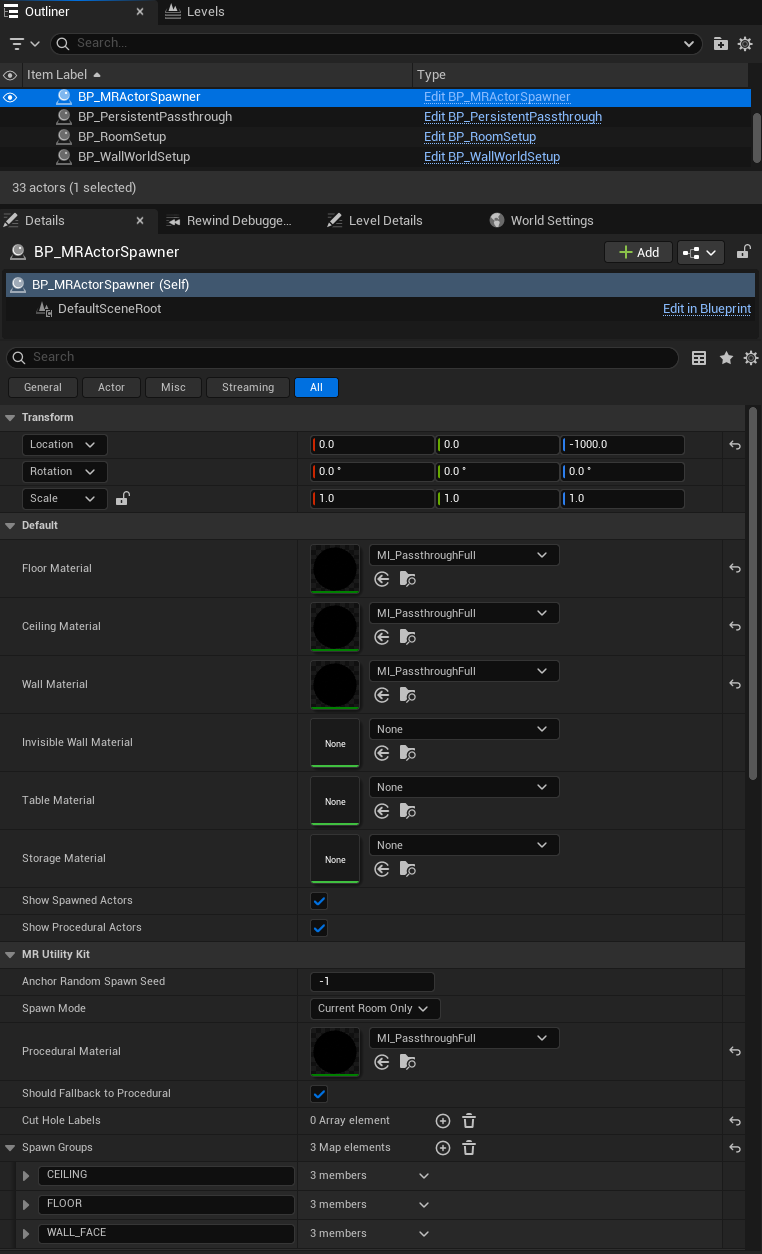
This can be achieved by configuring the BP_MRActorSpawner to use MI_PassthroughFull material for the walls, floor and ceiling. In addition, we disable generation of any other meshes, such as tables or lamps - they would only be in the way.
Creating a window into the virtual world
We need to create some additional logic to create a window into the virtual world on a selected wall, once the room has been setup. For this, we add a new Blueprint BP_WallWorldSetup.
The basic steps are, once the RoomSetup has completed:
- Select a wall in the current room
- Move the wall fully down so it's no longer visible by the user
- Add a BP_Diaphragm blueprint with 4 panels, and place this at the exact location/orientation of the wall
- Each panel has half the size of the wall, is offset from the center, and can move outwards from the center when it opens and reveals the virtual world behind it
- Each panel has the
MI_Passthrough_Fullmaterial set, so that passthrough is visible when the diaphragm is closed - The panels can be configured to open to a given maximum to leave a wall border visible in passthrough
- Move the virtual items into place, relative to the wall (see the next sections)
- Open the diaphragm with a timeline to make the virtual items visible, e.g. a smooth 5 second curve from closed to opened

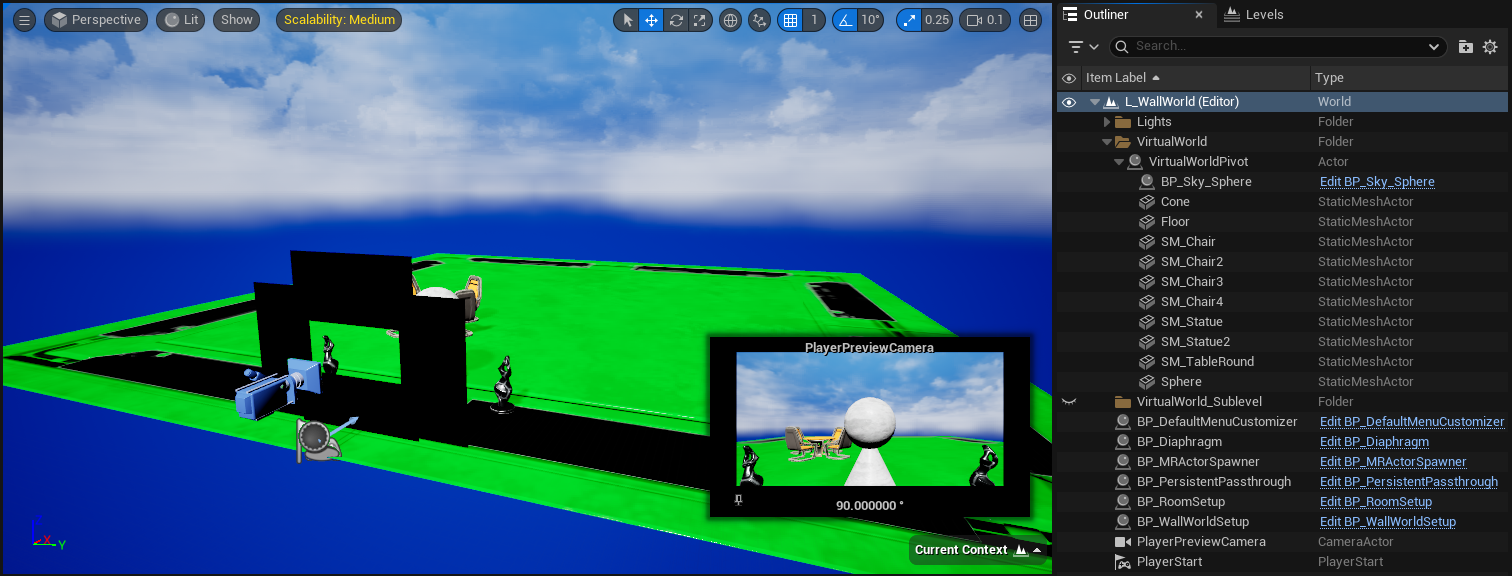
In the Unreal Engine level editor, it looks like the image below.

Aligning virtual items
We use the following structure for setting up a scene with virtual items, which will all be moved into place once a wall has been selected:
- VirtualWorldPivot actor, to which all other actors will be attached, so we only need to move this actor and all attached actors will follow
- A
BP_SkySphereto make the virtual world fully virtual (otherwise everything not covered by a virtual item would be passthrough again) - A plane to represent the virtual floor, placed slightly below the VirtualWorldPivot (otherwise it may clip through the actual passthrough floor, or even Z-fight it, which is even worse)
- A few meshes from the Unreal Engine Starter Content
Aligning the virtual items to a wall can be done by moving the VirtualWorldPivot actor to the correct location/orientation. Importantly, the correct location is moved downward by half the wall-height, given that the anchor is at the center of the wall (otherwise the virtual floor would be in the middle of the wall, instead of at about floor level).

In the Unreal Engine level editor, it looks like the image below.
While this approach works, it comes with some significant downsides:
- Because we move the actors in the virtual world, they cannot be marked as
Staticbut must all be marked asMovable, which affects things like shadows during light baking - All actors must be present in the map, ideally somewhere far way or hidden, so they aren't visible before the room setup is completed
- While multiple scenes could be placed in the map, this is not really a practical approach
In the next section, we discuss an alternative approach that solves these problems.
Aligning a virtual world
Unreal Engine supports loading a sublevel into the current level at a given location/orientation, which is exactly what we need to align virtual items with a wall, while managing them in a separate sublevel.
So instead of making all actors Movable and attaching the to a VirtualWorldPivot, we create a new sublevel with all actors. In the sublevel, the actors can be marked as Static, and we can use light baking (to some extent, loading the sublevel at different locations/orientations can still produce some warnings about unbuilt lighting, e.g. when using static point-lights).
We load the sublevel at a given location/orientation using the Blueprint node Load Level Instance (by Object Reference), where we input the location/rotation previously used for the VirtualWorldPivot.

In addition, we generate an Optional Level Name Override based on the Sublevel name and the wall-index. This prevents level streaming issues, given that unloading a streaming level is asynchronous, and when we try to load the same sublevel (even at a different location/orientation) the asynchronous removal may be cancelled and the loading at the new location/orientation is skipped.
In the Unreal Engine level editor, it looks like the image below.

This setup allows us to switch between different walls with the following process:
- Close the currently open diaphragm
- Once the diaphragm is closed, mark the sublevel as
Is Requesting Unload and Removal - Select a new wall (e.g. the next or previous wall)
- Do the regular steps for setting up the diaphragm and virtual world at the selected wall, and open the diaphragm

Clicking play will embed the YouTube player and may set third-party cookies and collect data from YouTube.
General challenges with this setup
Projecting a virtual world at a wall in the player's environment works best when the wall is free from obstacles (such as furniture), otherwise the virtual world may only partially obscure the obstacles which would decrease the level of immersion.
Several challenges remain though:
- Keep player from bumping into wall - this can be mitigated by moving/placing some virtual obstacle to keep the player at a safe distance from the wall. As a last resort the Meta guardian boundary is used to warn the player if they get to close to a (scanned) wall or obstacle with their head or hands.
- Keep player from bumping into furniture obscured by virtual world - this can be mitigated by (selectively) displaying the virtual representation of the furniture. However, this only works for significant objects that are mapped by the room scan, for smaller items there is no reasonable solution.
Conclusion
Placing a virtual world aligned at a wall in the real world offers a safe and natural way for player's to interact with the virtual world from their environment.
We at Immerstory are excited to support our customers with their immersive experiences, and look forward to sharing more exploration progress soon.
What immersive experience would you like to see? Let us know!
Additional Resources
Documentation for the MetaXR plugin, specifically the Mixed Reality Utility Kit which was used for this demo, can be found here.